How Do I Setup an IPCAM-WO?
You can setup an IPCAM-WO by connecting the camera to the network and then having it activated by your alarm monitoring company. Either a hard-wired ethernet connection or a wireless WPS connection can be used. You will need to know the MAC address for the camera in order to activate it.
The IPCAM-WO should be used with a wired Ethernet connection when possible for best performance. When this option isn't feasible, a WIFI connection can be established using WPS (WIFI Protected Setup). WPS provides a secure connection between router and camera, preventing unauthorized viewing.
When planning a camera system, keep in mind that the IPCAM-WO will use about 15 bytes of data per second while in standby mode and up to 1.5 megabytes of data per second when streaming video. Honeywell recommends a minimum upload speed of 2.3 Mbps when using up to 3 IPCAMs and a minimum speed of 4.6 Mbps when using up to 6 IPCAMs.
Note: The Total Connect 2.0 Legacy IP Cameras like the IPCAM-WO can only be used if they were online at the time when Resideo pushed down an OTA update to make them compatible with an updated TC2 platform. Any legacy camera that was not online to receive this update can no longer be used. You must be very careful when purchasing used legacy TC2 IP Cameras, as many people will try to pass off bricked models on unsuspecting buyers. Please read this FAQ for more information.

Complete the following steps to set up the IPCAM-WO using WPS:
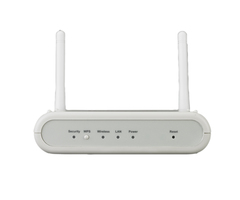
1. Connect the camera. Before connecting the camera to the wireless network, make sure that WPS is supported. You can check this by looking at the router. You should see a WPS logo. If WPS is not supported, you can add a WAP-PLUS to the network. To do this, plug in the WAP, and connect it to the router. Then, power up the WAP-PLUS, and wait about two minutes for it to complete its boot cycle.
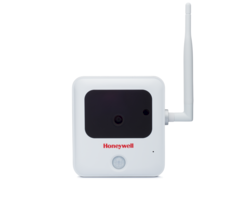
Connect the camera to the network by pressing and holding the WPS button on the router or the WAP-PLUS. After you have done this, use a paperclip or another thin object to press the Reset / WPS button on the camera for at least three seconds. This button is found on the back of the camera, next to its power connector.
If the IPCAM-WO is on the latest version of firmware when it begins the WPS join process, the red LED on the front will flash, and the camera will emit a beep about once every 2 to 3 seconds. When it has successfully joined the network, you'll see the LED turn green, and the camera will give 5 rapid beeps.
2. Install the camera. Mount the camera in its desired location. You want to install the camera before activating it so you can make sure that it will work in that location. It is a good idea to only temporarily mount the camera at first, and then permanently mount it once it has been activated.
3. Activate the camera. Contact your alarm monitoring company, and tell them that you would like to activate your IPCAM-WO. They will need to know the MAC address for the camera to complete the process. The MAC is a 12-character code that can be found on the back of the camera.
4. Test the camera. Log-in to Total Connect 2.0 and click on the "Cameras" button. Verify that the video feed for the camera is visible. From Total Connect 2.0, you can also connect to the camera's setup, allowing you to change any of the device's settings, establish recording schedules, set the motion-capture settings and more.
5. Permanently mount the camera. Once you have established the desired settings for the camera, you can permanently mount it using the hardware that came with the device.
Did you find this answer useful?
We offer alarm monitoring as low as $10 / month
Click Here to Learn MoreRelated Products
Related Videos

Related Categories
- Answered
- Answered By
- Julia Ross