Honeywell 4204 Install Guide - Dated 01/17 Rev. A
Related Products
Related Categories
Document Transcript
Document ID N8909V5 1/17 Rev. A
ADEMCO 4204 Relay Module – Installation Instruction
s
GENERAL INFORMATION
The ADEMCO 4204 Relay Module provides from one to f
our
dry, form-C (SPDT) relay outputs to compatible
control/communicators. It connects to the control’s
keypad
wiring terminals.
The 4204 can be mounted inside the control’s cabine
t or
mounted remotely depending on the application. Refe
r to the UL
notes below for certain restrictions.
If mounted remotely, the 4204 has a built-in tamper
switch that
allows it to detect and report the removal of its c
over to the
control. Second, communication to the 4204 is supe
rvised so
that it cannot be disconnected from the keypad wiri
ng without
detection by the control. If the wiring is cut, a t
amper or alarm
signal will result, to indicate that this device (a
nd possibly other
devices connected to the keypad wiring) has become
inoperative.
INSTALLATION
For UL Installations
:
When used with controls that do not support cover t
amper or
supervise communications wiring to the 4204, mount
the 4204
inside the control’s cabinet.
When used with controls that support cover tamper a
nd
supervise communications wiring to the 4204, mount
the 4204
may either be mounted inside the control’s cabinet
or mounted
remotely.
CUL
NOTE: The maintenance instructions shall detail all
test
and maintenance instruction codes and software
necessary to provide test and inspection requiremen
ts
of CAN/ULC-S536, Standard for the Inspection and
Testing of Fire Alarm Systems
When mounted inside the control’s cabinet, some con
trols allow
the 4204 to be mounted horizontally as follows: ins
ert the self-
tapping screws (provided) in two adjacent raised ta
bs on the
back of the cabinet. Leave the heads projecting 1/
8”. Hang the
4204 on the screw heads via two of the slotted hole
s on the
back of its housing. The 4204’s cover need not, in
this case, be
tamper-protected. Set DIP switch 1 to “ON” if the
cover is not
used (see table). See the control’s instructions f
or additional
information.
When the 4204 is mounted remotely, it can be mounte
d
horizontally or vertically and the built-in tamper
switch can be
used. Wires can exit from the side or via the brea
kout on the
back of its housing. The DIP switch must be set wi
th its position
1 “OFF” and when the installation is completed, the
unit’s
tamper-protected cover must be replaced.
NOTE:
For EN50131-3 compliance a tie-wrap must be secure
d
around the case of a remotely mounted 4204.
Apply tie-wrap around the case to the right of the
large zone
wire opening (4-inch case width). This is in opposi
tion of the
tamper switch and magnet.
NOTE:
CE installations require maximum cable length of 3
0
meters.
Affix the connections label that accompanies the 42
04 to the
inside of the 4204’s cover (if the cover is used) o
r to the inside of
the control’s cover.
CONNECTIONS AND SETTINGS
Select and set an address for the 4204, using its D
IP switch as
shown in the DIP switch table. Each 4204 must be a
ssigned a
unique address so the control can identify and comm
unicate
with the 4204. The address to set is determined by
the
particular control to be used. See the control’s in
stallation
instructions. As shipped, the DIP switch is set fo
r address “0”.
UL
•
For UL fire installations, no more than
one wire per terminal may be
connected.
•
Use only 14-22AWG wire.
NOTE:
All power-limited wiring must be separated from no
n-
power limited wiring by ¼”.
Make connections to the 4204’s four relays via 12-p
osition
terminal block TB2. Refer to the control’s install
ation
instructions for specific information on how to pro
gram the
activation options for the relays.
Make connections to the control’s keypad wiring poi
nts via 4-
position terminal block TB1, the 4-pin plug, or bot
h (wire color
connections are the same). See the diagram on the
other side
of this page.
SPECIFICATIONS
Physical:
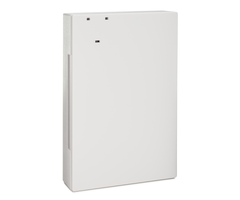
6-7/16” W x 4-1/4” H x 1-1/4” D
(163mm x 108mm x 32mm)
Electrical:
Input Voltage:
12VDC nominal (10
-
14VDC, from
control’s remote keypad connection
points)
Input Current:
15mA standby + 40mA per active relay
Contact Rating:
2A max. at 28VDC/AC (resistive loads)
UL
•
For dry, indoor use only. Do not install in air-
handling spaces.
•
For UL Commercial Burglary installations, the
4204 must be tamper protected or mounted in
a tamper-protected cabinet.
•
In Commercial Fire applications, the module
cannot be mounted in the control unit’s
cabinet, but must be mounted in an external
UL864-listed cabinet.
N8909V5 1/17 Rev. A
2 Corporate Center Drive, Suite 100
P.O. Box 9040, Melville, NY 11747
Copyright
2008 Honeywell International Inc.
www.honeywell.com/security
4204-01-V1
4204 ADDRESS SETTINGS
("—" means "OFF")
DETERMINE 4204'S ADDRESS: CONTROL'S INSTRUCTIONS SP
ECIFY ADDRESS
TO USE. "0" ADDRESS SETTING SHOWN (AS SHIPPED).
SWITCH
NUMBER
0
1
2
3
4
5
6
7
8
9
10
11 12 13
14
15
2
ON
—
ON
—
ON
—
ON
—
ON
—
ON
—
ON
—
ON
—
3
ON
ON
—
—
ON
ON
—
—
ON
ON
—
—
ON ON
—
—
4
ON
ON
ON
ON
—
—
—
—
ON
ON
ON ON
—
—
—
—
5
ON ON
ON
ON ON
ON ON
ON
—
—
—
—
—
— —
—
1 2 3 4 5
Þ
DIP SWITCH SETTINGS
OFF
ON
DIP SWITCH
(WHITE AREAS DENOTE SWITCH HANDLES)
POSITIONS 2-6:
POSITION 1:
ENABLES/DISABLES COVER TAMPER.
ON
= TAMPER DISABLED,
OFF
= TAMPER ENABLED. SHOWN DISABLED AS SHIPPED.
6
ON
ON
ON
ON
ON
ON
ON
ON
6
7
16 17 18 19 20 21 22
23
24
25 26
27
28
29
30
31
ON
—
ON
—
ON
—
ON
—
ON
—
ON
—
ON
—
ON
—
ON
ON
—
—
ON
ON
—
—
ON
ON
—
—
ON ON
—
—
ON
ON
ON
ON
—
—
—
—
ON
ON
ON ON
—
—
—
—
ON ON
ON
ON
ON
ON ON
ON
—
—
—
—
—
— —
—
—
—
—
—
—
— —
—
—
—
—
—
—
—
—
—
ON
ON
ON
ON
ON
ON
ON
ON
POSITION 7:
NO FUNCTION
TB2
12
11
10
9
8
7
6
5
4
3
2
1
(–) GROUND
(+) 12VDC
YEL
BLK
GRN
RED
13
14
15
16
DIP SWITCH
FOR SETTING DEVICE ADDRESS
AND ENABLING/DISABLING TAMPER
COVER TAMPER
(REED)
SWITCH
TB1
4204
4-PIN TOUCHPAD PLUG
3
2
RELAY
1
4
TYPICAL
(SHOWN "OFF")
C
NC
NO
C
NC
NO
C
4204-02-V2
NC
NO
C
NC
NO
EITHER OR BOTH
CAN BE USED
DATA IN FROM CONTROL
DATA OUT TO CONTROL
RELAY
RELAY
RELAY
4204 CONNECTIONS
1 2 3 4 5 6
7
Must be connected to a
power-limited source.
If switching power
through a relay, the
power must be from a
power-limited source.
Relays are programmable
but outputs are not
supervised.
Supervised
REFER TO THE INSTALLATION INSTRUCTIONS FOR THE CONT
ROL WITH WHICH THIS DEVICE IS USED FOR DETAILS REGA
RDING
THE LIMITATIONS OFTHE ENTIRE ALARM SYSTEM.
FEDERAL COMMUNICATIONS COMMISSION STATEMENTS
The user shall not make any changes or modification
s to the equipment unless authorized by the Install
ation Instructions or User's Manual.
Unauthorized changes or modifications could void th
e user's authority to operate the equipment.
CLASS B DIGITAL DEVICE STATEMENT
This equipment has been tested to FCC requirements
and has been found acceptable for use. The FCC requ
ires the following statement for
your information:
This equipment generates and uses radio frequency e
nergy and if not installed and used properly, that
is, in strict accordance with the
manufacturer's instructions, may cause interference
to radio and television reception. It has been typ
e tested and found to comply with the
limits for a Class B computing device in accordance
with the specifications in Part 15 of FCC Rules, w
hich are designed to provide reasonable
protection against such interference in a residenti
al installation. However, there is no guarantee tha
t interference will not occur in a particular
installation. If this equipment does cause interfer
ence to radio or television reception, which can be
determined by turning the equipment off
and on, the user is encouraged to try to correct th
e interference by one or more of the following meas
ures:
• If using an indoor antenna, have a quality outdo
or antenna installed.
• Reorient the receiving antenna until interferenc
e is reduced or eliminated.
• Move the radio or television receiver away from
the receiver/control.
• Move the antenna leads away from any wire runs t
o the receiver/control.
• Plug the receiver/control into a different outle
t so that it and the radio or television receiver a
re on different branch circuits.
• Consult the dealer or an experienced radio/TV te
chnician for help.
INDUSTRY CANADA CLASS B STATEMENT
This Class B digital apparatus complies with Canadi
an ICES-003.
Cet appareil numérique de la classe B est conforme
à la norme NMB-003 du Canada.
FCC / IC STATEMENT
This device complies with Part 15 of the FCC Rules,
and RSS210 of Industry Canada. Operation is subjec
t to the following two conditions: (1)
This device may not cause harmful interference, and
(2) This device must accept any interference recei
ved, including interference that may
cause undesired operation.
Cet appareil est conforme à la partie 15 des règles
de la FCC & de RSS 210 des Industries Canada. Son
fonctionnement est soumis aux
conditions suivantes: (1) Cet appareil ne doit pas
causer d’interférences nuisibles. (2) Cet appareil
doit accepter toute interférence reçue y
compris les interférences causant une réception ind
ésirable.
SUPPORT & WARRANTY
For the latest documentation and online support inf
ormation, please go to:
https://mywebtech.honeywell.com/
For the latest warranty information, please go to:
www.honeywell.com/security/hsc/resources/wa
For patent information, see
www.honeywell.com/patents
MyWebTech
Warranty
Patents
- Uploaded