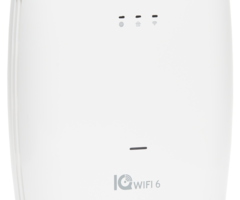
Qolsys IQ WIFI 6 - Quick Install Guide - Dated 07/2022
Related Products

Document Transcript
3
CONNECT TO INTERNET
CONNECT IQ PANEL OR IQ HUB TO NETWORK
1
2
IQ WIFI 6 QUICK GUIDE
ADD ADDITIONAL IQ WIFI 6 TO EXPAND COVERAGE
Connect the other end into
the “WAN” port on IQ WiFi 6
IQ WiFi 6 will automatically power up,
configure as the primary IQ WiFi 6,
and download any needed updates.
The LEDs will be solid green when
complete*.
(Up to 9 min)
Connect one end of the provided
ethernet cable into an available
port on a modem or router.
Plug the barrel jack of the power
supply into the “DC-IN” port on IQ
WiFi 6. Plug the power supply into
the wall outlet.
Plug the power supply
into an additional IQ WiFi
6. The power LED will
stop flashing when
complete.
(Up to 2 min)
Add up to
seven IQ WiFi 6
to cover dead
spots and
improve
performance
PRIMARY IQ WIFI 6
ADDITIONAL IQ WIFI 6
Press the WPS button on
the primary and then the
additional to begin pairing*
Up to 9
min
IQ WiFi 6 will automatically sync,
configure and download any updates.
The LEDs will be solid green when
complete.
(Up to 9 min)
.
Up to 9
min
On the IQ Panel
(or IQ Hub)
Open settings tray,
touch Settings,
Advanced Settings,
type valid Dealer or
Installer code, then
touch WiFi.
Locate the SSID/Network name
IQ_WiFi_XXXXXX
and touch it to connect.
Default password is
located on the sticker on
the Primary Controller
IQ Panel will automatically
move to IQWiFi 6’s Security
Network.
MAIN
SECURITY
GUEST
4
CONFIGURE WIFI NETWORK
On IQ Panel, open settings
tray, touch Settings,
Advanced Settings, type in
valid code, touch Installation,
Devices, WiFi Devices, then
touch the IQ WiFi icon
Select an SSID/Network name to
access the Network Settings page.
Make edits as desired. You’ll use
this information to add devices
to the network.
IMPORTANT NOTE:
When you
change one network (2.4 or 5 GHz)
it will automatically change the
other to match.
The entire IQ WiFi 6 network will
automatically sync and reboot.
Press “SAVE” to complete.
Johnson Controls proprietary.
Reproduction without permission is not permitted.
IMPORTANT NOTE:
If you would like existing devices to automatically move to the new network, name and password should be identical to the previous network
Up to 2
min
*
PRO TIP:
Once the “ “ LED on the Primary IQ WiFi 6 is solid you can repeat WPS pairing additional IQ WiFi 6
*
PRO TIP:
If you are adding additional IQ WiFi 6
(see step 2)
you might use this time to unbox and power up. Document#: IQWIFI6-IM
Revision Date: 2022-7
techsupport@qolsys.com
Johnson Controls proprietary.
Reproduction without permission is not permitted.
This device complies with Industry Canada license-exempt RSS standard(s). Operation is subject to the following two conditions: (1) this device may not cause interference, and (2) this device must accept any interference, including interference that may cause undesired
operation of the device.
Cet appareil est conforme avec Industrie Canada exempts de licence standard RSS (s). Son fonctionnement est soumis aux deux conditions suivantes: (1) cet appareil ne doit pas provoquer d'interférences et (2) cet appareil doit accepter toute interférence, y compris celles
pouvant causer un mauvais fonctionnement de l'appareil.
CONTACT TECH SUPPORT
GOT QUESTIONS?
CONNECT IQ WIFI 6 TO ALARM.COM
5
IQ WIFI 6 QUICK GUIDE
CONNECT DEVICES TO THE NETWORK
6
Using the network credentials
you created in step 4, add any
NEW devices to the
MAIN
network.
(You’ll move them to the security
network in the next step)
Using the alarm.com Mobile Tech app, find the customer account
END USER APP
7
TROUBLESHOOTING
8
IQ WiFi 6 settings and controls will
automatically appear in the end user’s
alarm.com mobile app.
MANAGE WI-FI PROFILES
VIEW WI-FI DEVICE LIST
PAUSE WI-FI
GUEST NETWORK
Touch “Add”
“Wi-Fi Router”
“Add Devices”
“Qolsys IQ WIFI 6”
Locate the MAC
address on the
bottom the
Primary IQ WiFi 6
Enter the MAC or
touch the “camera”
icon and scan the
bar code
Name your device.
IQ WiFi 6 will sync
automatically.
Select “Equipment”
IQ WiFi 6 will
appear under
“Access Points” on
the customer’s
account
MAIN
SECURITY
GUEST
MAIN: Primary network for customer devices
such as TVs, Tablets and appliances
SECURITY: Your private place for IQ Panel,
IQ Remotes, Video Doorbells, Cameras, etc.
GUEST: For customer’s guests
IQ WiFi 6 broadcasts 3 SSID/network names:
Select the “Security” SSID/
Network. (
Touch “Advanced” to
apply to all cameras.).
To move security devices to the
security network, log into your
alarm.com customer account
and choose “Wireless Network”
under Video settings.
Choose “Access Point”
Cameras will move automatically
The alarm.com App is
available in the iOS
App Store, Google Play
Store and more
A standalone “IQ WiFi”
app is available for end
users who are not yet
alarm.com customers
IQ WiFi 6 link quality between the primary controller and secondary agents
using the LEDs on each unit. To improve link quality move the unit to
various locations in the site.
To factory default:
press and hold the reset
button with a paper clip for 15 sec. until power
LED blinks red, release when LED solid red.
Many troubleshooting issues can identified using the chart below:
- Uploaded
