Alarm.com ADC-S40-T Z-Wave Plus Temperature Sensor - Install Guide - 2022
Related Products
Related Categories
- Home Automation Modules
- Temperature Sensors
- Home Automation
- Temperature Sensors
- Home Automation Modules
- Home Automation
Document Transcript
Temperature Sensor
Installation Guide
ADC-S40-T
Notices
FCC
This device complies with part 15 of the FCC rules. Operation is subject to the following two conditions:
1.
This device may not cause harmful interference, and
2.
This device must accept any interference received, including interference that may cause undesired operation.
NOTE: Changes and Modifications not expressly approved by Building 36 can void your authority to operate this
equipment under Federal Communications Commissions rules.
This equipment has been tested and found to comply with the limits for a Class B digital device, pursuant to part
15 of the FCC Rules. These limits are designed to provide reasonable protection against harmful interference in a
residential installation. This equipment generates, uses and can radiate radio frequency energy and, if not
installed and used in accordance with the instruction, may cause harmful interference to radio communication.
However, there is no guarantee that interference will not occur in a particular installation. If this equipment does
cause harmful interference to radio or television reception, which can be determined by turning the equipment
off and on, the user is encouraged to try to correct the interference by one or more of the following measures:
•
Reorient or relocate the receiving antenna.
•
Increase the separation between the equipment and receiver.
•
Connect the equipment into an outlet on a circuit different from that to which the receiver is connected.
•
Consult the dealer or an experienced radio/TV technician for help.
IC Notice
This device complies with Industry Canada license-exempt RSS standard(s). Operation is subject to the following
two conditions:
1.
This device may not cause interference, and
2.
This device must accept any interference received, including interference that may cause undesired operation.
Le present appareil est conforme aux CNR d’Industrie Canada applicables aux appareils radio exempts de licence.
L’exploitation est autorisee aux deux conditions suivantes:
1.
L’appareil ne doit pas produire de brouillage, et
2.
L’appareil doit accepter tout brouillage radioelectrique subi, meme si le brouillage est susceptible d’en
compromettre le fonctionnement.
Radiation Exposure Statement
The device has been found to be compliant to the requirements set forth in CFR 47 Sections 2.1091 and Industry
Canada RSS-102 for an uncontrolled environment. The antenna(s) used for this transmitter must be installed to
provide a separation distance of at least 20 cm from all persons and must not be co-located or operating in
conjunction with any other antenna or transmitter.
Le dispositif a été jugé conforme aux exigences énoncées dans les articles 47 CFR 2.1091 et Industrie Canada
RSS-102 pour un environnement non contrôle’. L’antenne(s) utilisée pour ce transmetteur doit etre installé pour
fournir une distance de séparation d’au moins 20 cm de toutes les personnes et ne doit pas être co-localisés ou
fonctionner en conjunction avec une autre antenne ou transmetteur.
Questions?
Visit
answers.alarm.com
or contact your service provider.
8281 Greensboro Drive
Suite 100
Tysons, VA 22102
220407
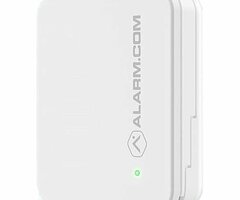
© 2022 Alarm.com. All rights reserved. Network LED
❺
Remove the battery tab from the
sensor. When the LED on the sensor
turns solid, the sensor has been
successfully added.
❻
Ensure the device shows up on
the account. This may take
up to 2 minutes.
❼
Name the device based on its
application. This can be done in
MobileTech, the Partner Portal,
or the Customer Website.
❽
Using the double-sided adhesive
tape provided, mount the sensor
on the wall.
Z-Wave manual installation
❶
Power on the Z-Wave controller.
❷
Put the Z-Wave controller into
Add mode. Refer to the Z-Wave
controller documentation for
more information.
❸
Remove the battery tab from
the sensor. When the LED on the
sensor turns solid, the sensor has
been successfully added.
❹
Ensure the device shows up on
the account. This may take
up to 2 minutes.
❺
Name the device based on its
application. This can be done in
MobileTech, the Partner Portal,
or the Customer Website.
❻
Using the double-sided adhesive
tape provided, mount the sensor
on the wall.
Troubleshooting
If the sensor is not communicating
with the Z-Wave controller
❶
Slide the device open. The LED
should turn on and then turn off
within a few seconds.
If the LED behavior is different,
the sensor cannot communicate
with the Z-Wave controller.
Follow these steps to fix the
communication problems:
a) Install a Z-Wave repeater
between the Z-Wave controller
and the sensor.
TIP: Any AC-powered Z-Wave device will
act as a repeater and improve the range
between the Z-Wave controller and the
Z-Wave device you are installing.
b) If the previous step does not resolve
the issue, try deleting the sensor
from the network (see next section)
and add it again.
Deleting the sensor from
the network
❶
Put the Z-Wave controller into
Delete mode. Refer to the Z-Wave
controller documentation for
more information.
In the box
•
ADC-S40-T Temperature Sensor
•
CR2450 battery
•
Installation guide
•
Double-sided tape
Installation
The Temperature Sensor is
designed for indoor use only.
For optimal performance, install the
sensor approximately 5 feet above
the floor of an interior wall. Avoid
installing the sensor on an exterior
wall, in areas that are close to
heating or cooling vents, and areas
that are exposed to direct sunlight.
Z-Wave SmartStart installation
❶
Power on the Z-Wave controller.
❷
Log in to the MobileTech app and
find the customer account.
❸
Add the device using SmartStart and
follow the on-screen instructions.
❹
Scan the device’s QR code found
on the box or the sensor.
❷
Slide the device open to delete the
sensor from the network. The LED
on the sensor will turn solid and
then blink to indicate the device
has been successfully deleted.
Adding the sensor to the network
❶
Put the Z-Wave controller into
Add mode. Refer to the Z-Wave
controller documentation for more
information.
❷
Slide the device open to add the
sensor to the network. When the
LED on the sensor turns solid, the
sensor has been successfully added.
Resetting the device to default
NOTE: This will remove the device from
the Z-Wave network.
❶
Remove the battery door, tap
the tamper switch 3 times in a row,
press and hold the tamper switch
for 10 seconds until the LED starts
flashing. Then, release to reset
to default.
❷
After the tamper switch is released,
the LED will blink quickly and then
turn solid for 3 seconds indicating
that the device is resetting.
- Uploaded