Honeywell Home SiXMINICT - Install Guide Dated 12/18 Rev A
Related Products
Related Categories
Document Transcript
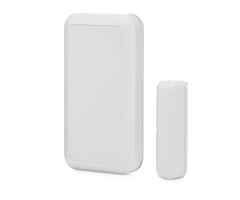
SiX
MINI
CT
Wireless
Door/Window Sensor
– Contact de Porte / Fenêtre Sans Fil
Installation Instructions
Instructions d’installation
The SiXMINICT is a wireless
door/ window sensor intended
for use with Honeywell
Home
controls that support SiX
™
series devices.
Magnet Breaking Gap:
Wood = 1.15
in.
(29.21
mm)
Steel = 0.
52
in.
(13.21
mm)
Ce contact de porte / fenêtre
sans fil est conçu pour être
utilisé avec les panneaux de
commande Honeywell
Home
qui supportent les dispositifs de
la série SIX
MC
.
Écar
t de l'aimant :
Bois = 1,
15
po
(29.21mm)
Acier = 0.
52
po
(
13.21
mm)
Enrolling
/ Enrôlement
Follow the controller’s instructions.
1. Pull the battery tab to activate the SiXMINICT and
begin the enrollment process.
(Or,
Use the magnet if
the tab is removed
)
2. The LED flashes (up to about 20 seconds*
) during
enrollment.
•
The device sends its unique MAC ID (Serial
Number) and Services type
to the controller.
•
The controller registers the device and displays the
sensor
data on screen.
*NOTE
: Enrollment time varies depending on the
signal strength between the device and the
controller.
3. When done, the LED is ON for 3 seconds to confirm
enrollment.
Pour commencer l'enrôlement, suivez les instructions du
panneau de commande.
1. Retirez la languette qui recouvre la
pile pour activer le
SiX
MINI
CT et commencer la procédure d'enrôlement.
(Ou, si la languette est déjà retirée, utilisez l'aimant.
)
2. Durant l'enrôlement, la DEL clignote (jusqu'à 20
secondes*).
•
Le dispositif transmet au panneau de commande son ID
MAC (numéro
de série) et l'information pour les services.
•
Le panneau de commande enregistre le dispositif et
affiche les données du transmetteur sur l'écran.
*NOTE
: La durée de l'enrôlement varie selon la
puissance du signal entre le dispositif et le panneau de
commande.
3. Une fois terminé, la DEL demeure allumée durant 3
secondes et confirmer l'enrôlement.
NOTE
: Once enrolled in a system, the SiXMINICT
cannot be used with another controller until it is
removed from the current controller. See the
Control
ler’s in
structions for details.
NOTE
: Une fois enrôlé, le
SiXMINICT
ne peut pas être
utilisé avec un autre système avant d'avoir été supprimé
du panneau actuel. Reportez
-vous aux instructions du
panneau.
– 2 –
Mounting
NOTE
: After enrolling, verify adequate signal strength by
conducting Go/No Go tests (see the controller’s
instructions) with the device in its intended mounting
location. Adjust the device location and orientation as
necessary.
Signal
Strength
: Range of 1-
4 bars (green); should be
minimum 1 green bar
for the Zone being programmed. Four
red bars indicate poor signal strength; the device should be
relocated. See the Control’s instructions for bar indication
signal strength values.
1. Separate the unit from the back cover.
2. Mount the unit as shown.
Mount the Sensor to a stationary surface, and mount
the
magnet on the moveable surface.
3. Replace the back cover.
Sensor Location Feature
: To verify the location of each
SiX device in an installation, enter programming mode and
select a SiX device
zone
. The device LED lights
(can take
up to 30 seconds)
. Select it again to turn the LED off or
select the next device to locate.
Installez
NOTE
: Après l'enrôlement, vérifiez la puissance du signal
adéquate en effectuant des tests Go / No Go (voir les
instruc
tions du panneau de commande) avec le dispositif
dans son emplacement de montage prévu.
Au besoin,
modifiez l'emplacement ou l'orientation du dispositif.
Force du signal
: Gamme de 1 à 4 bars (vert); Devrait être
minimum de 1 barre verte pour la zone progr
ammée. Quatre
barres rouges indiquent une faible intensité de signal;
L'appareil devrait être relocalisé.
Reportez
-vous aux
instructions de contrôle pour les valeurs de l'indicateur de la
barre de force du signal.
1. Sép
arez l'unité de la façade arrière.
2. Montez l 'appareil comme illustré.
Montez le capteur sur une surface stationnaire et
montez l'aimant sur la surface mobile.
3. Replac
ez la façade arrière.
Fonction d'emplacement du détecteur
: Pour vérifier
l'emplacement de chaque dispositif SiX dans un
e
installation, entrez dans le mode de programmation et
sélectionnez un dispositif SiX. Le voyant de le dispositif
s'allume
(peut prendre jusqu'à 30 secondes)
.
Sélectionnez
-le à nouveau pour éteindre la LED ou
sélectionnez le prochain dispositif à localiser.
– 3 –
Battery Replacement
•
Separate the unit from the back cover.
•
Re
move
the battery
,
wait
10 seconds
,
then insert a new
battery
.
Recommended B
atteries:
3V Coin Cell
Honeywell
BL3-
0004 (CR2450);
Duracell DL2450; Panasonic CR2450;
Energizer CR2450
•
Replace the back cover.
BATTERY CAUTION
: Risk of fire, explosion and burns.
Do not
recharge, disassemble, heat above 212°
F (100°
C)
or incinerate.
Dispose of used batteries pro
per
ly. Keep away from children.
NOTE
: Constant exposure to high or low temperat
ure or
high humidity may reduce battery life.
Remplacement de la pile
•
Séparez l'unité de la façade arrière.
•
Retirez la pile,
attendez 10 secondes
, et insérez la
nouvelle pile. 3V Piles recommandées :
Honeywell BL3-
0004 (CR2450);
Duracell DL2450; Panas
onic CR2450;
Energizer CR2450
•
Replacez la façade arrière.
Attention de batterie
: Risque d'incendie, d'explosion et de
brûlures. Ne rechargez pas, démonter, chauffer au-
dessus de
100°C
(212°F
), ou incinérer. Débarrassez
-vous des batteries
utilisées de façon
appropriée. Gardez à partir des enfants.
NOTE
: Une exposition constante à des températures élevées
ou basses ou à un taux d'humidité élevée peut réduire la durée
de vie de la pile.
Specifications /
Spécifications
:
Battery / Pile
:
1 x 3V Coin Cell
Honeywell BL3-0004 (CR2450); Duracell DL2450;
Panasonic CR2450; Energizer CR2450
Tamper
:
Cover and Wall
Interrupteurs antisabotage
:
Couvercle et mur
RF Frequency
:
2.4GHz
Fréquence
RF
:
2.4GHz
Operating Temperature
:
32°
– 122° F / 0° –
50° C
(
Agency
Compliance
32°
–120° F / 0° –
49° C)
Température de fonctionnement
:
32°
– 122° F / 0° –
50° C
(
Agence de conformité
32°
–120° F / 0° –
49° C)
Relative Humidity
:
95% max.
(Agency Compliance -
93% max.)
non-condensing
Humidité relative
:
95% max.
(Agence
de conformité
-
93% max.)
sans condensation
Dimensions
:
0.45”H x 1.25”W x 2.44”L
(
11.5mm H x 32mm W x 62mm L
)
Approval Listings /
Approbations Homologations
:
FCC / IC
cETLus Listed
Conforms to UL 634
Certified to ULC/ORD-C634
Othe
r Standards:
RoHS
Product must be tested at least once each year
Le fonctionnement du produit doit être vérifié au
moins une fois par année
REFER TO THE INSTALLATION INSTRUCTIONS FOR
THE CONTROL WITH WHICH THIS DEVICE IS USED,
FOR DETAILS REGARDING LIMI
TATIONS OF THE
ENTIRE ALARM SYSTEM.
POUR LES LIMITES DU SYSTÈME D’ALARME AU
COMPLET, REPORTEZ
-VO
US AU GUIDE
D’INSTALLATION DU PA
NNEAU DE COMMANDE.
FEDERAL COMMUNICATIONS COMMISSION (FCC) & INDUSTRY CANADA (IC) STATEMENTS
The user shall not make any changes or modifications to the equipment unless authorized by the Installation Instructions or U
ser's Manual. Unauthorized
changes or modifications could void the use
r's authority to operate the equipment.
CLASS B DIGITAL DEVICE STATEMENT
This equipment has been tested to FCC requirements and has been found acceptable for use. The FCC requires the following stat
ement for your information:
This equipment generates and uses radio frequency energy and if not installed and used properly, that is, in strict accordance with the manufacturer's
instructions, may cause interference to radio and television reception. It has been type tested and found to comply with the limits for
a Class B computing device
in accordance with the specifications in Part 15 of FCC Rules, which are designed to provide reasonable protection against su
ch interference in a residential
installation. However, there is no guarantee that interference will not occur in a particular installation. If this equipment does cause interference to radio or
television reception, which can be determined by turning the equipment off and on, the user is encouraged to try to correct t
he interference by one or more of the
following measures:
• If using an indoor antenna, r
eplace it with a quality outdoor antenna.
• Reorient the receiving antenna until interference is reduced or eliminated.
• Move the radio or television receiver away from the receiver/control.
• Move the
antenna leads away from any wire runs to the receiver/control.
• Plug the receiver/control into a different outlet so that it and the radio or television receiver are on different branch cir
cuits.
• Consult the dealer or an experienced radio/TV technician for help.
INDUSTRY CANADA CLASS B STATEMENT
This Class B digital apparatus complies with Canadian ICES
-003.
Cet appareil numérique de la classe B est conforme à la norme NMB
-003 du Canada.
FCC / IC STATEMENT
This device complies with Part 15 of the FCC R
ules,
and Industry Canada’s license-
exempt RSSs
. Operation is subject to the following two conditions: (1) This
device may not cause harmful interference, and (2) This device must accept any interference received, including interference that may cause undesired
operation.
Cet appareil est conforme à la partie 15 des règles de la FCC
et exempt de licence RSS d’Industrie Canada. Son fonctionnement est soumis aux conditions
suivantes: (1) Cet appa
reil ne doit pas causer d’interférences nuisibles. (2) Cet appareil doit accepter toute interférence reçue y compris les interférences
causant une réception indésirable.
Responsible Party / Issuer of Supplier’s Declaration of Conformity:
Ademco Inc., a subsidiary of Resideo Technologies, Inc., 2
Corporate Center Drive., Melville, NY 11747, Ph: 516-
577-
2000
Partie responsable / Émetteur de la déclaration de conformité du
fournisseur :
Ademco Inc., une filiale de Resideo Technologies, Inc.
, 2
Corporate Center Drive., Melville, NY 11747, Tél. 516
577-
2000
RF EXPOSURE
Warning
– The ant
enna(s) used for this device must be installed to provide a separation distance of at least 7.8 inches (20 cm) from all persons and
must not be co-
located or operating in conjunction with any other antenna or transmitter except in accordance with FCC and I
SED
multi
-transmitter
product procedures.
Mise en Garde
Exposition aux Fréquences Radio:
La/les antenne(s) utilisée(s) pour cet émetteur doit/doivent être installée(s) à une distance de séparation d'au
moins 20 cm (7,8 pouces) de toute personne et ne pas être située(s) ni fonctionner parallèlement à tout autre transmetteur ou antenne, excepté en
conformité avec les procédures de produit multi transmetteur FCC et ISED.
Support and Warranty
/ Soutien et
Garantie
For online support information, please g
o to:
Pour de l’assistance en ligne, visitez : https://mywebtech.honeywell
home
.com/
For the latest warranty information, go to:
Pour les dernières informations de garantie, s'il vous plaît aller à :
https://www.security.honeywellhome.com/hsc/resources/wa/index.html
For patent information, see:
Pour des informations sur les brevets, voir
https://www.resideo.com/patent
MyWebTec
h
Warranty
Patents
The Honeywell Home Trademark is used under
license from Honeywell International Inc
. All other
trademarks are the properties of their respective
owners. All rights reserved.
La Honeywell Home est une marque de commer
ce
de Honeywell International inc. utilisée sous licence
par Resideo Technologies, inc.
Toutes les autres
marques de commerce appartiennent à leurs
propriétaires respectifs. Tous droits réservés
.
2 Corporate Center Drive, Suite 100
P.O. Box 9040, Melvil
le, NY 11747
© 2018 Resideo Technologies, Inc.
www.resideo.com
Ê800
-22573V1GŠ
800
-
22573
V1
12/18
Rev
A
- Uploaded