Honeywell T6 Pro Z-Wave Thermostat - Installation Manual
Related Products

Related Categories
Document Transcript
Package Includes:
•
T6 PRO Z-Wave Thermostat
•
UWP™ Mounting System
•
Honeywell Standard Installation
Adapter (J-box adapter)
•
Honeywell Decorative Cover Plate –
Small; Size 4-49/64 in = 121mm.
•
Screws and anchors
•
3 A A batteries
•
Professional Install Guide
•
Getting Started Guide
*TH6320Z W2003 depicted. Other models may var y.
Actual size 4.09'' x 4.09'' x 1.06''
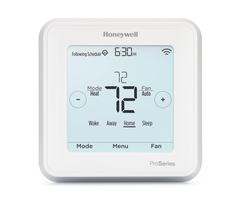
T6 Pro Z-Wave
Programmable Thermostat
Professional Install
Guide
33-00294-05
Compatibility
•
Designed for battery operation (3 x AA batteries) or for 24 VAC power operation
(via a “C” or common wire).
•
Compatible with most single and multi-stage conventional and heat pump
systems.
•
Designed to work with any Z-Wave compliant controller or gateway; however,
a security enabled Z-Wave Plus Controller is recommended to fully utilize all
thermostat features.
•
Works with millivolt systems.
•
Does not work with electric baseboard heat (120-240V).
User Guide
Visit yourhome.honeywell.com for a complete user guide.
Customer assistance
For assistance with this product, please visit
customer.honeywell.com
.
Or call Honeywell Customer Care toll-free at
1-800-468-1502
. 2
Introduction
The Honeywell T6 Pro Z-Wave Programmable Thermostat is a Z-Wave Plus certi
-
fied thermostat capable of controlling up to three heat and two cool stages of heat
pump, (incl. dual fuel heat pump systems) and up to two heat and two cool stages of
conventional system (3H/2C HP, 2H/2C Conv.) It also measures, displays and
reports % indoor relative humidity; however, this model does not control humidifica
-
tion equipment.
It is one of the easiest smart thermostats to install and is controllable by all Z-Wave
compliant controllers that have the control capability for "Thermostat" devices.
When integrated with the app that controls your Z-Wave controller, it lets you pro
-
gram and control your home’s HVAC system as well as controlling other Z-Wave
devices connected to the same Z-Wave controller.
Because the thermostat is battery-powered, low-voltage integrators
can easily connect the thermostat to most HVAC systems. Optional
24 VAC powering via “C” or common wire is also available, if desired.
CAUTION
•
We strongly recommend that installation is performed by a trained HVAC
technician.
•
Read the enclosed instructions carefully before installing the new
Honeywell T6 Pro Z-Wave Programmable Thermostat.
•
ELECTRICAL HA Z ARD: Can cause electrical shock or equipment damage.
Disconnect power before beginning installation.
•
To prevent abnormal operation, it is highly recommended to configure
the installer setup and set the thermostat to correct HVAC system before
including the thermostat to Z-Wave network. If the configuration must
be changed, first EXCLUDE the thermostat from the network, change
the thermostat configuration, and INCLUDE the thermostat back to the
network.
•
Before disconnecting wires from the existing thermostat, label the wires
with the terminal markings from the old thermostat and record them. Take
a picture of the old wiring.
•
Use 3 new A A batteries in the thermostat. 3
UWP Mounting System installation
1.
Open package to find the UWP. See
Figure 1.
2.
Position the UWP on the wall. Level and
mark hole positions. See Figure 2.
Drill holes at marked positions, and
then lightly tap supplied wall anchors
into wall using a hammer.
‒
Drill 7/32” holes for drywall.
3.
Pull the door open and insert wires
through wiring hole of the UWP. See
Figure 3.
4.
Place the UWP over the wall anchors.
Insert and tighten mounting screws
supplied with the UWP. Do not
overtighten. Tighten until the UWP
no longer moves. Close the door. See
Figure 4.
1
2
3
4
Optional Decorative Cover Plate installation
Use the
O
ptional Cover Plate
when:
•
Mounting the thermostat to an
electrical junction box
•
Or when you need to cover paint gap
from the old thermostat.
5.
Separate the Junction Box Adapter
from the Cover Plate. See Figure 5.
6.
Mount the Junction Box Adapter to
the wall or an electrical box using any
of the eight screw holes. Insert and
tighten mounting screws supplied with
Cover Plate Kit. Do not overtighten.
Make sure the Adapter Plate is level.
See Figure 6.
7.
Attach the UWP by hanging it on the
top hook of the Junction Box Adapter
and then snapping the bottom of the
UWP in place. See Figure 7.
8.
Snap the Cover Plate onto the
Junction Box Adapter. See Figure 8.
Use 3x supplied
screws #8 1-1/2”
Use 2x
supplied
screws
#6 5/8”
1/4” to 3/8”
1
2
3
4
1
2
3
4
8
7
6
5 4
Wiring UWP
Push down on the tabs to put the wires into the
inner holes of their corresponding termi
nals on
the UWP (one wire per terminal) until they are
firmly in place.
Gently tug on the wires to verify
they are secure.
If you need to release the wires
again, push down the terminal tabs on the sides
of the UWP.
This wiring is just an example,
yours may vary.
S
S
Y
2
U
U
G
C
Y
A
Rc
W
K
W
2
R
L/A
O/B
AU
X
E
Power options
Insert
R
and
C
wires into
designated terminals for primary
AC power (C terminal is optional
if batteries are installed, but it is
recommended). Remove wires by
depressing the terminal tabs.
Insert 3 AA batteries for primary or
backup power. Match the polarity of the
batteries with the + / – marks inside the
battery compartment.
NOTES:
•
The T6 Pro Z-Wave thermostat works in battery mode or normal power mode
based on its power source. The Z-Wave power mode can only be changed when
the thermostat is NOT included in a Z-Wave network. You can check the power
mode in the thermostat menu under
MENU/DEVICE INFO
.
•
If a C wire is not used or present, the thermostat must be powered by batteries.
The thermostat will operate in LSS mode (power-save, sleep mode) to help
conserve battery life after it has been included in a Z-Wave network. The Z-Wave
radio supports beaming. It allows other devices in the network to wake up the
Z-Wave thermostat, accept commands, and then go back to sleep.
•
If you need the thermostat to operate in AOS mode (always listening mode)
to act as signal repeater and to increase network reliability, you need to power
the thermostat by 24 VAC. The AOS mode information is provided via Node
Information Frame (NIF). 5
Wiring terminal designations
S
Input for wired
indoor or outdoor
sensors
L /A
- A
Heat Pump fault input
(C wire required)
S
O/B
Changeover valve
Y
Compressor
contactor (stage 1)
AUX -
W2
Auxiliary heat relay
Heat relay (stage 2)
Y2
Compressor
contactor (stage 2)
E
Emergency Heat relay
G
Fan Relay
W
Heat relay (stage 1)
C
24 VAC common.
For 2 transformer
systems, use
common wire from
cooling transformer.
K
Connect to K on Wire
Saver Module**
U
Unused
R
24 VAC power from
heating transformer*
U
Rc
24 VAC power from
cooling transformer*
Note: Not all
terminals may be
used, depending
on the system
type that is being
wired. The most
commonly used
terminals are
shaded.
* Terminal can be jumped using Slider Tab. See “Setting Slider Tabs” above.
**
The THP9045A1023 or THP9045A1098 Wire Saver Module can be used on heat/
cool systems when you only have four wires at the thermostat, and you need a
fifth wire for a common wire. Use the K terminal in place of the Y and G terminals
on conventional or heat pump systems to provide control of the fan and the
compressor through a single wire—the unused wire then becomes your common
wire. See THP9045 instructions for more information.
Set R Slider Tab.
•
Use built-in jumper
(R Slider Tab)
to differentiate between one or two
transformer systems.
•
If there is only one R wire, and it is
connected to the
R
,
Rc
, or
RH
terminal, set
the slider to the up position
(1 wire)
.
•
If there is one wire connected to the
R
terminal and one wire connected to the
Rc
terminal, set the slider to the down position
(2 wires)
.
NOTE:
Slider
Tabs for U terminals should be
left in place for other thermostat models.
Setting Slider Tabs
R/Rc slider tab
UWP Mounting System 6
Wiring conventional systems: forced air and hydronics
NOTES:
•
Available wiring configurations may differ by product models/p
roduct numbers.
•
Wire specifications: Use 18- to 22-gauge thermostat wire. Shielded cable is not required.
[1]
Power supply. Provide disconnect means and
overload protection as required.
[2]
Move R-Slider Tab on UWP to the
R
setting. For
more information, see "Setting Slider Tabs" on
page 5.
[3]
Optional 24 VAC common connection.
[4]
If
you do not have separate wires for the Aux
and E terminals, connect the wire to the Aux
terminal.
[5]
In Installer Setup Options (ISU), set system type
to Boiler. Set number of cool stages to 0.
[6]
In Installer Setup Options (ISU), set system type
to Conventional. Set cool stages to 2, and set
heat stages to 2.
1H/1C System
(1 transformer)
R
Power
[1]
Rc
[R+Rc joined by Slider Tab]
[2]
Y
Compressor contactor
C
24 VAC common
[3]
W
Heat relay
G
Fan relay
Heat-only System
R
Power
[1]
Rc
[R+Rc joined by Slider Tab]
[2]
C
24 VAC common
[3]
W
Heat relay
Heat-only System
(Series 20)
[5]
R
Series 20 valve terminal “R”
[1]
Rc
[R+Rc joined by Slider Tab]
[2]
Y
Series 20 valve terminal “W”
C
24 VAC common
[3]
W
Series 20 valve terminal “B”
Heat-only System
(power open zone valve)
[5]
R
Power
[1]
Rc
[R+Rc joined by Slider Tab]
[2]
W
Valve
C
24 VAC common
[3]
1H/1C System
(2 transformers)
R
Power (heating transformer)
[1]
Rc
Power (cooling transformer)
[1]
Y
Compressor contactor
C
24 VAC common
[3, 4]
W
Heat relay
G
Fan relay
Heat-only System with Fan
R
Power
[1]
Rc
[R+Rc joined by Slider Tab]
[2]
C
24 VAC common
[3]
W
Heat relay
G
Fan relay
Cool-only System
R
Power
[1]
Rc
[R+Rc joined by Slider Tab]
[2]
Y
Compressor contactor
C
24 VAC common
[3]
G
Fan relay
2H/2C System
(1 transformer)
[6]
R
Power
[1]
Rc
[R+Rc joined by Slider Tab]
[2]
Y
Compressor contactor (stage 1)
C
24 VAC common
[3]
W
Heat relay (stage 1)
G
Fan relay
W2
Heat relay (stage 2)
Y2
Compressor contactor (stage 2) 7
1H/1C Heat Pump System
R
Power
[1]
Rc
[R+Rc joined by Slider Tab]
[2]
Y
Compressor contactor
C
24 VAC common
[3]
O/B
Changeover valve
[7]
G
Fan relay
2H/1C Heat Pump System
[8]
R
Power
[1]
Rc
[R+Rc joined by Slider Tab]
[2]
Y
Compressor contactor
C
24 VAC common
[3]
O/B
Changeover valve
[7]
G
Fan relay
Aux
Auxiliary heat
[4]
E
Emergency heat relay
[4]
L
Heat pump fault input
2H/2C Heat Pump System
[6]
R
Power
[1]
Rc
[R+Rc joined by Slider Tab]
[2]
Y
Compressor contactor (stage 1)
C
24 VAC common
[3]
O/B
Changeover valve
[7]
G
Fan relay
Y2
Compressor contactor (stage 2)
L
Heat pump fault input
3H/2C Heat Pump System
[10]
R
Power
[1]
Rc
[R+Rc joined by Slider Tab]
[2]
Y
Compressor contactor (stage 1)
C
24 VAC common
[3]
O/B
Changeover valve
[7]
G
Fan relay
Aux
Auxiliary heat
[4]
E
Emergency heat relay
[4]
Y2
Compressor contactor (stage 2)
L
Heat pump fault input
Dual Fuel System
R
Power
[1]
Rc
[R+Rc joined by Slider Tab]
[2]
Y
Compressor contactor (stage 1)
C
24 VAC common
[3]
O/B
Changeover valve
[7]
G
Fan relay
Aux
Auxiliary heat
[4]
E
Emergency heat relay
[4]
Y2
Compressor contactor (stage 2 - if
needed)
L
Heat pump fault input
S
Outdoor sensor
S
Outdoor sensor
Wiring heat pump systems
[1]
Power supply. Provide disconnect means and
overload protection as required.
[2]
Move R-Slider Tab on UWP to the
R
setting. For
more information, see "Setting Slider Tabs" on
page 5.
[3]
Optional 24 VAC common connection.
[4]
If
you do not have separate wires for the Aux
and E terminals, connect the wire to the Aux
terminal.
[6]
In
Installer Setup Options (ISU), set system type
to Heat Pump. Set compressor stages to 2, and
set Aux/E stages to 0.
[7]
In
Installer Setup Options (ISU)
, set Reversing
Valve to O/B on Cool (for cool changeover) or
to O/B on Heat (for heat changeover).
[8]
In Installer Setup Options (ISU), set heat sys
-
tem type to Heat Pump. Se
t compressor stages
to 1, and set Aux/E stages to 1.
[10]
In Installer Setup Options (ISU)
, set system type
to Heat Pump, set compressor stages to 2, and
set Aux/E stages to 1.
NOTES:
•
Do
NOT
use
W
for heat pump applications. Auxiliary heat must wire to
AUX
or
E
.
•
Available wiring configurations may differ by product models/product numbers.
•
Wire specifications: Use 18- to 22-gauge thermostat wire. Shielded cable is not required. 8
Mounting thermostat
1
Push excess wire back into the wall
opening.
2
Close the UWP door. It should remain
closed without bulging.
3
Align the UWP with the thermostat, and
push gently until the thermostat snaps in
place.
4
If needed, gently pull to remove the
thermostat from the UWP.
5
Turn the power on at the breaker box or
switch.
Initial installer setup
•
After the T6 Pro Z-Wave thermostat has
powered up, touch
START SETUP
on the
thermostat.
•
Touch
or
to toggle between Installer
Set Up (ISU) options.
•
Touch
Edit
or touch text area, and then
touch
or
to edit default setup
option.
•
Touch
Done
or touch text area to confirm
the setting or press
Cancel
.
•
Touch
or
to continue to setup
another ISU option.
•
To finish setup and save your settings,
scroll to the
Finish
screen at the end of
the ISU list.
NOTES:
•
To see a list of all setup parameters, go to
"Installer setup options (ISU) – advanced
menu" on page 15. The thermostat
displays the ISU name and the ISU
number.
•
To prevent abnormal operation, it is
highly recommended to perform installer
setup and set thermostat to correct
HVAC system before including it in a
Z-Wave network.
Cancel
Done
Edit ISU
ISU #
ISU option blinking
Cancels
ISU option
selection, go
back to view
ISU
Arrow buttons
used to scroll
through ISU
options
Saves selected ISU
option moves on to
the next ISU screen
Edit
View ISU
ISU option and
name (scrolling)
Arrow buttons
used to scroll
through ISUs 9
After you finish the installer setup and set the
date and time, you will be asked to set up a
Z-Wave to include the thermostat into Z-Wave
network.
•
Touch
Ye s
to include the thermostat in to
Z-Wave network, or touch
No
if you want this to
be done later.
•
You’ll be asked to set your primary controller
to
INCLUDE MODE
. Please refer to the user
manual of your Z-Wave controller.
•
After inclusion procedure has been initiated
on your Z-Wave controller, touch
Select
on the
thermostat.
•
If the inclusion procedure is successful,
INCLUDED
, the
node ID, and the Z-Wave connected status icon appear on the
screen. If the procedure fails,
FAILED TO INCLUDE
appears on the screen. If this
happens, position the thermostat closer to the Z-Wave controller and repeat the
inclusion procedure.
•
Your controller will indicate whether the thermostat was successfully added to its
network. (Please refer to the user manual of your Z-Wave controller.)
NOTES:
•
This thermostat will function as a normal programmable thermostat with the
default program schedule if not included in a Z-Wave network. Once you include
the thermostat in to Z-Wave network, it assumes to be programmed from your
Z-Wave controller and the program schedule on the thermostat is turned OFF by
default. For more information, see "Scheduling options" on page 12.
•
To include or exclude the thermostat from Z-Wave network after initial thermostat
setup, go to thermostat
MENU/Z-WAVE SETUP
.
•
Before adding the thermostat to a Z-Wave network, check that it does not already
belong to one. If the thermostat is included in Z-Wave network, it offers an option
to exclude. If the thermostat is excluded from Z-Wave network, it offers an option
to include. You can also check the status by viewing the
Node ID
located in the
thermostat
MENU/DEVICE INFO
. An excluded thermostat should show zero for
the Node ID (000).
•
Whether you are including or excluding the thermostat from Z-Wave network, first
you have to initiate it on your Z-Wave controller. Please refer to the user manual of
your Z-wave controller.
•
For other specific tasks such as adding the thermostat to home automation
scenes or groups, refer to the user manual of your Z-Wave controller.
Z-Wave setup
Cancel
Back
Select
No
Ye s 10
Z-Wave connection status is located in the upper-right corner of the screen.
•
Thermostat is included and connected to a Z-Wave network.
•
Thermostat is excluded from a Z-Wave network.
•
Thermostat is either included in a Z-Wave network but the Z-Wave signal
is lost, or is included but AC power is lost (battery used as backup). In this
case, Z-Wave radio is turned off to preserve battery life. AC power must be
restored or you have to change the power mode. It can be done via excluding
thermostat from Z-wave network and including again in battery power mode
where batteries are used as main power source. You can check the actual
power mode in the thermostat
MENU/DEVICE INFO
.
Z-Wave connection status
AM
Menu
Fa
n
Mode
Fan
Auto
Mode
Heat
Wa
ke
AwayH
omeS
leep
Following Schedul
e
Example of Wi-Fi is connected.
Wifi is on and
connected
Wifi is disconnected
or wifi is not setup
Wifi is off
AM
Menu
Fa
n
Mode
Fan
Auto
Mode
Heat
Wa
ke
AwayH
omeS
leep
Following Schedul
e
Example of Wi-Fi is connected.
Wifi is on and
connected
Wifi is disconnected
or wifi is not setup
Wifi is off
AM
Menu
Fa
n
Mode
Fan
Auto
Mode
Heat
Wa
ke
AwayH
omeS
leep
Following Schedul
e
Example of Wi-Fi is connected.
Wifi is on and
connected
Wifi is disconnected
or wifi is not setup
Wifi is off
This thermostat may be configured to report the actual room temperature in
a higher resolution than can be shown on the thermostat display. The default
temperature reporting resolution is 1 °F or 0.5 °C. When configured to
ADVANCED
,
the temperature reporting resolution will be 0.5 °F or 0.25 °C. To change default
temperature reporting to a higher resolution, go to thermostat
MENU/Z-WAVE
SETUP/TEMP REPORT
and set to
ADVANCED
. The temperature is reported by
every displayed value change, and no later than 2 hours from last report.
NOTE:
When higher temperature resolution reporting set, you may experience
different resolution of temperature displayed on the thermostat and Z-Wave
controller.
Advanced Z-Wave temperature reporting 11
1
Press the
Mode
button to cycle to the next available
System mode.
2
Cycle through the modes until the required System
mode is displayed and leave it to activate.
System modes:
•
Heat:
Controls the heating system.
•
Cool:
Controls the cooling system.
•
Off:
Turns the heating and cooling systems off.
•
Auto:
When enabled, the thermostat will
automatically use heating or cooling to reach the
desired temperature.
•
Em Heat:
Controls auxiliary or emergency heat; only
available on systems with a heat pump.
NOTES:
•
Em Heat and Auto modes may not appear on the
thermostat screen, depending on your equipment
and how the thermostat was configured.
•
Em Heat is only available if the thermostat is
configured to control a heat pump and an auxiliary/
emergency heat stage.
•
When Auto mode is enabled and initiated,
Auto
Chg. On
will appear in the upper-right corner of the
thermostat home screen, and the active mode (Heat
or Cool) will be displayed. Auto mode is disabled by
default. To enable it, see "Installer setup – advanced
menu" on page 14 and 16.
System operation setting
Fan operation setting
1
Press the
Fan
button to cycle to the next
available Fan mode.
2
Cycle through the modes until the required
Fan mode is displayed and leave it to
activate.
NOTE:
Available Fan modes vary with system
settings.
Fan modes:
•
On:
The fan will run continuously.
•
Auto:
The fan will run only when the heating
or cooling system is on.
•
Circ:
The fan will run at random intervals at
least 35% of the time to keep air circulating
throughout your home.
AM
Menu
Fa
n
Mode
Fan
Auto
Mode
H
eat
AwayH
omeS
leep
Following Schedul
e
AM
Menu
Fan
Mode
Fan
Auto
Mode
Cool
AwayH
omeS
leep
Following Schedul
e
Auto Chg.
On
AM
Menu
Fan
Mode
Fan
Auto
Mode
Wa
ke
AwayH
omeS
leep
Following Schedul
e
AM
Menu
Fa
n
Mode
Fan
Auto
Mode
H
eat
AwayH
omeS
leep
Following Schedul
e 12
Scheduling options
This thermostat may be configured to be programmable or non programmable.
Thermostat schedule is an optional menu item. It will only show up in the
thermostat menu if enabled in the Installer setup – advanced menu. It provides
setting for local thermostat schedule control.
Once the thermostat is included in to Z-Wave network, it assumes to be
programmed from your Z-Wave controller and the program schedule on the
thermostat is turned OFF by default. Use just the controller or associated app to
program schedule (automation scenes) for the thermostat.
•
O
nly Home and Away periods appear on the thermostat home screen.
•
Home temperature setpoints are adjustable on the thermostat Home screen.
Common for all days.
•
Away mode is an Energy saving mode adjustable in the thermostat
MENU/
AWAY SE
TTING
. Common for all days.
See table below with default, adjustable settings:
Thermostat schedule is turned
OFF
, thermostat included in Z-Wave network
Period
Start Time
Heat
Cool
Away
N/A*
62
°
85
°
Home
N/A*
72
°
78
°
*Triggered by Z-Wave controller
AM
Menu
Fan
Mode
Fan
Auto
Mode
Heat
AwayH
ome
Following Schedul
e
Back
Sched.
On/Off
Enabling thermostat schedule when thermostat is included in Z-Wave network
(optional):
Z-Wave controllers from various manufacturers may or may not support the
Z-Wave Thermostat General V2 Device class used by the Honeywell T6 pro Z-Wave
Thermostat. If your controller does not support full thermostat device class
functions, it may still be able to control basic Home/ Away (Energy Saving) modes of
the thermostat through BASIC_SET commands (ON/OFF) used by the controller for
other Z-Wave devices (eg. lighting devices). When only basic commands capable to
receive from controller, you can enable the local thermostat schedule to differentiate
between temperatures when you are away and when you are at home to differentiate
between home and sleep temperatures.
•
Home,
Away and Sleep periods appear on the thermostat home screen.
•
Home and Sleep temperature and time settings are adjustable in the thermostat
MENU/SCHEDULE
.
•
Away mode is an Energy saving mode adjustable in the thermostat
MENU/
AWAY SE
TTING
. Common for all days. 13
See table below with default 5+2 schedule (Mon-Fri; Sat-Sun), adjustable settings:
Thermostat schedule is turned
ON
, thermostat included in Z-Wave network
Period
Start Time
Heat
(Mon-Fri)
Cool
(Mon-Fri)
Heat
(Sat-Sun)
Cool
(Sat-Sun)
Away
N/A*
62
°
85
°
62
°
85
°
Home
6:00
Am
70
°
78
°
70
°
78
°
Sleep
10:00
Pm
62
°
85
°
62
°
85
°
*Triggered by Z-Wave controller
Back
Sched.
On/Off
Back
Select
Back
Select
Sched.
On/Off
AM
Menu
Fan
Mode
Fan
Auto
Mode
Heat
AwayH
omeS
leep
Following Schedul
e
•
If the Schedule menu on the thermostat does not appear, make sure that
thermostat schedule is enabled. This setting is accessed from
INSTALLER
SETUP – ADVANCED MENU
(see pages 14, 15), ISU 120 - Schedule
type. Here you can also choose from pre-defined different thermostat program
schedule types to be adjustable in the thermostat
MENU/SCHEDULE
.
Program schedule on the thermostat when not included in Z-Wave network (not
operated by Z-Wave controller):
The Honeywell T6 Pro Z-Wave thermostat will function as fully programmable
thermostat when not operated by your controller. Each day can be programmed
for different heating and cooling setpoints in 4 unique periods (Wake, Away, Home,
Sleep) in the thermostat
MENU/SCHEDULE
. Make sure that thermostat schedule
is enabled in
INSTALLER SETUP – ADVANCED
(see pages
14, 15
), ISU 120 -
Schedule type.
See table below with default 5+2 schedule (Mon-Fri; Sat-Sun), adjustable settings:
Thermostat schedule is
turned ON
, thermostat excluded from Z-Wave network
Period
Start Time
Heat
(Mon-Fri)
Cool
(Mon-Fri)
Heat
(Sat-Sun)
Cool
(Sat-Sun)
Wake
6:00
am
70
°
78
°
70
°
78
°
Away
8:00
am
62
°
85
°
62
°
85
°
Home
6:00
Pm
70
°
78
°
70
°
78
°
Sleep
10:00
Pm
62
°
85
°
62
°
85
°
Back
Sched.
On/Off
Back
Select
Back
Select
Sched.
On/Off
AM
Menu
Fan
Mode
Fan
Auto
Mode
Heat
Wa
ke
AwayH
omeS
leep
Following Schedul
e
•
Wake, Away, Home, Sleep periods appear on the thermostat home screen.
•
Temperature setpoints for all four periods, different per day or group of days are
adjustable in thermostat
MENU/ SCHEDULE
. 14
Installer setup – advanced menu
To access the advanced menu, press and hold the
Menu
button
for
5 seconds
. Touch
or
to go through the options in the
advanced menu.
Advanced menu options
Device Setup
This is used to access the device ISU
setting.
Screen Lock
The thermostat touch screen can be
locked fully or partially.
System Test
Test the heating and cooling system.
Reset
Access all reset
options on the
thermostat. This
is the only place
to access factory
reset.
Range Stop (Temperature)
Set the Minimum Cool and Maximum
Heat temperature set points.
AM
Menu
Fan
Mode
Fan
Auto
Mode
Heat
Away
Home
Sleep
Following Schedule
Press and hold for
5 seconds
.
Auto Chg. On
AM
Heat On
Menu
Fan
Mode
Fan
Auto
Mode
Heat
Wa
ke
Aw
ay
HomeS
leep
Following Schedule
Recover
y
Key features
The screen will wake up by pressing the center area of the displayed temperature.
If powered by 24 VAC, the screen stays lit for 45 seconds after you complete
changes.
If powered by battery only, the screen stays lit for 8 seconds.
Brightness of an inactive backlight can be adjusted in the thermostat
MENU
only
if the thermostat is powered by 24 VAC.
System status
information
Cool On, Heat On
Auxiliary Heat On,
Recovery, or Auto
Changeover On.
Schedule information
Following time or
occupancy based
temperature control.
Desired temperature
Displays the desired
temperature setting.
Indoor temperature/
% indoor relative
humidity
Touch to display either
indoor temperature or %
indoor relative humidity.
Mode
Select system mode:
Auto (if enabled)/Heat/
Cool/Off/EM Heat
(Emergency Heat if
installed and configured).
Z-Wave connection
status
Shows Z-Wave
connection status.
Messaging
Shows device setup
options, menu options,
reminders, schedule
overrides.
Schedule period
Shows schedule period:
Wake/Away/Home/
Sleep. (varies on whether
included in/excluded
from Z-Wave network
and program scheduled
enabled).
Fan
Select Fan mode Auto/
On/Circulate.
Time, ISU #, or
Alert #
Menu
Touch to display user
options.
Note: Long press
of Menu button
for 5
seconds to
access Advanced
Menu options. 15
Installer setup options (ISU) – advanced menu
Note:
ISU options available may vary upon the thermostat model and equipment setup.
Table 1.
# ISU
ISU Name
ISU Options (defaults in bold)
Notes
120
Schedule Type
No Schedule or Occupancy (when included in Z-Wave network)
MO-SU = Ever y day the same
MO-FR, SA , SU = 5-1-1 schedule
MO-FR, SA-SU = 5-2 schedule
Each Day = Ever y day individual
You can change default MO-FR, SA-SU schedule here. To edit periods during days, temperature setpoints, or to
turn
Schedule On/Off
, go to
MENU/SCHEDULE
(only available if schedule is set).
125
Temp S c ale
Fahrenheit
, Celsius
130
Outdoor Temp
No,
Wired
An outdoor temperature is required to set the following ISUs: ISU 355 Balance point (Compressor Lockout),
ISU 356 Aux Heat Lockout. Use a wired outdoor sensor connected to the “S” terminals on the UWP and set this
ISU to Wired. (" Wiring heat pump systems" on page 7.)
200
Sy stem Type
Conventional Forced Air
Heat Pump
Boiler
Cool Only
Basic selection of system your thermostat will control.
205
Equipment Type
Conventional Forced Air Heat:
Standard Efficiency Gas (STD GAS),
High Efficiency Gas (EFF
GAS),
Oil, Electric, Hot Water Fan Coil
Heat Pump:
Air To Air,
Geothermal
Boiler:
Hot Water Radiant Heat,
Steam
This option selects the equipment type your thermostat will control. Note: This option is NOT displayed if
ISU 200 is set to Cool Only.
218
Reversing Valve
0/B on Cool,
0/B on Heat
This ISU is only displayed if ISU 200 is set to Heat Pump. Select whether reversing valve O/B should energize
on cool or on heat.
220
Cool Stages
(#200=Conv. /
200=HP)
0,
1,
2
221
Heat Stages;
Aux /E Stages
(#200=Conv.;
200=HP)
Heat Stages: 0,
1,
2
AUX /E Stages:
0,
1
Maximum of 2 Heat Stages for conventional systems. Maximum of 1 Aux /E stages for heat pump systems.
230
Fan Control
Equipment,
Thermostat
This ISU is only displayed if ISU 205 is set to Electric Forced Air or Fan Coil.
253
Aux/E Control
Both Aux/E,
Either Aux/E
Set “EITHER AUX /E” if you want to setup and control of Auxiliar y and Emergency heating separately . This ISU
is only displayed if ISU 200 is set to Heat Pump AND if ISU 221 Aux /E stages = 1.
255
Aux Heat Type
Electric,
Gas/Oil (or Fossil Forced Air)
This ISU is displayed only if ISU 200 is set to heat pump AND if ISU 221 Aux /E heat stages = 1. 16
Installer setup options (ISU) – advanced menu
Table 2.
# ISU
ISU Name
ISU Options (defaults in bold)
Notes
256
EM Heat Type
Electric,
Gas/Oil (or Fossil Forced Air)
This ISU is displayed only if ISU 200 is set to Heat Pump AND if ISU 221 Aux /E heat stages = 1 AND if ISU 253
is set to run AUX /E heat separately.
260
Fossil Kit Control
Thermostat,
External (Fossil Fuel Kit Controls Backup Heat)
This ISU is displayed only if ISU 200 is set to Heat Pump AND if ISU 221 Aux /E heat stages = 1, AND if ISU 256
is set to Gas/Oil.
300
Auto Changeover
On,
Off
OFF:
The user must select heating or cooling as needed to maintain the desired indoor temperature.
ON (Automatic):
On (enabled) Allows user to select Auto Changeover as one of the system modes from the
home screen. In auto mode, the thermostat control either heating or cooling automatically to maintain the
desired indoor temperature.
303
Auto Differential
0 °F
to 5 °F or
0.0 °C
to 2.5 °C
Differential is NOT deadband. Honey well uses an advanced algorithm that fixes deadband at 0 °F. The differ
-
ential setting is the minimum number of degrees from set-point needed to switch from the last mode running
(heat or cool) to the opposite mode when the thermostat is in auto-changeover. This is more advanced than
previous thermostats.
305
High Cool Stage
Finish
Ye s ,
No
This ISU is only displayed when the thermostat is set to 2 cool stages. When set to YES, this feature keeps the
higher stage of the cooling equipment running until the desired setpoint is reached.
306
High Heat Stage
Finish
Ye s ,
No
This ISU is only displayed when the thermostat is set to 2 or more heat stages. When set to YES, this feature
keeps the higher stage of the heating equipment running until the desired setpoint is reached.
340
Aux Heat Droop
0 = Comfort;
2 °F to 15 °F from setpoint (in 1 °F increments)
or 1.0 °C to 7.5 °C from setpoint (in 0.5 °C increments)
Aux heat droop can be set on heat pump systems with an auxiliar y heat stage. The Comfor t setting is NOT
available for Dual Fuel systems. Default setting is 0 °F (Comfor t) for Electric while 2 °F for Gas/Oil. The indoor
temperature must drop to the selected droop setting before the thermostat will turn Aux Heat on. For example,
if Aux Heat is set to 2 °F (1.0 °C), the indoor temperature must be 2 ° F (1.0 ° C) away from the setpoint before
Aux Heat turns on. When set to Comfor t, the thermostat will use Aux Heat as needed to keep the indoor tem
-
perature within 1 °F (0.5 ° C) degree of the setpoint.
350
Up Stage Timer Aux
Heat
Off,
30, 45, 60, 75, 90 minutes
2, 3, 4, 5, 6, 8, 10, 12, 14, 16 hours
The Auxiliar y Heat Upstage Timer star ts when the highest stage of the previous heating equipment type turns
on. Auxiliar y heat will be used (if needed) when the timer expires. This ISU is only displayed when ISU 340 (AUX
Heat Droop) is set to 2 °F or higher.
355
Balance Point
(Compressor
Lockout)
Off,
5 °F to 60 °F (in 5 °F increments) or 15.0 °C to 15.5 °C
(in 2.5 °C or 3.0 °C increments)
Compressor Lockout requires an outdoor temperature. Set Compressor Lockout to the temperature below
which it is inefficient to run the heat pump. When outside temperature is below this setting, thermostat will
lockout the heat pump and run Aux Heat only. This ISU is only displayed if ISU 130 = Wired, ISU 200 is set to
Heat Pump, ISU 221 Aux /E stages = 1. Default is 40 °F if ISU 205 Heating Equipment is Air to Air Heat Pump
and ISU 255 Aux Heat Type is Gas/Oil. Default is Off if ISU 205 Heating Equipment is Air to Air Heat Pump and
ISU 255 Aux Heat Type is Electric. Default is Off if ISU 205 Heating Equipment is Geothermal. Compressor
Lockout is optional for any type of heat pump (Air to Air Heat Pump, Geothermal Heat Pump).
356
Aux Heat Lock Out
(Aux Heat Outdoor
Lockout)
Off,
5 °F to 65 °F (in 5 °F increments) or
-15.0 °C to 18.5 °C (in 2.5 °C or 3.0 °C increments)
Aux Heat Lockout requires an outdoor temperature. Set Aux Heat Lockout to optimize energy bills and to not
allow to run the more expensive Aux Heat source above cer tain outdoor temperature limit. This ISU is only
displayed if ISU 130 = Wired, ISU 200 is set to Heat Pump, ISU 221 Aux /E stages = 1. 17
Installer setup options (ISU) – advanced menu
Table 3.
# ISU
ISU Name
ISU Options (defaults in bold)
Notes
365
Cool 1 CPH (Cooling
cycle rate stage 1)
1 - 6 CPH
(3 CPH)
This ISU is only displayed when Cool /Compressor Stages is set to 1 or more stages. Cycle rate limits the maxi
-
mum number of times the system can cycle in a 1 hour period measured at a 50% load. For example, when set
to 3 CPH, at a 50% load, the most the system will cycle 3 times per hour (10 minutes on, 10 minutes off ). The
system cycles less of ten when load conditions are less than or greater than a 50% load.
366
Cool 2 CPH (Cooling
cycle rate stage 2)
1 - 6 CPH
(3 CPH)
This ISU is only displayed when Cool /Compressor Stages is set to 2.
370
Heat 1 CPH (Heating
cycle rate stage 1)
1 - 12 CPH
This ISU is only displayed when Heat Stages is set to 1 stage or more stages. Cycle rate limits the maximum
number of times the system can cycle in a 1 hour period measured at a 50% load. For example, when set to 3
CPH, at a 50% load, the most the system will cycle is 3 times per hour (10 minutes on, 10 minutes off ). The
system cycles less of ten when load conditions are less than or greater than a 50% load. The recommended
(default) cycle rate settings are below for each heating equipment type:
Standard Efficiency Gas Forced Air = 5 CPH; High Efficiency Gas Forced Air = 3 CPH; Oil Forced Air =
5 CPH; Electric Forced Air = 9 CPH; Fan Coil = 3 CPH; Hot Water Radiant Heat = 3 CPH; Steam = 1 CPH.
371
Heat 2 CPH (Heating
cycle rate stage 2)
1 - 12 CPH
This ISU is only displayed when Heat Stages is set to 2 stages. The recommended (default) cycle rate settings
are below for each heating equipment type:
Standard Efficiency Gas Forced Air = 5 CPH; High Efficiency Gas Forced Air = 3 CPH; Oil Forced Air =
5 CPH; Electric Forced Air = 9 CPH; Fan Coil = 3 CPH; Hot Water Radiant Heat = 3 CPH; Steam = 1 CPH.
375
Aux Heat CPH
(Heating cycle rate
Auxiliary Heat)
1 - 12 CPH
This ISU is only displayed when ISU 200 = Heat Pump and ISU 221=1. It is only displayed when Auxiliar y Heat
is configured. The recommended cycle rate settings are below for each heating equipment type:
Standard Efficiency Gas Forced Air = 5 CPH; High Efficiency Gas Forced Air = 3 CPH; Oil Forced Air =
5 CPH; Electric Forced Air = 9 CPH
378
EM Heat CPH
(Heating cycle rate
Emergency Heat)
1 - 12 CPH
This ISU is only displayed when Emergency Heat is configured and ISU 253: Aux /E Terminal Control is set to
control Aux and E heat Independently. The recommended cycle rate settings are below for each heating equip
-
ment type:
Standard Efficiency Gas Forced Air = 5 CPH; High Efficiency Gas Forced Air = 3 CPH; Oil Forced Air =
5 CPH; Electric Forced Air = 9 CPH.
387
Compressor
Protection
Off,
1 - 5 minutes
The thermostat has a built in compressor protection (minimum off timer) that prevents the compressor from
restar ting too early af ter a shutdown. The minimum-off timer is activated af ter the compressor turns off. If
there is a call during the minimum-off timer, the thermostat shows “Cool on” or “Heat On” (heat pump) status
blinking on the thermostat home screen. This ISU is displayed if ISU 220 is set to at least 1 stage.
390
Ext Fan Run Time
in Cool
Off,
30, 60, 90 seconds
2, 3, 4, 5, 6, 7, 8, 9, 10, 11, 12, 13, 14, 15 minutes
Af ter the call for cooling ends, the thermostat keeps the fan on for the selected amount of time for increased
efficiency. This may reintroduce humidity into the living space. This ISU is displayed if ISU 220 is set to at least
1 stage.
391
Ext Fan Run Time
in Heat
Off,
30, 60, 90 seconds
2, 3, 4, 5, 6, 7, 8, 9, 10, 11, 12, 13, 14, 15 minutes
Af ter the call for heating ends, the thermostat keeps the fan on for the selected amount of time for increased
efficiency. This ISU is displayed if ISU 230 is set to Thermostat Controls Fan. 18
Installer setup options (ISU) – advanced menu
Table 4.
# ISU
ISU Name
ISU Options (defaults in bold)
Notes
425
Adaptive Recovery
On,
Off
Adaptive Intelligent Recover y (AIR) is a comfor t setting. Heating or cooling equipment will turn on earlier,
ensuring the indoor temperature will match the setpoint at the scheduled time.
430
Minimum Cool
Setpoint
50 °F to 99 °F
(50 °F );
10.0 °C to 37.0 °C
(10.0 °C)
The user cannot set the cooling temperature below this level.
431
Maximum Heat
Setpoint
40 °F to 90 °F
(90 °F );
4.5 °C to 32.0 °C
(32.2 °C)
The user cannot set the heating temperature above this level.
435
Lock Screen
None,
Partial, Full
Unlocked:
User has access to all thermostat settings.
Partially Locked:
User can modif y only temperature settings.
Fully Locked:
User cannot modif y any settings. Screen will be locked by default factor y code and cannot be
changed. This code is displayed for a shor t time, when you are about to lock the thermostat screen. Please note
the code in safe place for future reference.
500
Indoor Sensor
Ye s ,
No
Set this ISU when you want to wire a remote indoor sensor to the “S” terminals on the UWP - see " Wiring termi
-
nal designations" on page 5. This ISU is only displayed only if ISU 130 is set to NO wired outdoor sensor
configured.
515
Sensor type
10k,
20k
Choose resistance type of wired indoor sensor. This ISU is only displayed when indoor sensor is configured -
ISU 500.
520
Temperature Control
Thermostat, Wired,
Average
This ISU is only displayed when indoor sensor is configured - ISU 500. You can choose what temperature
source to be used or you can ask thermostat to use both thermostat and remote sensors for higher accuracy of
measurement.
702
Air Filters
0
- 2
This ISU refers to the number of air filters in the system.
71 1
Air Filter 1 Reminder
Off
10, 20, 30, 45, 60, 90, 120, 150 Run Time Days
30, 45, 60, 75 Days
3, 4, 5, 6, 9, 12, 15 Months
Choose either calendar or equipment run time-based reminder.
712
Air Filter 2 Reminder
Off
10, 20, 30, 45, 60, 90, 120, 150 Run Time Days
30, 45, 60, 75 Days
3, 4, 5, 6, 9, 12, 15 Months
Choose either calendar or equipment run time-based reminder.
810
Hum Pad Reminder
Off
6, 12 Calendar Months
921
Dehum Filter
Reminder
Off
30, 60 Calendar Days
3 - 12 Calendar Months (in 1 month increments)
1018
Vent Filter Reminder
Off,
3, 6, 9, 12 months 19
Installer setup options (ISU) – advanced menu
Table 5.
# ISU
ISU Name
ISU Options (defaults in bold)
Notes
1100
UV Devices
0
- 2
Some systems may have two UV devices, one for the A-Coil and another for Air Treatment. A replacement
reminder can be setup for each one separately.
1105
UV Bulb 1 Reminder
Off,
6, 12, 24 months
1106
UV Bulb 2 Reminder
Off,
6, 12, 24 months
14 01
Idle Brightness
0= Off,
0 - 5
Adjust brightness of an inactive backlight (idle screen) from default 0 (backlight off ) to 5 (maximum bright
-
ness). Brightness level higher that 0 will be applied and enabled for user to change in user menu only if ther
-
mostat is powered by 24 VAC (C-wire)
1410
Clock Format
12 hour,
24 hour
1415
Daylight Saving
On,
Off
Set to Off in areas that do not follow Daylight Saving Time.
1420
Temperature Offset
0=Off,
-3 °F to 3 °F (in 1 °F increments) or
-1.5 °C to 1.5 °C (in 0.5 °C increments)
0 °F - No difference in displayed temperature and the actual room temperature. The thermostat can display up
to 3 °F (1.5 C) lower or higher than the actual measured temperature.
1425
Humidity Display
Offset
0=Off,
-12% to 12% (in 1% increments)
0% - No difference in displayed and actual room % relative humidity. The thermostat can display up to 12%
lower or higher than the actual measured % relative humidity. 20
If your gateway/hub/controller supports configuration function, you may remotely
configure or change the default thermostat configuration parameters. For detailed
table with all available Z-Wave configuration parameters go to
http://customer.honeywell.com
or search for
T6 Pro Z-Wave Thermostat
in the
Z-Wave certified products section on
http://Z-Wavealliance.org
Z-Wave configuration parameters
Performing a system test
You can test the system setup in
ADVANCED
MENU
under
SYSTEM TEST
option.
1
Press and hold
Menu
on the thermostat for
5 seconds to access
ADVANCED MENU
options.
2
Touch
or
to go to
SYSTEM TEST
.
3
Touch
Select
or touch text area.
4
Touch
or
to select system test type.
Touch
Select
or touch text area.
5
For the heat test and cool test, use
or
to activate each stage of the equipment.
For the fan test, use
or
to turn the fan
on and off.
NOTE:
The clock is used as a timer while the
stages are running. The Heat On and Cool On
indicators are displayed when the system test
is running.
Viewing equipment status
You can see the status of thermostat-
controlled equipment in the
Menu
under the
EQMT STATUS
option.
1
Touch
Menu
on your thermostat.
2
Touch
or
to go to
EQMT STATUS
.
Touch
Select
or touch text area.
3
Touch
or
to view statuses of all the
equipment the thermostat is controlling.
Depending on what feature the thermostat
supports or how it was installed, the
Equipment Status screen reports data for
the following systems:
•
Heating and cooling
•
Fan
Heat On
Heat
Done
Done
Back
Select
Back
Select
Back
Select 21
Number
Alert/Reminder
Definition
54
Thermostat
Humidity
Sensor Error
The sensor of the thermostat has encountered
an error. Please contact dealer to replace the
thermostat.
16 4
Heat Pump
Needs Service
Heat pump needs service. Contact dealer to
diagnose and service heat pump.
170
Internal Memory
Error
The memory of the thermostat has encountered an
error. Please contact dealer for assistance.
171
Set the Date
and Time
Set the date and time on your thermostat. The date
and time are required for certain features to operate,
like the program schedule.
173
Thermostat
Temperature
Sensor Error
The sensor of the thermostat has encountered
an error. Please contact dealer to replace the
thermostat.
177
Indoor
Temperature
Sensor Error
Wired indoor temperature sensor is not connected
or there is a wiring short. Please contact dealer for
assistance.
178
Outdoor
Temperature
Sensor Error
Wired outdoor temperature sensor is not connected
or there is a wiring short. Please contact dealer for
assistance.
181
Replace Air
Filter (1)
Replace air filter (1). Reset the timer by touching
the "dismiss" button on thermostat screen after it is
replaced.
182
Replace Air
Filter (2)
Replace air filter (2). Reset the timer by touching
the "dismiss" button on thermostat screen after it is
replaced.
184
Replace
Humidifier Pad
Replace humidifier pad. Reset the timer by touching
the “dismiss” button on the thermostat screen after it
is replaced.
185
Replace
Dehumidifier
Filter
Replace the dehumidifier filter. Reset the timer by
touching "dismiss" button on thermostat screen after
it is replaced.
187
Clean or
Replace
Ventilator Filter
Clean or replace ventilator filter. Reset the timer by
touching the “dismiss” button on thermostat screen
after it is replaced.
188
Replace UV
Bulb (1)
Replace UV Bulb (1). Reset the timer by touching
the "dismiss" button on thermostat screen after it is
replaced.
189
Replace UV
Bulb (2)
Replace UV Bulb (2). Reset the timer by touching
the "dismiss" button on thermostat screen after it is
replaced.
Alerts and reminders are displayed via the alert symbol and alert number in the clock
area on the home screen. You can read more information about active alerts, snooze
or dismiss non-critical alerts in Menu/Alerts.
Alerts and reminders 22
Alerts and reminders
Number
Alert/Reminder
Definition
252
AC Power Lost
If batteries used as backup power it would drain
batteries quickly so Z-Wave communication needs
to be turned off. The working power mode can only
be changed when thermostat is NOT included in
a Z-Wave network. Either to exclude and include
thermostat back in to Z-Wave network to change the
power mode to LSS (power-save, sleep mode) or to
resume AC power. You can check the actual power
mode in the thermostat
MENU/DEVICE INFO
.
405
Battery Low
Battery low. Please turn the system mode to off and
replace the batteries.
407
Battery Critical
Battery critical. Thermostat cannot control your
system. Please replace the batteries immediately.
546
Z-Wave Not
Configured
Z-Wave has a not been configured yet to receive
commands from your Z-Wave network. Please follow
steps on how to include thermostat in to Z-Wave
network.
5 47
Z-Wave Radio
Error
Z-Wave module is not operating. Thermostat cannot
receive commands from your Z-Wave network. Please
contact dealer to replace the thermostat.
Screen is blank
•
Check circuit breaker and reset if necessary.
•
Make sure power switch at heating and cooling system is on.
•
Make sure furnace door is closed securely.
•
If battery powered, make sure the batteries are correctly inserted and
are not dead.
Screen is
difficult to
read
•
Change screen brightness in thermostat
Menu
. Increase brightness
intensity for inactive backlight of the thermostat screen (max. is level 5).
Setting is available only if thermostat is AC powered.
Heating or
cooling system
does not
respond
•
Touch
Mode
to set system to Heat. Make sure the temperature is set
higher than the Inside temperature.
•
Touch
Mode
to set system to Cool. Make sure the temperature is set
lower than the Inside temperature.
•
Check circuit breaker and reset if necessary.
•
Make sure power switch at heating & cooling system is on.
•
Make sure furnace door is closed securely.
Heat runs with
cooling
•
Verify there is not a wire attached to W for heat pump systems. See
wiring on pages 6-7.
Troubleshooting 23
Specifications
Model Number:
TH6320ZW2003
Model Name:
T6 Pro Z-Wave Thermostat
Model Description:
Programmable Z-Wave
thermostat with touchscreen
Stages:
Up to 3 Heat / 2 Cool Heat Pump
Up to 2 Heat / 2 Cool Conventional
Power Requirements
Batter y power: A A alkaline batter y 3pcs.
C-wire input: 18-30VAC; 50Hz-60Hz
Electrical Ratings:
Terminal
Voltage
(50/60Hz)
Running
Current
W
Heating
18-30 Vac
0.02-1.0 A
(Powerpile)
750 mV DC
100 mA DC
W2
(Aux) Heating
18-30 Vac
0.02-1.0 A
E
Emergency Heat
18-30 Vac
0.02-0.5 A
Y
Compressor
Stage 1
18-30 Vac
0.02-1.0 A
Y2
Compressor
Stage 2
18-30 Vac
0.02-1.0 A
G
Fan
18-30 Vac
0.02-0.5 A
O/B
Changeover
18-30 Vac
0.02-0.5 A
L /A
Input
18-30 Vac
0.02-0.5 A
Dimension:
4.09” x 4.09” x 1.06”
Display Size:
6.55 sq. in.
Temperature Ranges
Adjustable Heat Temperature Range Setting:
40-90 °F (4.5-32.0 °C)
Adjustable Cool Temperature Range Setting:
50-99 °F (10.0-37.0 °C)
Operating Ambient Temperature Range
Thermostat: 37-102°F (2.78-38.89 °C)
Operating Relative Humidity Range
Thermostat: 5% to 90% (non-condensing)
Temperature Sensor Accuracy
Thermostat: ± 1.5 °F at 70 °F (0.85 °C at 21.0 °C)
Physical Dimensions in Inches (mm) (H x W x D)
T6 PRO Z-Wave Thermostat (TH6320Z W2003):
4-5/64 x 4-5/64 x 1-1/16 (104 x 104 x 27)
UWP Mounting System (included):
2-9/32 x 2-13/64 x 2-43/64 (58 x 56 x 10)
Standard Installation Adapter (included):
3-29/32 x 3-57/64 x 21/32 (99 x 99 x 17)
Decorative Cover Plate – Small (included):
4-49/64 x 4-49/64 x 11/32 (121 x 121 x 9)
Decorative Cover Plate – Large (THP2400A1068):
6-7/64 x 6-7/64 x 9/32 (155 x 155 x 7)
Z-Wave Radio:
Frequency (USA and Canada): 908.42 MHz
Certified: Z-Wave Plus
Generic Device Type: Thermostat
Node type (C-wire): Always On Slave (AOS)
Node type (Battery): Listening Sleeping Slave (LSS)
Z-Wave Chipset: ZM5202AU
Supported Z-Wave Command Classes:
Z-
Wave Plus Info V2
Supervision V1
Transport Service V2
Association V2
Version V2
Association Group Information V2
Basic V1
Battery V1
Clock V1
Configuration V4
Device Reset Local V1
Manufacturer Specific V2
Sensor Multilevel V5
Notification V3
Powerlevel V1
Security 2 V1
Thermostat Fan Mode V3
Thermostat Fan State V1
Thermostat Mode V3
Thermostat Operating State V1
Thermostat Setpoint V2
NOTES:
Thermostat Mode V3:
•
Some of the reported modes are manufacturer
specific if not covered by the Z-Wave command
class.
Basic V1 (basic set command implementation):
•
Value 0x00 Device goes to Energy saving setting
(AWAY mode)
•
Values 0x01-0x63 and 0xFF Device goes to
Comfort setting (HOME mode)
Notification V3:
•
Notification V3 is enabled by default (Power
management alarm handling). Notification
Type: Power Management (0x08). Notification
Events: AC mains disconnected (0x02), AC mains
re-connected (0x03).
Security:
•
All supported Z-Wave Command classes are
supported securely (S2 unauthenticated), except
Transport Service V2, Security 2 V1 and Z-Wave
Plus Info V2
Association V2:
•
Group ID: 1; Maximum Nodes: 1; Description:
Z-Wave Plus Lifeline
•
Command Classes reported: Multilevel Sensor,
Thermostat Setpoint, Thermostat Mode
•
Thermostat Fan Mode, Thermostat Operating
State, Thermostat Fan State, Basic Home and Building Technologies
In the U.S.:
Honeywell
715 Peachtree Street NE
Atlanta, GA 30308
http://customer.honeywell.com
® U.S. Registered Trademark.
© 2018 Honey well International Inc.
33-0 0294—05 M.S. Rev. 03-18
Printed in U.S. A .
CAUTION: MERCURY NOTICE
This product should not be disposed of with other household waste. If this product is replacing a control that contains
mercury in a sealed tube, do not place the old control in the trash. Check for the nearest authorized collection centers
or authorized recyclers.
CAUTION: EQUIPMENT DAMAGE HA Z ARD
Compressor protection is bypassed during testing. To prevent equipment damage, avoid cycling the compressor
quickly.
CAUTION: ELECTRICAL HAZARD
Can cause electrical shock or equipment damage. Disconnect power before beginning installation.
Regulatory information
FCC REGULATIONS
§ 15.19 (a)(3)
This device complies with part 15 of the FCC Rules.
Operation is subject to the following two conditions:
1
This device may not cause harmful interference, and
2
This device must accept any interference received,
including interference that may cause undesired
operation.
IC REGULATIONS
RSS-GEN
This device complies with Industry Canada’s license-exempt
RSSs.
Operation is subject to the following two conditions:
1
This device may not cause interference; and
2
This device must accept any interference, including
interference that may cause undesired operation of the
device.
FCC Warning (Part 15.21) (USA only)
Changes or modifications not expressly approved by the
party responsible for compliance could void the user’s
authority to operate the equipment.
FCC - 47 CFR § 15.105 (b)
See
https://customer.honeywell.com/en-US/support/
residential/codes-and-standards/FCC15105/Pages/
default.aspx
for additional FCC information for this product.
5-year limited warranty
For Warranty information go to
http://customer.honeywell.com
- Uploaded