2GIG CT100: Z-Wave Thermostat Installation Video
Related Products
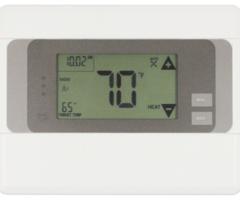
Description
Replacing your existing thermostat with the new GCTBZ48 battery powered Z-Wave thermostat Z-Wave thermostat has never been easier. Our video will show you how to remove your existing thermostat, and replace it with the Z-Wave thermostat.
Before removing your existing thermostat you should enable your HVAC system on all settings to ensure proper operation. This will let you know if there are any problems prior to installation as well as help you pin point any issues port-installation.
The video will guide you to remove your existing thermostat and disconnect the wires. The Z-Wave thermostat comes with wire labels that you can use to mark your wires. We recommend labeling your wires for later reference, especially if they are older wires that may have faded color sleeves.
Once you have labeled your wires, Press the thumb release on the back panel of the Z-Wave thermostat to separate the two halves. Mount the back panel to the wall according to the installation instructions. The back panel should mount directly over the existing mount for the old thermostat.
Follow the included GCTPZ48 installation guide to see where the wires should be installed into the housing on the back panel. Ensure that each wire is secured in place and the lock screws are tight against the wires. Double check that the rubber sheath is not pinched in the screws preventing terminal connection.
Once the wiring is complete you simply place the front plate to the back plate, locking the thumb release into place, as our video will detail. Using your finger nail, or a small screw driver, remove the face plate from the front plate to expose the battery installation slots.
Use new double “A” batteries for installation. The Z-Wave thermostat takes 4 batteries. Follow the video to ensure proper battery installation. When the batteries are in place the LCD screen of the thermostat should illuminate and begin the initial boot sequence.
Replace the face plate to the front plate to cover the batteries. Once the Z-Wave thermostat is installed and the mounting plates are in place, test each function of the HVAC system. If you notice a problem, refer to the instruction manual. The video will show you how to ensure that all the wires are properly connected and that the batteries in the thermostat are installed correctly.
You should refer to the GCTPZ48 installation manual when testing the HVAC system functions. Once you have cycled through each function and ensured correct operation, your Z-Wave thermostat install is complete.
If you have any problems during the install refer to the video for visual guidance. You should also check your GCTPZ48 operations guide and the trouble shooting guide in the event any issue arises from the installation.
With normal operation functionality, your GCTBZ48 battery powered Z-Wave thermostat is ready for use. Enjoy the added flexibility and user-friendly Z-Wave thermostat for all of your HVAC needs.
Transcript
Welcome to the installation training video for the GCTBZ48 Go!Control battery-powered z-wave thermostat.
Before removing the existing thermostat, first make sure that the existing heating ventilation and air conditioning system or HVAC works correctly, and using your user guide, verify that your thermostat will be compatible with your current HVAC system. Next, disconnect the power from the HVAC system and label each of the wires, and feel free to use the labels provided with the thermostat.
When mounting the thermostat, first push down on the thumb tab to remove the back panel, and mount the back panel to the wall. Ensure that the thermostat panel is secure by using the provided anchors and Phillips screws. Once mounted, find the appropriate wiring set up in the TBZ48 installation guide. Once the wiring is complete, attach the front panel to the back panel. Insert the batteries by first prying off the front of the front panel with your fingernails at the bottom of the case cover. Put in four AA batteries, and replace the front panel case. Lastly, test the heating and cooling to make sure that all of the functions of the HVAC system are working correctly.
For further system configuration please refer to your GCTBZ48 installation and operation guide. Congratulations. You have successfully installed the Go!Control GCTBZ48 z-wave thermostat.
This video is intended for use by a fully qualified and licensed electrician, and in accordance with the national electric code and local regulations. Thank you for watching. For more information, please visit our website at NORTEKCONTROL.COM.
- Uploaded