Adding and Deleting Zones Using the Tuxedo Keypad
Related Products
Description
In this video, Michael from Alarm Grid shows you how to add and delete zones using the Honeywell Home Tuxedo Keypad. The Tuxedo has a feature called Console Mode that allows it to emulate an Alphanumeric Keypad, such as a Honeywell 6160. You can use Console Mode to add and delete zones in the same way that you would do so on an Alphanumeric Keypad. The process will involve entering into Installer Programming and then using the [*56] option to add and delete system zones.
With the standard hardware, a Honeywell VISTA System is only capable of supporting hardwired sensors. If you want to begin using wireless sensors with the system, then you must add a wireless receiver module. A compatible wireless receiver will allow you to start pairing wireless Honeywell 5800 Series Sensors with the panel For a wired zone, you will choose the Zone Number that corresponds with the zone terminals where you have connected the sensor. As for wireless zones, they will use Zone Numbers that are not hardcoded as wired zones. For a VISTA-20P, wireless zones can begin at Zone 9. For a VISTA-15P, they begin at Zone 7. Keep in mind though that wireless zones can also be used as wired zones if one or more zone expansion modules are used.
When configuring Honeywell VISTA System zones, there are many settings you must adjust. One very important step is setting the Zone Type, which may also be referred to as the Response Type. This setting determines how the system responds when the sensor is faulted. You need to make sure to choose the correct Zone Type or else the system will not respond in the manner that you want. You may want to review the possible Zone Types for a VISTA System so that you know which types to use with different sensors.
https://www.alarmgrid.com/faq/how-do-i-use-a-resideo-tuxedo-to-add-delete-zones
http://alrm.gd/get-monitored
Transcript
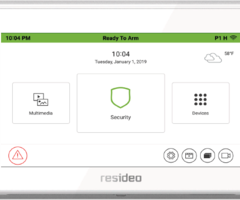
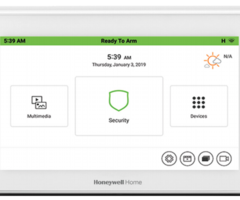
Hi DI wires. This is Michael from Alarm Grid. And today I'm going to be showing you how to add and delete zones using Console Mode on Honeywell Home Tuxedo keypad. Console Mode basically has the Tuxedo act as an alphanumeric keypad. Like a Honeywell 60160, which we have a Honeywell 60160 here, and we have our Honeywell Home Tuxedo keypad right here. The touch screen keypad. Both these keypads are connected with the same VISTA system. So any change I make on the Tuxedo in Console Mode will also appear on the 60160. So let's get into it. So first we want to get into console mode. That's how we're going to have our Tuxedo act as an alphanumeric keypad like the 60160. So we'll choose security, and then we'll choose the more choices, the three dots inside the circle. And we'll choose Console Mode. And now we're in Console Mode. And you see, we have the same screen on the Tuxedo as we do on the 60160. We get the disarm right arm. So what you get in the programming we have to enter in our installer code, which ours is at the default of 4, 1, 1, 2, and then we enter 8, 0, 0. And we get installer code 20, indicating that we have entered programming. So now to get into zone programming, I'm going to choose star 56. And now we're in zone programming. So today, I'm going to go through the process of doing a wireless zone. We're going to be adding a wireless zone. And then after it's added, I'll show you that it's working on the system, and then I'll delete the zone, just to show you how to do that. So first thing we want to do is going to ask us to set to confirm. It's easy as just to choose 0. This is related to wireless programming. If you choose 1, then you'll have to confirm the serial number later on. It's just an extra step if you really want to confirm that the serial number was transmitted properly. You have a lot of sensors around that might be something to consider. But in our case, we'll choose 0. And then it's going to ask us to enter in our zone number. Depending on the VISTA system you're using, in our case, our wireless zone started zone number 9. But we'll do zone number 10 today. We'll do 10. And then that's display on the screen. And then what we're going to do, we're going to press the star to continue. Just to reference, the star key usually proceeds you forward, and the pound key sends you back. So you know when you're navigating the menus. But we're going to go forward and press the star key. And then we get a summary screen. We'll press star again to continue. And then we're choosing the zone type. This is also known as the response type. This determines how the system responds when the zone is faulted, when you activate the sensor. I'm going to choose zone type number 1, because that'll be an entry exit. And that worked well for us. But I'll just go through a few of them. If I do it 0, 1, we get entry exit. If I do 0, 3, you see that's perimeter. That's another popular zone type for maybe a glass break sensor. If I do 10, then that's interior width delay. So that might be another one you're choosing, perhaps for a motion sensor. But in our case, we're doing a door and window contact sensor, specifically on Honeywell 5800 mini. So we'll choose 0, 1, we'll go with the entry exit 1. We're fine with that. So we'll press the star key to continue. And then you're choosing the partition. This is the partition assignment for the zone. We're fine with for partition 1. If you want to choose a different partition, maybe partition 2, you can enter that. But we'll do partition 1. And then we got to write the report code. We do want to just enter 1, 0. We want the first digit to not be a 0. So we'll keep that there at 10. And then we'll press the star key to continue. And then RF transmission. So there are three types of settings here-- important ones, anyway. Three is for a supervised RF, 4 is for unsupervised RF, and 5 is for button RF. Since this is a door and window contact sensor and we want it to be supervised, we'll choose 3. And now we're at the serial number screen where we can learn in the sensor. So what we're going to do we're in this going to fault the sensor. We're in a separate the magnet from the sensor. And it should transmit a signal to the system. There we go. We've got to go through it took a couple of times, but we got it there. And we have the loop number set at loop number 1, which is the correct loop number for the sensor. So we'll press the star key to continue. And then we get another summary screen here. We'll press star again. And now it's going to ask us if we want to program the alpha. The alpha basically service as the zone descriptor or the name for the zone. This is a whole process in itself, if you want to set a name. But we're fine keeping it with no name for now. We'll just recognize it as zone number 10, which is the zone number we have assigned to. And so we'll keep it at 0 and press star to continue. And then it cycles through and takes us back to where we can choose the zone number. So we're done with zone programming now. So we'll choose 0, 0 to quit. And then I'm going to enter star 99 to exit program. And you always want to use that to exit programming on a Tuxedo, or any keypad, for that matter. Anytime you're in programming on a VISTA, always use star 99 to exit to prevent yourself from being locked out. So we'll go ahead and do that. And you're going to see that the Tuxedo reboots. Whenever you exit programming on the Tuxedo, it does a power cycle. That's completely normal. It's just refreshing the information. So once it loads back up, I'll show you how the zone works out. How when we fault the sensor that the zone fault will be displayed on the screen. So we'll wait to do that. And then once we are back in, I'll go into programming after I show you how the sensor works, the zone. I'll show you how you can delete the zone. And then show you that once we delete it, then we no longer are able to get the zone faults on the screen, because it is deleted from the system. So we're just going to wait a brief moment while it gathers some zone information, including this sensor that we just programmed. The zone we just programmed. It's getting the information, so that way, it's ready to go once it boots back up. So it usually just takes a brief moment here. And there we go. We're back at the main screen. So we have our door and window contact sensor here. Like I said, this is a Honeywell 5800 mini. So the way that this works when the door window is closed, the magnet should be in direct contact, or in very close proximity. Usually within half an inch of the sensor. Usually you have the magnet, the smaller portion, on the moving part of the door window, and the larger sensor is on the door window frame, on the stationary part. Because if you were to slam the door, the window was shut aggressively or something, it would be better to have the magnet damaged rather than the sensor. I mean, you don't want either of them to be damaged, of course, but the sensor is the valuable piece of equipment. So really, having the magnet move around is the safer option. So when I open the door, the magnet separates from the sensor. And you see on our Tuxedo we get not ready faults, because we have the zone programmed. So it recognizes that the sensor has been faulted. And so we get that message on there. Now, when I close the door, I restore the magnet to the sensor. And you see that we have the right arm on the Tuxedo again. The zone is in a restored condition, and we don't have a fault. Just to show you one more time when I open the door, we get the fault condition. And you see it's also displayed on the 6160. And they're both connected with the VISTA system. So let me close the door. We get right arm. And one more time. We get it faulted. So that indicates that our zone is setup with the VISTA system. We did it using the Tuxedo in Console Mode. Now if you want to delete a zone, I'm going to show you how to do that. We can also use Console Mode for that as well. So we're going to go to Security again, and they did more choices the three dots, and we'll choose Console Mode. And now we're at programming. So I will enter in our master code 4, 1-- I'm sorry not our master, but our installer code. Our installer code 4, 1, 1, 2. And that's the default installer code on a VISTA system. And then we'll enter an 8, 0, 0. Again, that's the installer code. You shouldn't be using that for arming and disarming. Installer code. So we're at the main programming screen here. And again, we'll choose a star 56. And I will choose 0 again. And we're going to entering the same zone number that we entered in before, because this time we're deleting the zone. So we'll enter in 10. And then we'll press star. And get the summary screen and press star again. And for zone type, this time we're going to enter in 0, 0, for a zone disable. And then you're going to see when I press star, it's going to ask us if we want to delete the zone. And of course, we do. So we're going to enter in 1. And then it takes us back to the zone selection screen. So now I'm going to exit programming 0, 0, to exit zone programming. And then we'll enter in star. And it's going to ask us field, 99. And we're going to have the Tuxedo begin to reboot, remember, because we exited programming. So it's just doing that to refresh the information again and getting it to where it needs to be. So we're going to wait for that to boot back up. And when it does, I'm going to show you again the sensor here. And I'm going to show you how it doesn't display on the screen when we do the zone fault, because, well, there is no zone. We deleted the zone. We deleted the sensor from the system. So whatever the sensor does, the system's not going to acknowledge it. It's no longer programmed with the system. So once it's back up, you'll see that before when we open the door in theory, we got the zone fault on there. Gave us the not ready to arm message. But once this is backup, then you'll see we don't get any message. It just going to stay right arm, because we don't have any faulted zones on the system. Because we deleted the zone that we programmed. So it's just going to get everything together, and you see we're back at the main screen of the Tuxedo. And so we have our sensor here. And we open it. And we don't get anything on the screen, because we have deleted it. It's that simple. You go in there and you set the zone type, the response type the 0, 0, for zone disable. You confirm that you do want to delete the zone, and it wipes out all the zone information. Again, nothing happens when we fault the sensor, because it's not programmed with the system. So today we went through and we showed you how to use console mode to add a zone. We set up a Honeywell 5800 mini door and window contact. We showed you how that works. And we went back into programming, and we deleted the zone. And this was all done using Console Mode on the Tuxedo, which is basically the same as using an alphanumeric keypad like this 60160 right here. OK, so that's how you add and delete a zone using Console Mode on a Honeywell Home Tuxedo keypad. If you have any questions about the Tuxedo, or about a Honeywell VISTA system, or alarm monitoring services send an email to support@alarmgrid.com. If you found this video helpful, make sure to give it a thumbs-up below to like video. And remember to subscribe to our channel for updates on future videos. We hope you enjoyed the video. Thank you.
- Uploaded