Checking the ECP and RIS Address On a Tuxedo
Related Products
Description
In this video, Michael from Alarm Grid shows you how to check the ECP Address and the RIS Address for a Honeywell Home Tuxedo Keypad. The ECP Address and the RIS Address for the Tuxedo are both found within the same menu. This information can be easily accessed for reference and changed if needed. Configuring these settings properly is important for using the Tuxedo with a Honeywell VISTA System and the Total Connect 2.0 interactive service platform.
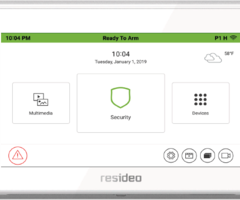
The Tuxedo is both a touchscreen keypad for a VISTA Panel and a Z-Wave Plus automation controller. The Enhanced Console Protocol (ECP) Address tells the Honeywell VISTA System where to find the Tuxedo as a keypad controller. The is related to addressing the keypad. Since the Tuxedo is an Advanced User Interface (AUI) device, it must be assigned a proper AUI device address. These are ECP slots 1, 2, 5, and 6 on a VISTA-20P or VISTA-21iP System. Remember that Total Connect 2.0 will also take up an AUI device Address, so keep that in mind when planning your system.
The Remote Interactive Services (RIS) Address tells Total Connect 2.0 and AlarmNet where to find the Honeywell Home Tuxedo as an automation controller. You will also have the option of setting the Tuxedo as the Primary RIS Device. You should never set the Tuxedo as the Primary RIS Device if the keypad is being used with Total Connect 2.0. This is because TC2 will always be used as the Primary RIS Device, not the Tuxedo.
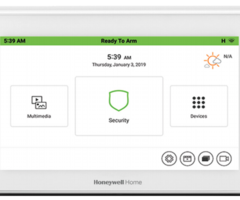
In order to access the ECP Address Menu where you can view and change both the ECP and RIS Addresses, start from the main screen of the Tuxedo. Choose the Settings icon (the gear) at the bottom of the screen. From there, select System Setup, followed by CS Setup. You will need to provide the proper Installer Code for the keypad to access this menu. If the Tuxedo has not yet been paired with a VISTA System, then this code is 4140 by default. If it is paired with a VISTA System, then it will use whatever Installer Code is set for the VISTA System. As reference, the default Installer Code for a VISTA System is 4112. Then select ECP Address to access the desired menu.
https://www.alarmgrid.com/faq/how-do-i-check-the-ecp-and-ris-address-on-a-resideo-tuxedo
http://alrm.gd/get-monitored
Transcript
[AUDIO LOGO] Hi, DIYers. This is Michael from Alarm Grid. And today, I'm going to be showing you how to check the ECP address and the RIS address for a Honeywell Home Tuxedo keypad. The ECP address and the RIS address, you want to configure both of those correctly. They're very important when setting up your Tuxedo keypad. So I'll explain about what these are, but first I'm just going to quickly show you how to get into the menu where you can access them, because that's why we're all here today. So we're at the main screen of the Tuxedo, and we're going to press the Settings icon. And then we're going to choose System Setup, and then we're going to choose CS Setup, and then we're going to enter in our installer code. Now, assuming you have your Tuxedo connected with a VISTA system, then it's going to be 4112 as the default. If you don't have your Tuxedo paired with anything yet, it's just a standalone keypad, you're just powering it, it's not connected, then it will be 4140 as the default installer code. But we have ours connected with the VISTA system, so we'll do 4112. And then we're going to choose ECP address. And that's the menu right there. You see we can access the ECP address and the RIS automation ECP address, just called the RIS address for short. So what these are. This basically tells the VISTA system where to find the Tuxedo as a keypad, as a touchscreen keypad, for controlling the system. Now, the Tuxedo is considered an AUI device, that's Advanced User Interface, so it has to be assigned one of the AUI device slots. For a 20P and 21IP, as well as a 21IP LTE system, there are four slots available. These are 1, 2, 5, and 6. So you'll want to have yours in the appropriate slot. And you see I didn't do anything on the Tuxedo and it kicked us out here. So we'll just go back into the menu. CS Setup, 4112 as our default installer code. And I'll try to do something on the screen as I'm talking, so it doesn't go away again. But that's what the ECP addresses for. It basically tells the VISTA where to find it as a touch screen controller, so you'll need to have it on one of the appropriate slots. This is concerned with addressing the keypad and that's done using the programming field star 189. I'm not going to go through that. We have an FAQ that talks about addressing. But just like any keypad, you will need to address it with your VISTA system. So make sure you have the ECP slot enabled on the VISTA system, the AUI slot. So that way it's good to go. Now, RIS. That's Remote Interactive Services. So that's basically telling AlarmNet and Total Connect 2.0 where to find the Tuxedo as an automation controller. So when the Tuxedo makes an automation command-- this is assuming the system is monitored and setup for use with Total Connect 2.0-- it's going to relay automation signals to AlarmNet, which then passes it on to Total Connect 2.0. So you basically just have it all synced up there. We're keeping ours set at 25 for what we're doing. Now, you will also notice there is an option, primary RIS address. Now in most cases, you'll have that not enabled for the Tuxedo. I covered it up by pressing the button, because I don't want it to kick us out of the menu again, but I accidentally changed it there. So we'll set that to 25 there. We want it at 25. But usually, Total Connect 2.0 is your primary RIS address. In pretty much every case it is. So assuming you're using Total Connect 2.0 with your system, you won't have the Tuxedo as the primary RIS address. So just keep that off. But this is something that you will set up with your monitoring company. But in our case, we have ours at 25. Where we're fine with that. So the ECP is at 1, RIS is at 25. We're good with these settings. So to save our changes, we'll press the check mark in the bottom right corner there. So that that's how you get to the ECP and RIS address menu. I'll just do a quick recap just to show you one last time. You click the Settings icon, the little gear. You do System Setup. Then you do CS Setup. And then assuming your Tuxedo is connected with a VISTA system, you'll do 4112. If it's not connected, 4140 is usually your default. And then you do ECP address and then you have it right there. So that's how you access the menu. So that's how you access the ECP and RIS settings for your Tuxedo keypad. If you have any questions about the Tuxedo or Total Connect 2.0 or monitoring services, send an email to support@alarmgrid.com. If you found this video helpful, make sure to give it a thumbs up below to like the video. And remember to subscribe to our channel for updates on future videos. We hope you enjoyed the video. Thank you.
- Uploaded