Lyric Security System: Join Lyric to WIFI Network
Related Products
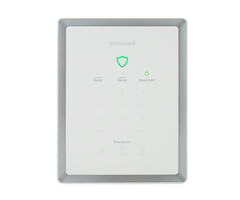
Description
The new Honeywell Lyric control panel doesn’t need a WiFi module installed by the end user to take advantage of wireless network communications. Honeywell has included the WiFi module with the Lyric.
All that is left for the end user is to enable wireless communications and connect the Lyric Security System to the home WiFi Network. This video will show you step by step how to connect to the wireless network in your home.
There are numerous advantages to joining the wireless network. The most obvious is for communication to the alarm monitoring company. However, the remote system Total Connect 2.0 also uses the wireless network to allow remote monitoring and access to the system as well as text and email alerts to your phone from the system.
There are two ways to join the wireless network. This video will cover both options so you can chose the one that is easiest for you.
Both methods utilize the Tools menu from the home screen. When asked for the code, you can use either the master code or the installer code. This video will use the master code first.
Enter your master code and select security. You will see the security options listed on the screen that are available to the master user. From this screen you will press the “WiFi Config” option. The video will briefly discuss the other options on this screen before moving on to the wireless configuration.
Follow the video to perform the standard connection method of scanning for a network. Note that this option will not work if the network you wish to join does not broadcast the SSID. In this instance you will need to do a manual configuration.
When you press the scan for network option, the system will search for broadcast SSIDs and return the options to you on the screen. The scan button will run the scan over, in case you need to look for your network again. When you see your network SSID press it once to highlight and then press the edit button.
Follow the video to learn about the security options and how to enter the network password into the panel. The control panel will join the network and as long as the password was correct, the control panel will be active on the network.
If you choose to use the installer code instead of the master code, you will press “Comm diagnostics” and then “Configure WiFi” to get to the menus for accessing the wireless network.
From this point, as you will see in the video, everything else is the exact same as with the master code method of configuration.
Be sure to return to the home screen after you are connected to the wireless network, all settings will be locked in to the system and should remain unless you change your wireless password at some point in the future.
Transcript
Hi DIYers. Sterling with AlarmGrid here, and today we're going to show you how to join your Lyric Security System to your WiFi network.
So there is no WiFi module installation video for the Lyric because the beauty of the Lyric is, they've built WiFi right into the box. So there's no extra module to get. It's built into the control panel and you just have to join to your network. And the reason you would join to the network is for any kind of communications to alarm monitoring services and/or Total Connect 2.0 services, if you want remote arming, disarming or alerts, texts or emails from the system. It does support cellular communications as well. So if you didn't want to rely on just WiFi internet, you can back it up with a cell module that fits into the side, and we'll show you that in a later video. There is no hardwired internet option, so if you were concerned about the reliability of WiFi, the solution is to use cellular. But if you want to do internet only, then WiFi is what you're going to use.
There's two ways to join to the network. One, is through the master programming and two, is through the installer level programming. So just like on the LYNX Touch, you have two different security codes out of the box by default. From the home screen, we have security, automation, video, smart scenes, notices and settings. So when we hit "settings," we can see brightness and volume. When we hit "security," we're into our deeper level field, very similar to anyone that's ever used the LYNX Touch. We're going to hit "tools," slightly different screens but kind of similar functionality, similar programming.
If we use our master code, by default it's "1234." We're into our master level programming. So Honeywell has not yet fully embraced the do-it-yourselfer to be the installer. They're still restricting you to your master level programming with the master code. And your programming or installer code gets you into the deeper level programming. The idea is that if you have a local company to install this, they're going to give you your master code so you can get in here and you can set up users. You can check your event log. You can do some more advanced stuff like changing batteries, adding cellular communicators, you have your date and time selection, your reminder so you can put reminders for yourself and you can do voice command setup as well. So this panel, you can talk to it and have it interact with you through your voice. And then, "WiFi config" is another thing that Honeywell assumes an end-user can do.
So on this screen, you have a few options. You can scan for access points and the panel will actually look and say what WiFi networks do I see? And you can join to any network that it sees, that you have a password for. You have a manual configure access point. So if you had one without an SSID broadcast, you can manually config and connect that way. And then finally, it does WPS encryption. So if there was a digit or character in your security password for your router that this system doesn't support, instead of typing in the security key, could do WPS encryption, which normally entails pressing a button on the router, pressing a button on the panel and then they talk to each other without having to type in a key. We'll show you that in a separate video. But for now we're going to show you the standard scan access points way to connect.
So we hit scan access points. Sometimes it takes longer than others but eventually you should see all wireless networks in range of the panel. If you hit the down arrow, you can see we have quite a few networks. We are in a town home complex, which makes sense, the houses are closer together and we're picking up quite a few WiFi networks.
So in our case, we're going to grab this second network down, that's our network name. And you highlight the network you want and at the bottom you hit "edit." If you didn't see any networks you could hit "scan." So if your router was powered down when you first scanned and you powered your router up, hitting "scan" would rescan for networks. But you do not have to hit "scan" because just hitting "scan access points" does the scanning and shows you your list. So as long as your network shows up here, you don't have to hit the "scan" separately.
So you highlight your network and you hit "edit." Now, you can see the SSID name at the top, which we have blurred for security reasons. You can see that the security level that the router is using is displayed here. This is a selectable option, however, it should grab whatever network security the router is using by default. So you really should never change that. And one thing we've noticed and talked to Honeywell about is that WEP security, which is an older security protocol for routers, is an option. If your router does WEP and it pops up WEP, it's because your router is set that way.
We do not recommend using WEP encryption at this time, okay? We are still in beta, things can change by the time this panel's released and perhaps WEP will be supported later, but for now we've seen some bugs and some sluggish panel behavior when you're using WEP encryption or security. And therefore, we're recommending that you use WPA2, which is by far the most popular standard. If you did have a really old router popping up WEP, we suggest looking at the router and seeing if you could switch it to WPA or WPA2. And if you can't, we really do urge you to look at possibly updating your router to one that supports WPA. It's going to work a lot better when your security is not set WEP, all right?
So WPA2 just means we have a security password to join to our network. To type our password in we hit this "key" box, and you can see we have this touchscreen keypad now. I have my WiFi complicated network password here as a picture and I'm going to type it in now. So you can see it's got four little asterisks. When we hit "clear," it wipes it out back to a default code ready to accept.
So you hit "clear" first, you have this button that'll toggle between letters and numbers. When you're on letters, you also have this button that toggles between uppercase and lowercase. And we're going to use this keypad to type our network security. All right. Now we have our nice secure password, which we're obstructing and not showing you what we're typing in here for customer security reasons. We are also going to recommend they change their password. But we now have our password and if we hit "save" followed by "join," as long as we've typed in the right password, this should connect to our router.
You can see the WiFi indicator at the top left, that it's thinking, processing, working. And we now have a nice successful "device has been successfully added to the network." If we hit "OK" and we come back out we can see on our network we now have a checkmark next to our nice four solid green bars of strong WiFi connectivity. If we hit the back arrow all the way to the home screen, we now have a WiFi indicator at the top left of the panel, which would alert you. Or you could visually see how strong the WiFi signal strength is from this panel to the router, all right?
So we told you, you can do that from the master code programming if you were to do "tools." And instead of "1234," which is the default master, if you do "4112," which is the default installer, you have this "save" screen. We going to just ignore. This is a screen that ties the panel to a dealer or a Honeywell provider or a Lyric certified dealer. It wants to associate to Honeywell's dealer website. In this case we're just going to say "no" for now, and we're now in programming.
So if we hit "program," you can go into "comm diagnostics" and "configure WiFi." And you have the same exact screens that we showed you through the master code programming. And doing "scan access points," you'll see our network with the green check that we're already joined. But this is the other way. If you're in the installer level programming, it's under "comm diagnostics," "configure WiFi" and then you have the same ability to join to a network using the installer code instead of the master code.
So, we exit out of programming and we are connected to our WiFi. And so that is how you connect a Lyric all-in-one security system to your WiFi network using the built-in WiFi capabilities of the panel and the security key method of scanning for access points.
We hope you've enjoyed this video. If you have any questions on connecting your Lyric system to your router, please let us know. And also we invite you to subscribe to our channel so you are up-to-date on all of the new Lyric videos that we'll be releasing throughout this beta program.
- Uploaded