Programming a Honeywell 5800CO Into an All-in-One Panel
Related Products
Related Categories
Description
In this video, Jorge covers the process for programming a Honeywell 5800CO into an all-in-one wireless panel. This is done by putting the panel into its wireless enrollment mode and then activating the 5800CO to learn it in. The panel must have a wireless receiver that accepts the 345 MHz frequency.
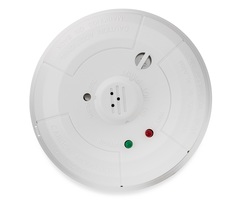
The Honeywell 5800CO is a standalone carbon monoxide detector that sends an immediate alert to the alarm control panel upon detecting unusually high levels of CO gas. The system will then know to trigger an immediate alarm and alert the central station if connected. A carbon monoxide alarm should be taken very seriously, and any building occupants should vacate the premises immediately. Even brief exposure to CO gas can be lethal. The gas is odorless and tasteless, which helps make it responsible for hundreds of deaths every year.
As a CO detector, the Honeywell 5800CO uses electrochemical detection technology to sense unusual levels of carbon monoxide gas. The sensor communicates at 345 MHz. This makes it compatible with most Honeywell and 2GIG Systems that have a functional wireless receiver. It can also be used with the Qolsys IQ Panel 2 Plus with Legacy Honeywell & 2GIG Daughtercard. If your system accepts signals at a frequency other than 345 MHz, then there are other CO detectors available.
Additionally, Honeywell also offers combination CO sensors that double as smoke and heat detectors. Most notably, there is the Honeywell 5800COMBO. The Honeywell 5800COMBO operates at the same wireless frequency as the 5800CO, but it includes smoke, heat and freeze detection, in addition to CO detection. Additionally, there's also the Honeywell SiXCOMBO, which is designed exclusively for use with the Honeywell Lyric Alarm System. The SiXCOMBO provides the same functions as the Honeywell 5800COMBO. But what's notable about the SiXCOMBO is that it communicates using 128-bit AES encryption for added wireless security.
http://alrm.gd/get-monitored
Transcript
Hey DIYers. I'm Jorge from Alarm Grid. Today, we're going to be going over how to program in a 5800CO to a Honeywell system. Now the programming of this 5800CO is going to be pretty much the same whether you're using the Lyric, or the L7000, or whether you're using a 2Gig panel. The 5800CO here, it's a Honeywell sensor, which means that it communicates at 345 megahertz, which makes it compatible with Honeywell and 2Gig alarm systems. So just something to keep in mind depending on what panel you have. So today I have a brand new one, fresh out of the box. So the first thing we're going to want to go ahead and do is-- you're going to need two things. You're going to need the sensor, the system powered on. You're going to need to be able to get into programming. And you're going to need something with a small, skinny end. So I'm actually using this little tool right here, but you guys can also use a paperclip, a toothpick, something small that you are going to be able to insert into the 5800CO to program it into the panel. So let's go ahead and-- first, let's get the Lyric system into programming mode, yeah? So I'm going to start off by going- usually it starts on the primary screen. So you hit Security, and once you're in that arming screen here, or if you're already there, go to Tools. When you're in Tools, you need to enter in the installer code. Mine is defaulted at 4112. Now, yours may be different if you or your company has changed it, so make sure you're using the correct one. You'll know if you're using the correct code if you get taken to this screen. If you're not on this screen, then you are using the wrong code. And you're going to need to get that installer code in order to program your system. So once I use my installer code, I get to this screen. I'm to hit Program. I'm going to go to Zones. I'm going to hit Add New. And I'd simply do Add New because it takes me to my next available open zone. And if you saw that, I don't have any zones learned into those Lyrics, so it automatically takes me to zone number three. Now you guys can pick and choose what zone you guys want to learn. And it's completely up to you. So now, 5800 Combo. I'm going to go ahead and unbox it. Just going to take off the sticker. Just one moment. And take it out of the box. So the 5800CO comes out and has a little sticker right there immediately. It says, the 5800CO is listed to UL standards. What we need to do is, we need to twist the cover off. So we're going to twist this cover counterclockwise, and it's just going to pop right off. You'll see in there it actually has a sticker of what the sensor is. It's in big black letters, 5800CO. And then on the inside, it does come with the battery already installed. Which it says here, pull to connect batteries. So once you pull that, this says the sensor will power on. On this little serial bar right here, It has the letter A with a serial number after. That's going to be your serial number that you use to learn into the panel. But we're going to do the auto learn feature, so it's going to automatically learn in there on its own. And there should be an expiration sticker here. So let me find that real quick. So there's a sticker right here. It says "REPLACE BY." So the Replace By will let you know when you need to have these replaced. They usually have a lifespan of 10 years. So right now mine is saying replace by January of 2029, since it was actually manufactured in January of 2019. So 10 years later, you do want to make sure that you replace your CO detectors. Now, the system won't notify you that you need to replace the CO detectors. So make sure that you guys write this down. Set yourself a reminder. If you have a smartphone, create a reminder in your phone. Remind me in 10 years to replace the CO detectors. While learning this in, we do need to make sure that the back plate is off. If not, it will learn in with a tamper loop. These detectors usually learn in with loop number one. So whenever you're auto enrolling it, if it comes in as a different loop, make sure that you switch it to loop number one. So I'm going to go ahead and get mine programmed in without the back plate on. So again, first thing we want to do is go ahead and pull that battery tab. Soon as we pull it-- battery slid out a little bit. Pop it back into place. Now the sensors should be powered on. And I'm going to need my tool. And go into to the Serial Number field on the panel. That's Serial Number field is going to put the system into a learning mode, which means that now, it's looking for RF signals. So what I'm going to do is, there's two holes on the front of the 5800CO. There's one hole with a little plastic bridge over it. There's another hole that actually says Test Hush. That hole right there is where you're going to use your tool, your toothpick, paperclip. You're just going to hold that down, and you should you should hear the panel beep after it receives a signal. Now with my seal detector. So I held it down for too long, so it put the CO into a test mode. But it did make the panel beep once, so I need to do this two more times. To auto enroll it, you need to do a total of three. I hold it down, I release it. Again, I push it down. So it looks like it just requires a simple push. That time right there I just pushed in and released it. It the panel beep-- it makes the sensor beep. Sends out an RF signal. It's the second time the Lyric has gotten that signal now, which is why now, if you actually look there, the serial number says 0404693. The serial number on my CO says 0404693. And you'll see that it learned in at loop number one, which is good. So if it learns in at any other loop, you can always edit it. But just make sure that you do have it set to loop number one. And my last time I'm going to do it just to confirm. It'll actually back me out to the main sensor screen. You'll see. Give it a second. There you go. It receives the third signal. Backs me out to the Sensor screen. And you'll see the serial number again up top left. Loop number, top right. Zone description. Since I'm going to have this as a CO, what I'm going to do is actually-- first, I'm going to change the device type. The device type, you should see carbon monoxide. So I'll leave it as there. For the zone description, you can go ahead and put it wherever you want. So second floor, front door, living room, kitchen, basement. Wherever you want to put it, just go into zone description. You can go ahead and hit the back arrow key to delete it all. I'll just go ahead and set it as living room. Now as you guys saw, as I was typing, it was automatically giving me suggestions. And that's what the panel does. But if it's not the first suggestion, you just keep on typing, and then eventually it'll auto fill the rest for you. So just keep typing. If you guys are doing custom, just keep on typing it, and it should work fine. All right, so I'm going to set the device type. Like I said, we switch it to carbon monoxide detector. Alarm Report. If you guys want this to report to your central station, if you guys are being monitored, which I'm assuming you guys do want it to report to a central station, make sure that that is enabled. It's usually enabled by default. So you pretty much don't want to mess around with that Alarm Report. The chime, you can leave that disabled. You don't really need the sensor to chime, because this is a sensor where if it goes off, it sets off an alarm. So it's not like it's going to chime carbon monoxide. Once it goes off, the system is going to alarm and say CO detection alarm. And we'll actually get into that in a second here. And Supervised. You want to make sure that it's supervised that way. You guys can always know that it's within range. If battery goes low or anything like that, you do want to make sure that it is supervised. And that the system is checking in with the sensor to make sure that it's communicating properly. It looks like we have all of the settings here set correctly. So after we do that, we just hit Save. Good. Now that I have this learned in, you can go ahead and put the back plate on. To do that, you want to make sure you match this little silver ring with this little clip right here. After you match it, it should just click into place. And then you turn it clockwise to lock it in. Now back out to the Main screen. So I just hit the back arrow key all the way Home. And now my system says ready to arm. Now to test the sensor, all we have to do is push in and it lets me know that there is a CO alarm going off. This chimes, and so will the panel. As you see, it's that temporal three beep sound. Do you hear it? So we're going to go ahead and disarm the system now, using our master code. It enunciates the alarm. We can go out and disarm it now by using our master code. 1234. Now yours obviously may be different if your company has changed it. So I disarmed it once. Remember, whenever there's an alarm, you do need to disarm it twice. The first one is to cancel, the second one is to clear it. So to clear this now, we just hit this Home button. And we enter in the code. And now the system goes back into a Ready to Arm mode. So again, you can test it by simply inserting your tool, toothpick, paperclip into that small hole right there. You just press and release, and it sends the test signal over to the panel. Now make sure that if you guys are testing this that you guys place your system on test with the central station. Why? Because if they receive a CO alarm and your account is not on test, they will dispatch the fire department by default. Yeah, even if you call to cancel, they will not cancel fire department dispatches. Why? Because CO gas is not something that can be detected easily. So they always like to make sure that they send the fire department out just to double check and make sure everything is cleared. So make sure, before you guys test this, if you're already being monitored, that you place your account on test with the central station. How we learn it into the Lyric is exactly the same way you learn it into the L7000. It's the same functionality on the GC3 or the GC2. And if you guys do have any questions about this, feel free to email us at support@alarmgrid.com If you guys found the video helpful, make sure that you hit Like underneath. Subscribe to the YouTube channel, and enable the notifications so whenever we upload new content, you guys do get notified. I'm George from Alarm Grid, and I'll see you guys next time.
- Uploaded