2GIG GC2 Firmware Update Instructions Using UPCBL2
Related Products


Related Categories
Document Transcript
©2013 2GIG Technologies Inc. All Rights Reserved.
1
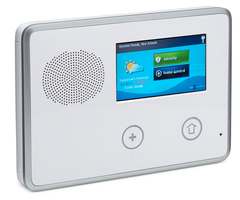
UPDATE THE FIRMWARE ON THE CONTROL PANEL AND TS1
OVERVIEW
This
document
describes
how
to
update
the
firmware
version
on
your
Control
Panel
and
your
TS1
using
a
PC.
To
use
the
Firmware
Update
Tool,
your
Control
Panel
must
have
at
least
version
1.5
or
newer.
NOTE:
Updating
the
firmware
does
not
alter
the
system
configuration
or
the
user
configuration
of
the
panel.
You
will
not
need
to
re
‐
learn
sensors
into
the
Control
Panel.
IMPORTANT:
Both
the
TS1
and
the
Control
Panel
must
have
same
version
of
firmware
before
the
TS1
can
be
paired
with
a
Control
Panel!
To
check
the
firmware
version
on
the
TS1,
see
"Checking
the
Firmware
Version
on
the
TS1"
on
page
4.
Two
different
options
exist
to
update
the
TS1
Firmware:
1
OTA
from
Alarm.com
(requires
cell
radio
and
live
account
with
ADC)
2
Update
the
TS1
using
the
firmware
update
cable
and
separate
extender
pins
IMPORTANT:
Assembly
Required!
BEFORE YOU BEGIN
•Contact
the
Central
Station
to
ensure
that
the
user
account
is
set
to
TEST.
•You
must
know
how
to
install
drivers
and
run
applications
on
a
Windows
computer.
Your
PC
must
be
running
Windows
XP™
or
later.
Recommended
packages
include:
• Windows
Vista™
• Windows
XP
10™
(Service
Pack
3)
• Windows
XP
12™
(Service
Pack
3)
•Your
PC
needs
to
have
at
least
1
available
USB
port.
•Your
PC
must
have
Internet
access
and
you
must
have
administrative
rights
or
be
logged
in
as
Administrator.
NOTE:
Mac
OS
is
NOT
supported.
•You
have
the
4
‐
pin
Extender
Pin.
•You
have
a
Firmware
Update
Cable
(2GIG
‐
UPCBL2).
IMPORTANT:
DO
NOT
attempt
to
plug
the
Firmware
Update
Cable
into
the
TS1
or
the
Control
Panel
at
this
time.
DOWNLOADING THE FIRMWARE UPDATE
TOO L
1
Login
to
the
dealer.2gig.com
website.
2
Under
Support
/
Firmware
Update
Tool,
select
the
Update
Tool
Kit
in
the
appropriate
language.
A
zip
file
containing
the
following
is
downloaded
to
your
PC:
• CDM20814_Setup.exe
• CP_[version#]_English_[build#].exe
• TS1_[version#]_English_[build#].exe
3
Extract
the
files
from
the
zip
file
to
a
folder.
4
To
install
the
Firmware
Update
Cable
Drivers,
run
CDM20814_Setup.exe
.
5
To
open
the
Device
Manager,
click
the
Windows
Start
Menu.
6
In
the
text
box,
type
“device
manager.”
7
From
the
search
results,
select
Device
Manager
.
8
To
make
a
note
of
the
COM
ports
currently
assigned,
expand
Ports
(COM
&
LPT)
.
9
Plug
the
Firmware
Update
Cable
into
the
PC
.
Wait
for
the
driver
to
complete
installing.
A
new
USB
Serial
Port
(COMX)
appears.
10
Make
a
note
of
the
COM
Port
Number.
TIP:
X
=
COM
Port
Number
such
as
3,
4,
5,
etc.
INSTALLING THE UPDATE TOOL
1
Find
the
folder
where
you
extracted
the
zip
files
to
in
step
3
above.
2
Right
‐
click
on
CP_[version#]_English_[build#].exe.
From
the
Right
‐
click
menu,
select
Send
to
.
3
From
the
Send
to
menu,
select
Desktop
(create
shortcut).
4
To
edit
the
Properties
of
the
shortcut
file,
right
‐
click
the
shortcut
file.
From
the
Right
‐
click
menu,
select
Properties.
Edit
Target
field.
To
the
end
of
the
field,
add
a
“
‐
CX”.
See
the
example:
Add
a
space,
hyphen
and
a
C
followed
by
the
COM
Port
Number
X
(where
X
is
the
COM
Port
number
you
determined
in
step
10).
Click
OK. 2
©2013 2GIG Technologies Inc. All Rights Reserved.
Firmware Update Tool | Update Instructions
CONNECTING THE CONTROL PANEL TO
YOUR PC
You
will
need
a
small
screwdriver
to
open
the
Control
Panel.
1
Remove
the
screw
from
the
top
of
the
panel
and
open
it.
2
Hang
the
panel
from
the
back
plate
using
the
“third
‐
hand”
strap.
3
Disconnect
the
battery
from
the
Control
Panel.
4
Disconnect
the
power
supply
from
TB1
and
2
on
the
Control
Panel
terminal
block
or
unplug
the
panel
power
supply
from
the
wall
outlet.
5
Connect
one
end
of
the
Firmware
Update
Cable
to
the
available
USB
slot
on
your
PC.
6
Connect
the
other
end
of
the
Firmware
Update
Cable
to
the
Control
Panel
in
the
J4
connector
(as
shown).
IMPORTANT:
Make
sure
that
the
slotted
side
of
the
connector
is
facing
away
from
the
tab
on
the
J4
connector.
Failure
to
do
so
may
result
in
damage
to
the
Control
Panel.
IMPORTANT:
Make
sure
that
all
of
the
pins
are
covered
by
the
connector.
Failure
to
do
so
may
result
in
damage
to
the
Control
Panel.
7
Locate
the
shortcut
file
on
your
desktop,
and
run
the
shortcut
file.
The
following
screen
displays
while
a
connection
from
your
PC
to
the
Control
Panel
is
established.
8
Re
‐
connect
the
battery
to
the
Control
Panel.
9
Re
‐
connect
the
power
to
the
Control
Panel.
10
Click
Yes
when
prompted
to
confirm
the
update.
NOTE:
If
the
screen
displays
a
RED
FAIL
message,
check
to
ensure
that
the
firmware
update
cable
is
plugged
into
your
PC
correctly
in
the
proper
USB
slot.
Also
check
to
ensure
that
the
correct
COM
Port
appears
in
the
Firmware
Update
Tool
Shortcut’s
Target
field.
11
Your
computer
screen
should
go
from
displaying
the
“No
Panel”
screen,
to
displaying
“Flashing”
(see
figure
below).
Check
to
ensure
that
the
status
bar
indicates
progress. Update the Firmware on the Control Panel and TS1
©2013 2GIG Technologies Inc. All Rights Reserved.
3
12
After
status
bar
completes
on
the
first
“Flashing”
screen,
the
second
“Flashing”
screen
appears:
IMPORTANT:
DO
NOT
disconnect
the
cable,
the
power
to
the
Control
Panel,
or
close
the
Firmware
Update
Tool
until
the
status
bar
has
completed
and
the
final
screen
appears
(showing
the
updated
firmware
version).
The
entire
update
takes
approximately
7
‐
8
minutes.
The
Pass
screen
flashes
briefly
to
signal
that
firmware
has
updated
successfully
.
Only
when
the
yellow
“No
Panel”
screen
reappears
(as
shown
above),
do
the
following.
1
Disconnect
the
power
from
the
Control
Panel.
2
Remove
the
firmware
update
cable
from
the
Control
Panel.
3
Reconnect
the
battery
in
the
Control
Panel.
4
Reconnect
the
power
to
the
Control
Panel.
BEFORE UPDATING THE TS1 FIRMWARE
1
Assemble
the
Extender
Pins
and
the
Firmware
Update
Cable.
2
Holding
the
slotted
side
of
the
Firmware
Update
Cable
towards
you,
plug
the
4
‐
pin
extender
pins
into
the
4
slots
as
shown
in
the
following
illustration.
3
Plug
the
USB
end
of
the
Firmware
update
Cable
into
your
computer’s
COM
port.
Verify your Computer
’s COM Port Number
1
To
open
the
Device
Manager,
click
the
Windows
Start
Menu.
2
In
the
text
box,
type
“device
manager.”
3
From
the
search
results,
select
Device
Manager
.
4
Expand
Ports
(COM
&
LPT)
.
5
Make
a
note
of
the
COM
Port
number.
TIP:
X
=
COM
Port
number
such
as
3,
4,
5,
etc.
6
Download
the
v1.10
exe
file
from
your
email.
7
From
the
Send
to
menu,
select
Desktop
(create
shortcut).
8
To
edit
the
Properties
of
the
shortcut
file,
right
‐
click
the
shortcut
file
that
you
just
created
on
your
desktop.
From
the
Right
‐
click
menu,
select
Properties.
9
Edit
Target
field.
To
the
end
of
the
field,
add
a
“
‐
CX
”
as
shown
in
the
example
above.
Add
a
space,
hyphen
and
a
C
followed
by
the
COM
Port
number
“X”
(where
X
is
the
COM
Port
number
you
determined
in
step
5).
10
Click
OK
.
UPDATING THE TS1 FIRMWARE
Disconnect
all
power
from
the
TS1
panel
1
Locate
the
shortcut
file
on
your
desktop,
and
run
the
shortcut
file.
The
following
screen
displays
while
a
connection
from
your
PC
to
the
TS1
is
established
.
2
Confirm
the
update
on
the
following
screen.
NOTE:
If
the
screen
displays
a
RED
FAIL
message,
check
to
ensure
that
the
firmware
update
cable
is
plugged
into
your
PC
correctly
in
the
proper
USB
slot.
Also
check
to
ensure
that
the
correct
COM
Port
appears
in
the
Firmware
Update
Tool
Shortcut’s
Target
field. Firmware Update Tool | Update Instructions
4
©2013 2GIG Technologies
Inc. All Rights Reserved.
Locating the Slots to Plug in the Firmware
Update Cable
1
Remove
the
mounting
plate
from
the
back
of
the
TS1.
2
Slots
exist
for
8
‐
,
5
‐
,
and
4
‐
pin
connections.
Insert
the
Firmware
Update
Cable
(with
extender
pins)
into
the
4
‐
pin
slot
.
WARNING:
When
inserting
the
Firmware
Update
Cable
(with
the
extender
pins)
it
is
EXTREMELY
IMPORTANT
to
insert
the
cable
with
the
flat
side
DOWN
and
the
slotted
side
UP.
3
Power
up
the
TS1
using
the
AC
power
transformer
(make
sure
that
polarity
(ports
+
and
‐
)
is
correct
when
wiring).
4
Your
computer
screen
should
go
from
displaying
the
“No
Panel”
screen,
to
displaying
“Flashing”
(see
figure
below).
Check
to
ensure
that
the
status
bar
indicates
progress.
5
After
status
bar
completes
on
the
first
“Flashing”
screen,
the
second
“Flashing”
screen
appears:
IMPORTANT:
DO
NOT
disconnect
the
cable,
the
power
to
the
TS1,
or
close
the
Firmware
Update
Tool
until
the
status
bar
has
completed
and
the
final
screen
appears
(showing
the
updated
firmware
version).
The
entire
update
takes
approximately
7
‐
8
minutes.
The
Pass
screen
flashes
briefly
to
signal
that
firmware
has
updated
successfully
.
Only
when
the
yellow
“No
Panel”
screen
reappears
(as
shown
above),
do
the
following.
1
Power
down
the
TS1
(disconnect
power).
2
Remove
the
Firmware
Update
Cable
from
the
TS1.
3
Screw
the
back
mounting
plate
onto
the
TS1.
4
Re
‐
apply
power
to
the
TS1
(plug
it
in).
CONFIRMING THE FIRMWARE UPDATE
ON THE CONTROL PANEL
1
Wait
for
the
Control
Panel
to
boot
up.
2
From
the
Control
Panel
Home
Screen
,
choose
Security
/
Menu
/
Toolbox
.
3
From
the
Toolbox
Screen
,
use
the
→
arrow
un
Ɵ
l
you
see
the
Version
Screen.
CHECKING THE FIRMWARE VERSION ON
THE TS1
1
Wait
for
the
TS1
to
boot
up.
TS1s
that
are
not
paired
with
panels
display
the
following
screen
upon
boot
up.
2
Make
sure
that
the
Firmware
Version
on
the
Control
Panel
matches
the
Firmware
Version
on
the
TS1
before
attempting
to
“learn
‐
in”
or
pair
the
TS1
with
the
Control
Panel.
For technical support in the USA and Canada
855
‐
2GIG
‐
TECH
(855
‐
244
‐
4832)
For technical support outs
ide of the USA and Canada
Contact
your
regional
distributor
Visit
2gig.com
for
a
list
of
distributors
in
your
region
PN:
77
‐
000001
‐
001
Rev.
C
- Uploaded