Alarm.com ADC-SEM300 - Install Guide Dated 05/2021 Rev. A
Related Products


Related Categories
- Verizon LTE Cellular Communicators
- Smart Home Controllers
- Internet Alarm Communicators
- Dual-Path Alarm Communicators
- AT&T LTE Cellular Communicators
Document Transcript
SEM-Honeywell/ADEMCO Vista Dual-Path (SEM300) - Installation
Guide
925-00002-001 Rev A
Alarm.com Dual-Path System Enhancement Module (SEM) is the most cost-effective and comprehensive solution to
migrate compatible Honeywell/ADEMCO VISTA-10P, VISTA-15P, and VISTA-20P panels to Alarm.com’s award-winning
interactive services. The Dual-Path SEM supports the 4G LTE cellular network and optional Broadband Ethernet. This
ensures the longest life cycle with the most secure and reliable service.
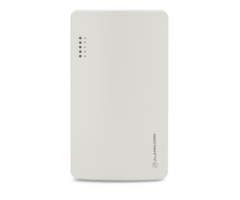
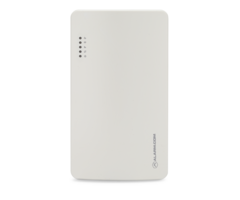
Equipment
System Enhancement Module
Installation guide
https://answers.alarm.com/ADC/Partner/Installation_and_Troubleshooting/Panels/SEM_Honeywell_ADEMCO_Vista/SEM-Ho...
Updated: Thu, 27 May 2021 18:46:08 GMT
1 Wire
Wall anchors and screws
https://answers.alarm.com/ADC/Partner/Installation_and_Troubleshooting/Panels/SEM_Honeywell_ADEMCO_Vista/SEM-Ho...
Updated: Thu, 27 May 2021 18:46:08 GMT
2 Panel compatibility
Important
:
For remote programming to be available, the panel must support the downloader feature. This feature is
available on most panels with a minimum revision of v5.2. For the most up-to-date list of compatible panels, see
SEM-
Honeywell/ADEMCO Vista Dual-Path - Troubleshooting Guide
.
The SEM is compatible with Honeywell/ADEMCO Vista-10P, -15P, and -20P panels and the equivalents below, dating
back to 2005. The Honeywell/ADEMCO VISTA-21iP is also compatible when the Internal IP/GSM jumper switch is set to
the OFF position.
Panel
Compatibility
Honeywell/ADEMCO Vista-10P
•
Honeywell/ADEMCO Vista-10PSIA
•
First Alert FA130CP
•
First Alert FA130CPSIA
Honeywell/ADEMCO Vista-15P
•
Honeywell/ADEMCO Vista-15PSIA
•
First Alert FA148CP
•
First Alert FA148CPSIA
Honeywell/ADEMCO Vista-20P
•
Honeywell/ADEMCO Vista-20PSIA
•
First Alert FA168CPS
•
First Alert FA168CPSSIA
Honeywell/ADEMCO Vista-21iP
Compatible when the Internal
IP/GSM jumper switch is
set to the OFF position.
Recommended tools and supplies
Note
: These are not included.
•
Screwdrivers: Small blade and Phillips
•
Drill and bits for screws and/or wall anchors
•
Ethernet cable
•
Alpha keypad (not required)
◦
Alarm.com strongly
recommends installing an alpha keypad to ensure the failure to communicate (FTC)
trouble
condition is displayed to the user. See FAQs for more information.
•
Four-conductor, 22 AWG or larger stranded wire
The following table
shows the maximum wire length for each gauge.
https://answers.alarm.com/ADC/Partner/Installation_and_Troubleshooting/Panels/SEM_Honeywell_ADEMCO_Vista/SEM-Ho...
Updated: Thu, 27 May 2021 18:46:08 GMT
3 Gauge
Maximum wire length
22 gauge
40 feet (12.2 m)
18 gauge
90
feet
(27.4 m)
Prepare the system
Before powering down the system:
Verify panel compatibility
Verify that the panel is compatible by checking the version and year printed on the PROM chip inside the panel
enclosure.
https://answers.alarm.com/ADC/Partner/Installation_and_Troubleshooting/Panels/SEM_Honeywell_ADEMCO_Vista/SEM-Ho...
Updated: Thu, 27 May 2021 18:46:08 GMT
4 Execute *96
Enter programming and execute *96 to reset the account number and initialize the downloader. Then, exit programming
via *99.
Enable the keypad address
The default keypad address the SEM uses is Keypad 8 Device Address 23. If this keypad address is disabled, the SEM
and panel will not communicate properly. However, at first power-up, the SEM will attempt to enable this address
https://answers.alarm.com/ADC/Partner/Installation_and_Troubleshooting/Panels/SEM_Honeywell_ADEMCO_Vista/SEM-Ho...
Updated: Thu, 27 May 2021 18:46:08 GMT
5 automatically. If unsuccessful, the address must be enabled manually via programming *196.
If another keypad is occupying this address already, a different address must be selected for the SEM. To select a
different keypad address, manually adjust the dual in-line package DIP switches on the SEM to match the desired
keypad address listed below. Then, exit programming via *99.
For additional information about enabling the keypad address, see
What keypad address should be used with the SEM-
Honeywell/ADEMCO Vista?
.
Keypad address
DIP switch setting
VISTA programming command
17
None—all OFF
*190
18
Switch 4 ON, others OFF
*191
19
Switch 3 ON, others OFF
*192
20
Switch 3 and 4 ON, others OFF
*193
21
Switch 2 ON, others OFF
*194
22
Switch 2 and 4 ON, others OFF
*195
23
Switch 2 and 3 ON, others OFF
*196
Disarm and power down the panel
1.
Verify the panel is disarmed and clear of any alarms, troubles, or system faults.
2.
If you do not know the current installer code, check the installer code at the panel before powering down the panel.
3.
Then remove AC power and disconnect the backup battery to completely power down the system.
Create an Alarm.com account
1.
Create a new Alarm.com customer account using Partner Portal or MobileTech. The IMEI located on the
Alarm.com module will be needed to create this account.
https://answers.alarm.com/ADC/Partner/Installation_and_Troubleshooting/Panels/SEM_Honeywell_ADEMCO_Vista/SEM-Ho...
Updated: Thu, 27 May 2021 18:46:08 GMT
6 2.
During the account creation process, you are prompted to enter the current installer code on the panel. Alarm.com
uses this code to access panel programming and read information stored on the panel.
3.
At the end of the
Create New Customer
process, you are
able to print or email a Welcome Letter for the customer,
which includes login information for the Alarm.com Customer Website.
For more information about creating a customer
account, see
How to create an Alarm.com customer account
.
https://answers.alarm.com/ADC/Partner/Installation_and_Troubleshooting/Panels/SEM_Honeywell_ADEMCO_Vista/SEM-Ho...
Updated: Thu, 27 May 2021 18:46:08 GMT
7 After powering down the system:
Remove third party communication
If there are any third-party communicators installed or a POTS line connected to the panel, remove them.
The SEM is not compatible with POTS, IP/GSM devices, or other third-party communicators. Therefore, the SEM should
be the only communication device installed for alarm signaling to the monitoring station.
Inspect for peripheral devices
1.
Take inventory of all peripheral devices (wireless receivers, zone expanders, keypads, power supplies, etc.) wired
to the system.
2.
Inspect the wiring to verify there are no loose ends or intermittent connections between the device and system.
The presence of peripheral device issues can often cause the SEM installation process to take longer than
expected.
Connect the SEM
Mounting
https://answers.alarm.com/ADC/Partner/Installation_and_Troubleshooting/Panels/SEM_Honeywell_ADEMCO_Vista/SEM-Ho...
Updated: Thu, 27 May 2021 18:46:08 GMT
8 Before mounting the SEM to the wall:
1.
Evaluate how the wiring cables will be routed from
the SEM to the panel.
2.
Remove the snap-off plastics. There are two
routing options available: the side of the enclosure
for side routing or the rear of the enclosure for wall
routing.
https://answers.alarm.com/ADC/Partner/Installation_and_Troubleshooting/Panels/SEM_Honeywell_ADEMCO_Vista/SEM-Ho...
Updated: Thu, 27 May 2021 18:46:08 GMT
9 To mount the SEM:
1.
Press in on the thumb tabs located at the bottom of
the enclosure, then swing up the top half of the
enclosure cover to expose the internal
components.
2.
Place the SEM enclosure back plate against the
wall at the desired mounting location and mark the
four mounting holes.
3.
Using the provided mounting screws and wall
anchors (if needed), place the first mounting screw
through the top-right enclosure hole. This screw
will be used to hang the SEM from the wall while
mounting and should not be tightened until the last
step.
4.
Place the second mounting screw through the
bottom-left mounting hole. This screw is used to
level the enclosure on the wall and should not be
tightened until the last step. A standard leveling
device may be used to ensure the unit is level.
5.
Place the third mounting screw through the top-left
enclosure hole. This screw should be tightened
fully against the unit and wall before moving to the
next step.
6.
Place the final mounting screw through the bottom-
right enclosure hole. This screw should be
tightened fully against the unit and wall before
moving to the next step. Note that this screw is
critical for the wall tamper functionality and should
not be overlooked.
7.
Tighten the first two mounting screws fully to the
unit and wall to complete the mounting process.
Wiring
Important
:
Alternate wiring is required when using this device for ETL installations. For more information, see
ETL
requirements
.
https://answers.alarm.com/ADC/Partner/Installation_and_Troubleshooting/Panels/SEM_Honeywell_ADEMCO_Vista/SEM-Ho...
Updated: Thu, 27 May 2021 18:46:08 GMT
10 To wire the panel:
1.
Connect panel terminal 4 (GND) to SEM GND, panel terminal 6 (GREEN: DATA IN FROM KEYPAD) to GREEN
(OUT), and panel terminal 7 (YELLOW: KEYPAD DATA OUT) to YELLOW (IN).
2.
Using the included red cable with the two-prong
battery connector, connect the battery to both the SEM and the
panel. For a power limited circuit, ensure the fuse is inside the Vista panel.
3.
Connect an Ethernet cable to the pre-installed Ethernet jack to utilize Dual-Path communication. Local network
changes may be required before the broadband path activates. For more information about Dual-Path
communication, see
Configure Dual-Path communication for a panel remotely
.
4.
Remove the snap-off plastics from the enclosure side at the
desired locations, then route the cables around the
internal strain relief walls and out the side of the enclosure.
5.
Before completing the mounting, verify the wiring
connections are secure and all internal components are in their
proper location.
6.
Then close the enclosure by sliding the cover into the mounting points at the top of the enclosure base and then
swinging down the cover to snap the thumb tabs into place.
https://answers.alarm.com/ADC/Partner/Installation_and_Troubleshooting/Panels/SEM_Honeywell_ADEMCO_Vista/SEM-Ho...
Updated: Thu, 27 May 2021 18:46:08 GMT
11 Zone scan
1.
Reconnect the backup battery and restore AC power to the panel. On power-up, the SEM will enter programming
to
read the current installer code programmed at the panel, then perform a zone scan to read the existing zone
information and settings programmed at the panel. During this process, the SEM will also automatically program-
specific
panel settings needed for the SEM to perform properly. The settings programmed are identified in
Installation settings
.
2.
The zone scan will automatically begin after the panel is powered up. On the keypad you will see a series of
disarms and programming setting changes before seeing
MODEM COMM
on the screen. If you have a non-alpha
keypad, the keypad will show
CC
instead of
MODEM COMM
.
◦
Zone scan (~5 minutes):
Caution
: Do not
touch the panel or keypad.
◦
If you do not see the MODEM COMM message appear on the keypad during zone scan and instead notice
the keypad scrolling through each zone individually, the SEM is using an alternate zone scan method because
it is unable to access the downloader. For troubleshooting this behavior, see
Uploader /downloader disabled
.
3.
When the zone scan is complete, the keypad will display the home screen. The equipment list is now available on
the Partner Portal equipment page and the MobileTech Remote Toolkit and all user codes are synced to the
Customer Website.
◦
Zone scan complete:
https://answers.alarm.com/ADC/Partner/Installation_and_Troubleshooting/Panels/SEM_Honeywell_ADEMCO_Vista/SEM-Ho...
Updated: Thu, 27 May 2021 18:46:08 GMT
12 Confirm communication
Before completing the installation, verify that the SEM is fully in sync with the panel and communicating to Alarm.com by
verifying:
1.
The correct devices are present on the account equipment list in Alarm.com MobileTech.
2.
The customer can view all user codes in the Alarm.com mobile app or customer website, and the correct users are
reported when arming or disarming at the panel.
3.
All alarms are reported correctly to Alarm.com and the monitoring station.
It is also recommended to execute a System Check in
Alarm.com MobileTech to verify the health of the account and
identify any other issues. For more information about performing a System Check, see
System Check User Guide
.
Additional information
Z-Wave devices
Alarm.com recommends using MobileTech or the Partner Portal to complete the installation of any Z-Wave devices. For
more information about enrolling Z-Wave devices, see
Manage Z-Wave devices on
a SEM-Honeywell/ADEMCO Vista
.
For more information about
Z-Wave communication, Z-Wave signal strength, and additional Z-Wave resources,
see
General Z-Wave Information
.
https://answers.alarm.com/ADC/Partner/Installation_and_Troubleshooting/Panels/SEM_Honeywell_ADEMCO_Vista/SEM-Ho...
Updated: Thu, 27 May 2021 18:46:08 GMT
13 Touchscreen keypads
The SEM is compatible with AUI devices, including the 6280, Tuxedo Touch, and other touchscreen keypads. Arming,
disarming, panics, and alarms initiated on these keypads will be processed by Alarm.com and reported to the monitoring
station. However, changes to the installer code via Quick Programming mode and bypassing open sensors will not be
processed by Alarm.com unless the keypad is used in Console mode.
Bypass open sensors
To use the bypass open sensors feature through Alarm.com, *23 Quick (Forced) Bypass must be enabled. This setting
is not enabled automatically and must be enabled to use this feature on the Alarm.com Customer Website or mobile
app. For more information about enabling bypass features, see
Bypass a sensor on a SEM-Honeywell/ADEMCO Vista
.
Installation settings
For the SEM to communicate with the panel and report all alarms, certain panel settings must be set at the panel. These
settings are automatically changed during installation, so no further action is required by the installer.
Enable IP/GSM
•
*29 IP/GSM needs to be set to [1]. This setting ensures the panel is communicating with the SEM using the Long
Range Radio (LRR) protocol.
Silent alarms
These settings are required for the SEM to report silent and duress alarms.
•
*41 Primary phone # is cleared.
•
*42 Secondary phone # is cleared.
•
*43 Partition 1 primary account # is set to a four-digit number, 1111.
•
*45 Partition 2 primary account # is set to a four-digit number, 4321.
•
*48 Report format is set to the primary phone number format set to [77].
•
*55 Dynamic signaling priority is set to [1].
•
*64 Test report code needs is set to [1,0].
•
*92 Phone line monitor enable is set to [0,0].
•
The zone 92 reporting code is enabled.
Report codes
To successfully report all monitoring station events, the System Status and Restore Report Codes (*59-*68) will
automatically be enabled. These settings will always be enabled automatically after a power cycle or if the SEM zone
scans again.
https://answers.alarm.com/ADC/Partner/Installation_and_Troubleshooting/Panels/SEM_Honeywell_ADEMCO_Vista/SEM-Ho...
Updated: Thu, 27 May 2021 18:46:08 GMT
14 Important
: All monitoring station forwarding settings should be set up via Alarm.com Monitor Settings.
ETL Requirements
This device is certified to be used for fire and burglary
monitoring in residential applications only. When using
this device with ETL installations, the following
requirements apply:
•
The system must use a 12V 7AH backup battery.
•
The +12V red power cable from the SEM must be
wired directly to the +12V AUX terminal at the panel
instead of to the backup battery.
•
The account must be configured to send a phone
test once every 30 days. This can be achieved by
either:
◦
Programming an auto phone test locally or
using the Remote Toolkit.
◦
Enabling
Manual/Auto Tests
on the account
Monitoring Settings page.
•
The enclosure tamper should be tested once every
year by removing the enclosure cover and verifying
a tamper event is reported to Alarm.com
Important:
•
This installation must be done in accordance with the National Electrical Code, ANSI/NFPA 70; Chapter 29 of the
National Fire Alarm and Signaling Code, ANSI/NFPA 72; the Standard for the Installation of Residential Fire
Warning Systems, CAN/ULC-S540; Canadian Electrical Code, Part I, Safety Standard for Electrical Installations,
CSA C22.1; Standard for the Installation, Inspection and Testing of Intrusion Alarm Systems, CAN/ULC S302; and
Standard for Signal Receiving Centre Intrusion Alarm Systems and Operations, CAN/ULC S301.
•
If
Ethernet is active, the broadband communication medium used between the protected property and
communications service provider shall be for the exclusive use of the protected property and is not to be shared
with other communications service provider subscribers.
Gateway LED reference
The enclosure
gateway LEDs can be used to indicate communication errors, panel communication, network
communication, and signal strength.
https://answers.alarm.com/ADC/Partner/Installation_and_Troubleshooting/Panels/SEM_Honeywell_ADEMCO_Vista/SEM-Ho...
Updated: Thu, 27 May 2021 18:46:08 GMT
15 Note
: For advanced troubleshooting, open the cover to look at the Alarm.com module LEDs. For more information about
the module LEDs, see
SEM-Honeywell/ADEMCO Vista - Module LED Troubleshooting
.
Trouble LED
The
Trouble
LED flashes 1 to 8 times in a four-second interval to indicate specific error conditions.
Flash pattern
Description
1
The Alarm.com module cannot communicate with the
panel. Perform a power cycle on the panel. If the error
persists, lift the Alarm.com module out of the SEM circuit
board and re-insert it while power is disconnected from
the system.
https://answers.alarm.com/ADC/Partner/Installation_and_Troubleshooting/Panels/SEM_Honeywell_ADEMCO_Vista/SEM-Ho...
Updated: Thu, 27 May 2021 18:46:08 GMT
16 Flash pattern
Description
2 then 4
The Alarm.com module provisioning process could not
be completed. Power-cycle the system. If the error
persists, see
Alarm.com CORE Technical Support
.
2 then 5
The Alarm.com module provisioning process could not
be completed because the module is currently roaming
off the carrier’s primary network.
3
The Alarm.com module is trying to register on the cellular
network. If it persists for more than a few minutes, the
module is having problems registering. Check L4 for
signal level. If signal level is lower than 2 bars, change
the panel’s location or use a remote antenna option.
4
The Alarm.com module is registered on the cellular
network but could not connect with Alarm.com. If the
error persists, see
Alarm.com CORE Technical Support
.
5
The radio on the module is not working correctly. If this
persists for more than a few minutes, the module may
need to be replaced. This error is extremely rare, so
please verify that the module is flashing 5 times.
6
This indicates an error only if it persists for more than a
minute. Otherwise, it’s an indication that the module is
resolving an unusual condition regarding communication
with the cellular network.
7
The SEM is unable to access panel programming. Check
the panel wiring and installer code.
8
If this error persists, the account may have been set up
incorrectly. Check that the serial number being used
matches the serial number used to create the account. If
the serial numbers are the same, contact
Alarm.com
CORE Technical Support
.
Path LED
The
Path
LED flashes to indicate the active communication path (cellular, broadband, or both) to Alarm.com.
https://answers.alarm.com/ADC/Partner/Installation_and_Troubleshooting/Panels/SEM_Honeywell_ADEMCO_Vista/SEM-Ho...
Updated: Thu, 27 May 2021 18:46:08 GMT
17 Flash pattern
Description
Steady long flash (~2 sec)
The cellular communication path is active.
Long flash (~2 sec) followed by a short flash (~0.5 sec)
Both cellular and broadband communication paths are
active.
Steady short flash (~0.5 sec)
The broadband communication path is active. This
should also accompany an error LED flash.
No flash
Both communication paths are not communicating. This
should also accompany an error LED flash.
Signal LED
The
Signal
LED flashes to indicate the cellular signal strength (0 to 6 bars).
Panel LED
The
Panel
LED flashes with every communication to the panel.
Power LED
The
Power
LED illuminates solid when power is supplied.
Troubleshooting
Communication to Alarm.com or monitoring station
If there is no activity present in the event history or the account is not signaling to Alarm.com.
1.
Initiate a communication test from the SEM by pressing
[#]
+
[9]
+
[8]
+
[7]
+
[*]
to initialize communication with
Alarm.com or verify the module is communicating on the cellular network.
2.
For this test to send a signal to the monitoring station, verify
Phone Tests
is selected as an
Event to Forward
in the
customer’s Monitoring Settings. For more information about updating the Monitoring Settings, see
Change the
monitoring settings on a customer account
.
https://answers.alarm.com/ADC/Partner/Installation_and_Troubleshooting/Panels/SEM_Honeywell_ADEMCO_Vista/SEM-Ho...
Updated: Thu, 27 May 2021 18:46:08 GMT
18 Customer equipment list
If the device
list is empty on the MobileTech or Partner Portal equipment page, the SEM may be having problems
communicating with the panel. To resolve:
1.
Verify the correct keypad address is enabled.
2.
Verify all wiring is correct and secure.
3.
Resync the installer code if a zone scan is not initiating upon power-up.
a.
To resync the installer code, use the keypad to change the installer code to a new, unique code.
b.
After resyncing the installer code, power cycle the panel and verify a zone scan is initiated.
4.
Verify the panel is disarmed and then request an updated equipment list using MobileTech or the Partner Portal.
Verify the firmware version is displaying properly. For more information about requesting an updated equipment
list, see
Request an updated sensor list and system status
.
5.
Verify the zone scan has started. If you do not see the
MODEM COMM
message appear on the keypad, the SEM
is using the alternate zone scan method. For troubleshooting this behavior, see
Uploader /downloader disabled
.
Customer user codes
If the panel does not support uploader/downloader, the customer user codes must be manually synced to Alarm.com. If
user codes are not visible, The SEM may be having issues scanning the user codes programmed at the panel. To
resolve:
1.
Verify an equipment list is present on the equipment page. If some equipment is not present, see
Customer
equipment list
.
2.
Verify the SEM has access to uploader/downloader. If this feature reports as disabled but the panel supports
uploader/downloader, see
Uploader /downloader disabled
.
◦
If the panel does not support uploader/downloader, the customer user codes must be manually synced to
Alarm.com. To do this:
a.
Delete all user codes locally or using the Partner Portal or MobileTech. Select the
Delete All User
Codes
option, and then wait about 15 minutes for this process to complete. For more information about
this process, see
Why do previous Honeywell Vista panel user codes need to be deleted to integrate
with the SEM?
.
b.
Re-add user codes locally or using Customer Website or mobile app. Wait about 5 minutes for this
process to complete.
c.
Verify that all user codes are present on the Customer Website or mobile app.
d.
Arm and disarm with all user codes locally.
e.
Verify that the correct username and slot number are reported to the Customer Website or Partner
Portal.
Uploader/downloader disabled
If panel settings are not visible on Alarm.com,
there is a warning stating the uploader/downloader feature is currently
disabled, and/or the SEM is not performing as expected, try the following:
https://answers.alarm.com/ADC/Partner/Installation_and_Troubleshooting/Panels/SEM_Honeywell_ADEMCO_Vista/SEM-Ho...
Updated: Thu, 27 May 2021 18:46:08 GMT
19 1.
Verify the Vista panel version meets the minimum revision number required for this feature.
◦
Vista-10P rev 2.0+
◦
Vista-15P rev 3.1+
◦
Vista-20P rev 5.2+
◦
Vista-21iP rev 3.1+
2.
Resync the installer code if a zone scan is not initiating upon power-up.
a.
To resync the installer code, use the keypad to change the installer code to a new, unique code.
b.
After resyncing the installer code, power cycle the panel and verify a zone scan is initiated.
3.
Enter programming and execute *96 to reset the account number and initialize the downloader. Then exit
programming via *99, power cycle the system and verify the zone scan is initiated.
4.
Verify the programming settings set during initialization are correct.
◦
Verify the Sub ID Primary *43 value is a four-digit value with no zeros (1111 or FFFF is recommended). The
SEM does not support zero values (e.g., 0000 or 1010) in
this section.
◦
Verify the Report Format Primary/Secondary *48 value is set to 7,7.
5.
Power cycle the system and request the firmware version.
Questions?
If you are experiencing difficulties with your installation, please contact
Alarm.com CORE Technical Support
at
866-834-0470 and we'll be happy to assist further.
Specifications
Power requirements
13.6 V nominal, 125 mA nominal (continuous), 230 mA
maximum
Cellular network
4G LTE with 3G HSPA, 2G GSM fallback
Panel interfaces
Two keypad BUS connections,
12 V power and ground
Alarm.com module indicators
Five LEDs (red, yellow, or green)
SEM circuit board indicators
Five LEDs (red, green, yellow, or blue)
Operating temperature
14 to 131°F (-10 to 55°C)
Storage temperature
-30 to 140°F (-34 to 60°C)
Humidity
90% relative humidity non-condensing
Enclosure dimensions
(L x W x D) 7.66 x 4.35 x 1.65 in. (19.46 x 11.05 x 4.19
cm)
https://answers.alarm.com/ADC/Partner/Installation_and_Troubleshooting/Panels/SEM_Honeywell_ADEMCO_Vista/SEM-Ho...
Updated: Thu, 27 May 2021 18:46:08 GMT
20 Enclosure color
White
Case material
Fire-retardant PC/ABS, PC
Regulatory information
Contains FCC: YL6-143470L, Model: ADC-470L
Changes or modifications not expressly approved by Alarm.com can void
the user’s authority to operate the equipment.
This equipment has been tested and found to comply with the limits for a
Class B digital device, pursuant to part 15 of
the FCC Rules. These limits are designed to provide reasonable protection against harmful interference in a
residential
installation. This equipment generates, uses, and can radiate radio frequency energy and, if not installed and used in
accordance with the instructions, may cause harmful interference to radio communications. However, there is no
guarantee that interference will not occur in a particular installation. If this equipment does cause harmful interference to
radio or television reception, which can be determined by turning the equipment off and on, the user is encouraged to try
to correct the interference by one or more of the following measures:
•
Reorient or relocate the receiving antenna.
•
Increase the separation between the equipment and receiver.
•
Connect the equipment into an outlet on a circuit different from that to which the receiver is connected.
•
Consult the dealer or an experienced radio/TV technician for help.
Operation is subject to the following two conditions:
1.
This device may not cause interference.
2.
This device must accept any interference, including interference
that may cause undesired operation of the device.
This equipment complies with the FCC RF radiation exposure limits set forth for an uncontrolled environment. This
equipment should be installed and operated with a minimum distance of 20 centimeters between the radiator and your
body.
All cables used for installation should not exceed 30 meters.
IC regulations
Contains IC: 9111A-143470L, Model: ADC-470L
This device complies with Industry Canada license-exempt RSS standard(s). Operation is subject to the following two
conditions:
This device may not cause interference.
This device must accept any interference, including interference
that may cause undesired operation of the device.
https://answers.alarm.com/ADC/Partner/Installation_and_Troubleshooting/Panels/SEM_Honeywell_ADEMCO_Vista/SEM-Ho...
Updated: Thu, 27 May 2021 18:46:08 GMT
21 Le présent appareil est conforme aux CNR d’Industrie Canada applicables aux appareils radio exempts de licence.
L’exploitation est autorisée aux deux conditions suivantes : (1) l’appareil ne doit pas produire de brouillage, et (2)
l’utilisateur de l’appareil doit accepter tout brouillage radioélectrique subi, même si le brouillage est susceptible d’en
compromettre le fonctionnement.
ETL regulations
Contains Model: ADC-SEM-300
Conforms to UL STDS 985 & 1023
Certified to ULC STD S545
Additional resources
Enroll in the
System Enhancement Module (VISTA Dual-Path) 201
course today! For more information on accessing
Academy Training, see
How can I access Academy Training?
.
https://answers.alarm.com/ADC/Partner/Installation_and_Troubleshooting/Panels/SEM_Honeywell_ADEMCO_Vista/SEM-Ho...
Updated: Thu, 27 May 2021 18:46:08 GMT
22
- Uploaded