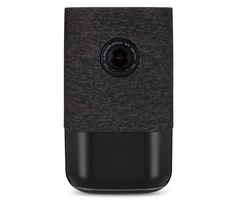
Alarm.com ADC-V622 - Install Guide
Related Products
Related Categories
- Wireless Security Cameras
- Security Camera Systems
- Low-Light Security Cameras
- HD Security Cameras
- 1080P Security Cameras
Document Transcript
180° HD Camera (ADC-V622) - Installation Guide
Pre-installation checklist
•
ADC-V622 camera (included)
•
AC power adapter (included, required for non-PoE connections)
•
Broadband (Cable, DSL, or Fiber Optic) Internet connection
•
A computer, tablet, or smartphone with Wi-Fi is required if the router does not have the Wi-Fi Protected Setup
(WPS) feature
•
Login and Password for the Alarm.com account to which you will add the camera
Note
: There are three local options for connecting the ADC-V622 to the wireless network: Ethernet Mode, Wi-Fi
Protected Setup (WPS) Mode, and Access Point (AP) Mode.
For
information on how to install
a video device via MobileTech, see
Install a video device using the MobileTech app
.
Add the camera to an Alarm.com account
https://answers.alarm.com/Installation_and_Troubleshooting/Video_Devices/180_HD_Camera_(ADC-V622)/180_HD_Camera_(ADC-V622)_-_Installation_Guide
Updated: Fri, 17 Aug 2018 15:57:43 GMT
1 WPS Mode
To ensure sufficient Wi-Fi signal, complete these steps with the camera near its final location but prior to mounting.
1.
Connect the camera’s AC power adapter and plug it into a non-switched outlet.
2.
Press the
Menu
button and use the
Volume
buttons to scroll to the WPS menu option (follow the audio prompts or
look for a flashing blue LED).
3.
Press the
Menu
button to activate WPS Mode. The LED will flash blue.
4.
Activate the WPS Mode on the router. The ADC-V622 will begin to connect to the Wi-Fi network. The LED will be
solid green when the connection is complete.
5.
Add the device to the account by either selecting the account in MobileTech OR by using a web browser and
entering the following URL: www.alarm.com/addcamera
6.
Select the camera from the video device list or type in its MAC address to begin adding the camera. The camera’s
MAC address is located on the back of the camera near the power cable.
7.
Follow the on-screen instructions to finish adding the camera. You may configure camera settings using the
Customer Website.
You can now power down the camera and install it in its final location using the included hardware.
AP Mode
To ensure sufficient Wi-Fi signal, complete these steps with the camera near its final location but prior to mounting.
1.
Connect the camera’s AC power adapter and plug it into a non-switched outlet.
2.
Press the
Menu
button and use the
Volume
buttons to scroll to
Access Point mode (follow the audio prompts or
look for a flashing white LED).
3.
Press the
Menu
button to activate Access Point Mode. The LED will flash white.
4.
On an Internet enabled device, connect to the Wi-Fi network “ADC-V622 (XX:XX:XX)” where XX:XX:XX is the last
six digits of the ADC-V622’s MAC address, which is located on the back of the device near the power cord.
5.
On the same device, open a web browser and enter
http://v622install
in the URL field. Follow the on-screen
instructions to add the ADC-V622 to the Wi-Fi network. The LED will be solid green when the connection is
complete.
6.
Add the device to the account by either selecting the account in MobileTech OR by using a web browser and
entering the following URL: www.alarm.com/addcamera
7.
Select the camera from the video device list or type in its MAC address to begin adding the camera. The camera’s
MAC address is located on the back of the camera near the power cable.
8.
Follow the on-screen instructions to finish adding the camera. You may configure camera settings using the
Customer Website.
You can now power down the camera and install it in its final location using the included hardware.
Ethernet Mode
Complete these steps prior to installing the camera in its final location.
1.
Using an Ethernet cable, connect the camera to the network.
2.
Connect the camera’s AC power adapter and plug it into a non-switched outlet (if not using a PoE connection).
https://answers.alarm.com/Installation_and_Troubleshooting/Video_Devices/180_HD_Camera_(ADC-V622)/180_HD_Camera_(ADC-V622)_-_Installation_Guide
Updated: Fri, 17 Aug 2018 15:57:43 GMT
2 3.
Add the device to the account by either selecting the account in MobileTech
or by using a web browser and
entering the following URL: www.alarm.com/addcamera
4.
Select the camera from the video device list or type in its MAC address to begin adding the camera. The camera’s
MAC address is located on the back of the camera near the power cable.
5.
Follow the on-screen instructions to finish adding the camera. You may configure camera settings using the
Customer Website.
You can now power down the camera and install it in its final location using the included hardware.
LED reference guide
LED Pattern
Status
Description
Internet connection
Local network and internet
connection
Local network connection
Local network connection only, no
internet
No network connection
No local network or internet
connection
System booting
Camera is booting
WPS Mode
To enter WPS mode, push the Menu
button and use the Volume buttons
to scroll to WPS Mode. See
instructions above to add the
camera to your router and account
using WPS mode.
AP Mode
To enter AP mode, push the WPS
button and release when flashing
white (about 6 seconds). See
instructions above to add the
camera to your router and account
using AP mode.
https://answers.alarm.com/Installation_and_Troubleshooting/Video_Devices/180_HD_Camera_(ADC-V622)/180_HD_Camera_(ADC-V622)_-_Installation_Guide
Updated: Fri, 17 Aug 2018 15:57:43 GMT
3 LED Pattern
Status
Description
Bluetooth pairing
To pair with Bluetooth, push the
Menu button and use the Volume
buttons to scroll to Bluetooth mode.
Factory Reset
Caution
: This will restore factory-
default settings to the camera. If
already installed, the camera may
need to be removed from the
Alarm.com account and re-added
after a factory reset.
To perform a factory reset, push the
Menu button and use the Volume
buttons to scroll to the Factory Reset
option. Follow the audio prompts to
initiate Factory Reset.
Troubleshooting
1.
If you have issues connecting the camera to the account, power cycle the camera. If using the AC adapter, unplug
the power jack from the camera and then plug it back in to restore power. If using PoE, unplug the Ethernet jack
from the camera and then plug it back in to restore power.
2.
If issues persist, try resetting the camera to factory defaults. Press the
Menu
button and use the
Volume
buttons
to scroll to the
Factory Reset
option. Follow the audio prompts to initiate Factory Reset. The camera will reboot
with factory defaults. If the camera was previously installed on an Alarm.com account, it will need to be deleted
before it can be installed again.
Questions?
Visit:
https://www.alarm.com/supportcenter
https://answers.alarm.com/Installation_and_Troubleshooting/Video_Devices/180_HD_Camera_(ADC-V622)/180_HD_Camera_(ADC-V622)_-_Installation_Guide
Updated: Fri, 17 Aug 2018 15:57:43 GMT
4
- Uploaded