Alarm.com ADC-VC847PF - 1080P Indoor/Outdoor Varifocal Dome Camera - Install Guide
Related Products
Related Categories
- Security Cameras
- HD Security Cameras
- Security Cameras
- POE Cameras
- Outdoor Cameras
- Low-Light Security Cameras
- HD Security Cameras
- 1080P Security Cameras
Document Transcript
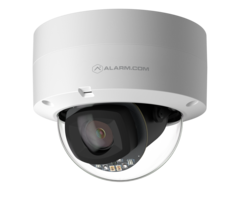
Dome Camera
Installation Guide
ADC-VC847PF 1
Pre-installation checklist
• ADC-VC847PF camera (included)
• AC power adapter (required for non-PoE connections)
(sold separately)
• Router with broadband Internet connection
(Cable, DSL, or Fiber Optic) and an open Ethernet port
• A computer or mobile device with Internet access
• An Ethernet / Cat5e cable
• Username and password for the Alarm.com account
to which you will add the camera 3
Overview
❶
LED indicator
❷
Reset button
❸
MicroSD card slot
❹
Varifocal Lens
❺
Lens positioning system
❻
12VDC power connector
❼
RJ45 ethernet interface
❽
Camera label
with MAC Address
2
3
❽
❼
❻
❷
❹
❺
❶
❸ 5
Installation
Choose the appropriate installation wizard
(customer or technician) below or proceed to the
Ethernet mode section to begin adding the camera.
Customer - Mobile App Installation Wizard
❶
Log in to the Mobile App. You will need the username and
password of the account to log in.
❷
Tap the navigation
menu.
❸
Tap
+ Add Device
>
Video Camera
>
VC847PF
.
(If you do not see the Add Device option,
please use the Ethernet mode instructions below
to complete your installation.)
❹
Follow the on-screen instructions.
Service provider technician - MobileTech installation
❶
Log in to MobileTech.
❷
Select the customer’s account.
❸
Tap
Quick Actions
>
Add Device
>
Video
.
❹
Follow the on-screen instructions.
Ethernet mode
Complete these steps prior to installing
the camera in its final location:
❶
Connect the camera to the router via an Ethernet cable.
❷
If the Ethernet connection does not provide power,
connect the camera to the optional AC power adapter
(sold separately) and plug the adapter into a
non-switched outlet.
continued
4
5 7
❸
Wait 2 minutes for the camera to boot up and connect
to the Internet. The LED will be solid green when this
process is complete.
❹
Add the device to the account by either selecting the
account in MobileTech or by using a web browser
and entering the following URL:
www.alarm.com/addcamera
(you will need the customer username and password).
❺
Select the camera from the video device list or enter
its MAC address to begin adding the camera.
The camera’s MAC address is located on the bottom
of the device or on the packaging.
❻
Follow the on-screen instructions to finish adding the camera.
You can now power down the camera and install it in its
final location using the included hardware. You may configure
camera settings from the Customer Website.
LED reference
Not illuminated
- Power off
Solid green
- Connected to Alarm.com
Blinking green
-
Local network connection
Blinking green and red
-
Reverting to factory default settings
Blinking red
- Power on, camera booting
Solid red
-
No local or Internet connection
6
7 8
9
Notices
This equipment has been tested and found to comply with the limits for a
Class B digital device, pursuant to part 15 of the FCC Rules. These limits are designed
to provide reasonable protection against harmful interference in a residential
installation. This equipment generates, uses and can radiate radio frequency energy
and, if not installed and used in accordance with the instructions, may cause harmful
interference to radio communications. However, there is no guarantee that
interference will not occur in a particular installation. If this equipment does cause
harmful interference to radio or television reception, which can be determined by
turning the equipment off and on, the user is encouraged to try to correct the
interference by one or more of the following measures:
•
Reorient or relocate the receiving antenna.
•
Increase the separation between the equipment and receiver.
•
Connect the equipment into an outlet on a circuit different from that
to which the receiver is connected.
•
Consult the dealer or an experienced radio/TV technician for help.
Changes or modifications not expressly approved by the party responsible for
compliance could void the user’s authority to operate this equipment.
Troubleshooting
• If you have issues connecting the camera to the account,
power cycle the camera and try again.
• If issues persist, reset the camera to factory defaults. Press
and hold the
Reset button
until the LED is flashing Green
and Red (about 15 seconds), then release the button. The
camera will reboot with factory defaults.
If the camera was previously installed to an Alarm.com
account, it will need to be deleted before it can be
installed again.
Questions?
Visit
answers.alarm.com
or contact your service provider.
8 8281 Greensboro Drive
Suite 100
Tysons, VA 22102
200827
© 2020 Alarm.com.
All rights reserved.
- Uploaded