Honeywell SiXCOMBO - Installation Manual
Related Products
Related Categories
- Wireless Smoke Detectors
- Wireless Carbon Monoxide Detectors
- Honeywell SiX Smoke Detectors
- Honeywell SiX Heat Detectors
- Combination Smoke/Heat Detectors
- Combination CO/Smoke Detectors
Document Transcript
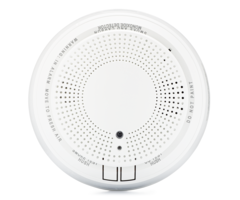
SiXCOMBO
Combination Smoke/Carbon Monoxide (CO) Detector w/B
uilt-in Wireless Transmitter
(features voice and 360 degree viewable LED ring)
Installation and Setup Guide
This device is intended for use with Honeywell cont
rol panels that support SiX series devices. Before
installing detectors, please
thoroughly read these installation instructions and
read the
Limitations of Fire Alarm Systems
Insert (P/N 800-15144 5/13) and
System
Smoke Detectors Application Guide
(P/N SPAG9101 7/12).
FEATURES
•
Multi-Criteria Sensing:
uses four
sensing elements to react faster
while minimizing false alarms:
-
Photoelectric smoke sensor
detects airborne smoke particles
-
Carbon Monoxide (CO) sensor
detects smoldering fires
-
Infrared (IR) sensor measures
ambient light and flame
signatures, such as flame flicker
-
Thermal detection monitors for
dangerous rise in temperature
•
Low Temperature sensing:
senses ambient temperature
and reports if temperature goes
below 41°F (5°C).
•
One Go / All Go: all smoke
detectors in the system
programmed as one-go-all-
go will sound on alarm.
•
CO Detector End-of-Life
reporting (detector needs
replacing)
•
Smoke detector maintenance
reporting (detector needs
cleaning)
•
Low Battery Detection
CO Test
LED
Smoke Test
5800combo-ii 001
( )
( )
IR Flame
Detector
Table 1: Operation Modes
MODE
Status LED
(Top)
LED Windows
(Side)
Sounder
Speaker
Power Up
Blink Green,
every 2 secs
Dark
Silent
Voice welcome,
instructions after first
time power up or
after default
Normal
(Standby)
Single Blink
Green every
10 secs
Dark
Silent
Silent
Smoke
Alarm
Blink R
ed
every 10 secs
Blink red
Temp-3 Voice smoke warning
Thermal
Alarm
Blink Red
every 10 secs
Blink red
Temp-3 Voice smoke warning
CO Alarm
Blink Red
every 10 secs
Blink blue
Temp-4
Voice CO
warning
Powered
Down
Dark
Dark
Silent
Silent
ENROLLMENT
The Smoke, Heat, and Carbon Monoxide (CO) sensors
each have
unique MAC ID numbers (serial numbers) that are enr
olled in
separate zones.
•
Once enrolled, the device cannot be used with anot
her system
until it is removed from the current controller. Se
e the 24-hour
Enrollment Deletion section below or the controller
’s instructions.
Enroll the Device Services (Smoke, Heat, CO)
1. Remove the detector from the base plate (tamper
switch must
be faulted when enrolling).
2. Put the control panel in Zone Programming mode.
For Lyric Controller:
Security
>
installer code
>
Program
>
(
scroll down
) >
SiX Programming
3. Pull the battery tab to activate enrollment proc
ess (be sure
batteries are seated properly to avoid a false low
battery
condition). If the battery tab has already been rem
oved and the
unit is powered up, press either Test switch for le
ss than 3
seconds to activate the enrollment process.
4. The device attempts enrollment (green LED flashe
s about 8
seconds). If successful, the green LED lights stead
y for 3
seconds and the device announces successful enrollm
ent.
If the LED does not light steady, enrollment faile
d. Retry by
pressing either Test switch for less than 3 seconds
.
All services (Smoke, Heat, and CO) are automatical
ly enrolled
in sequential (or next available) zone numbers with
the
following default attributes:
Zone
Device Type
Zone Response Type
Smoke Det.
Smoke Detector
Fire No Verification
Heat Det.
Heat Sensor
Fire No Verification
CO Det.
Carbon Mono. Det.
Carbon Monoxide
5800combo-ii 002
Pull Battery Tab
Open
Top
5800 combo-ii-003-USA
2
Serial Number
Loop Number
Zone Description 1
Zone Description 2
Zone n
Program
Zones > Serial Number.
LED
Flashes
3a) Test CO
3b) Test Smoke
1
Power - Up
( )English
( )Spanish
Transmission announcment >
Beep > Serial # sent to panel
(approx. 30 secs)
4
Press Test button for 1 sec.
3
Test
or
5
Save
NOTE
: Maintenance and CO End-of-Life are automatically
enrolled for the respective smoke and CO zones. Upo
n either of
these conditions, Contact ID code E386 “Low Mainten
ance
Smoke” is sent for the respective zone.
Supervision
: Detector supervision is factory set for 1 minute
and is not programmable.
5. To assign zone descriptors for each of the zones
and/or change
device type or zone response type, select the zone
then select
Edit
and make the desired changes. Press
Save
when done.
24
-
Hour Enrollment Deletion
Use this procedure within 24 hours of initial enrol
lment to delete
this device from the controller. This allows reenro
llment in a
specific controller in case enrollment in that cont
roller failed (i.e.,
the device inadvertently enrolled in a different co
ntroller). This
resets the device to factory default settings and r
emoves the.
communication link data in the controller in which
it is enrolled,
allowing the device to be reenrolled in the desired
controller
1. Press and hold both the Smoke and CO test switch
es
simultaneously for 5 seconds, then release. The gre
en light
flashes rapidly.
2. Press and hold both buttons again for one second
and release.
LANGUAGE SELECTION
1. Press and hold both the Smoke and CO test switch
es
simultaneously for 5 seconds until Welcome message
is
announced, then release. The green light flashes ra
pidly.
2. Pres the Test button corresponding to the desire
d language:
English: Press the Smoke (•) test button
Spanish: Press the CO (••) test button
MOUNTING
After enrolling, verify adequate signal strength by
conducting Go/No Go tests (see the controller’s
instructions) with the device in its intended mount
ing
location. Adjust the device location and orientatio
n
as necessary.
1. Using two supplied screws and anchors, mount
the base.
2. Attach the smoke detector to the mounting base
with a clockwise motion.
5800 combo-QG-004
3.Test each detector as described in the Testing
section.
4. Confirm all desired signals have been received
by the Central Station.
NOTE:
NFPA 72 recommends the installation of
detectors only after completing construction or any
other dust producing activity.
NOTE: This device should not be located within 5 ft
(1.5 m) of any cooking appliance.
- 2 -
TESTING
Test communications between the detector and the co
ntrol panel. The
detector mode has two test buttons; one for smoke t
esting and one for
CO testing.
The detector may also be functionally tested using
canned smoke and
canned CO. If the detector fails any of the test m
ethods, the detector
should be replaced.
NOTE:
Testing the detector will activate the alarm and s
end a signal to the
panel.
Before testing, notify the proper authorities to av
oid any
false alarms.
Smoke Test (Alarm Test)
Press and hold the Smoke Test button for 1 to 2 sec
onds. The
detector will sound and illuminate per Table 2 and
send a smoke alarm
signal to the control panel (all programmed smoke d
etector loops are
signaled). Verify that the smoke alarm signal was r
eceived at the
control panel.
Smoke System Test (Functional Smoke Test)
Press and hold the Smoke Test button for 3 to 5 sec
onds to enter the
functional smoke test mode.
See Functional Smoke Test section below.
Functional Smoke Test
With the detector in smoke system (functional) test
mode, spray
canned smoke into the detector. The canned smoke th
at can be used
and is approved for test include: Home Safeguard In
dustries 25S, SDi
CHEK02 and CHEK06, SDi SOLOA4, and SDi SMOKESABRE.
1.
The detector will sound and illuminate per Table 2
and a smoke
alarm signal will be sent to the panel.
2.
Verify the smoke alarm signal was received by the c
ontrol panel.
CO Test (Alarm Test)
Press and hold the CO Test button for 1 to 2 second
s. The control
panel should display and sound a CO alarm (all prog
rammed CO
detector loops are sent).
CO System Test (Functional CO Test)
Press and hold the CO Test button for 3-5 seconds t
o enter the
functional gas test mode.
See Functional Gas Test section below.
Functional Gas Test
Solo C6 brand canned CO may be used to verify the d
etector’s ability to
sense CO by utilizing the RealTest® feature as foll
ows:
1. Press and hold the CO test button for 3 to 5 sec
onds. The green
LED will start blinking once per second indicating
the detector is in
RealTest® mode. (If the detector will not go into R
ealTest® mode,
the CO sensor may be in fault or at end-of-life.)
2. While the green LED is blinking once per second,
spray a small
amount of canned CO directly into the CO gas entry
port.
3. Upon successful gas entry and if functioning pro
perly, the detector
will go into CO alarm and send an alarm to the cont
rol panel.
4. The CO test will automatically clear when the CO
clears from the
sensor or in 30 seconds if no CO was introduced.
HUSH FEATURE / ALARM SILENCE
If required, the audible alarm for smoke and CO con
ditions can be
silenced for 5 minutes by pushing the “Test/Hush” b
utton. In addition,
low chirping can be silenced for 12 hours when the
Test/Hush button is
pressed.
During a Smoke alarm, if an alarm condition still e
xists after the 5
minute hush period, the alarm will sound. The hush
feature will not
operate at levels above 4%/ft smoke concentration.
During a CO alarm, if carbon monoxide is still pres
ent after the 5 minute
hush period, the alarm will sound. The hush feature
will not operate at
levels above 350 ppm (parts per million) carbon mon
oxide.
CO SENSOR END-OF-LIFE FEATURE
When the CO sensor has passed end-of-life, a troubl
e signal will be
sent to the control panel (if programmed). This ind
icates that the CO
sensor inside the detector must be replaced. If unr
esolved for 30 days,
the detector will chirp every 45 seconds. The typic
al life of the CO
sensor is ten years from the date of manufacture. I
t is recommended to
periodically check the “Replace by” date located on
the label on the
back of the detector head.
CO Test Button
Smoke Test Button
5800 Combo ii -005
Follow
instructions
on the Can
CO Gas Port
Test
Buttons
HEAT
≥ 12”
(30.48 cm)
SMOKE
*
Solo C6
CO
1
2
3
4
( )
30
0
45
5
~ 5 sec/seg
15
or
( )
Table 3: Carbon Monoxide Detector: Events &
Contact ID Codes
Event
Alpha Keypad
CS Report
CO alarms
CO Alarm
CO alarm (CID 162)
CO test
CO Alarm
CO alarm (CID 162)
Low battery
Lo Bat
RF low-battery
(CID 384)
Detector
supervision
CO Trouble
RF sensor supervision
(CID 381)
Detector end-
of-life/trouble
CO Trouble
Sensor trouble - end-
of life (CID 380)
Tamper
disarmed = CO Trouble
armed = CO Alarm
RF sensor tamper
(CID 383)
Table 2: LED Indication & Sounder during Test and T
rouble
MODE
Status LED
(Top)
Side LED
Windows
Sounder
Speaker
Smoke Test
Blink Green
once every
second
Dark
Temp-3
Warning of
alarm signal
transmission.
Voice smoke
warning
Smoke System
(functional) Test
Blink Red
once every 10
secs
Blink once
every
10 secs
RealTest™
Functional CO gas
entry test –
Waiting
for gas entry
Blink Green
once per
second
Dark
Silent
Voice
instructions for
testing; warning
of alarm signal
RealTest™
Functional CO gas
entry test -
Upon
successful gas
entry
Blink Red
once every
10 secs
Blink blue
every
10 secs
Modified
Temp-4
Voice carbon
monoxide
warning
Low Battery
Blink Amber
every 10 secs
Dark
Chirp
every 45
secs
after 7
days
Voice instruc-
tions when
chirp is
silenced by
pressing either
test button
Smoke
Maintenance
Blink Amber
every 5 secs
Dark
Silent
Voice smoke
maintenance
instructions if
either test
button is
pressed
CO Trouble
Double Blink
Amber every
5 secs
Dark
Silent
CO End of Life –
First 29 days
Double Blink
Amber every
3 secs
Dark
Silent
Voice end-of-
life instructions
when either test
button is
pressed
CO End of Life –
after 30 days
Double Blink
Amber every 3
secs
Dark
Chirp
every 45
secs
Voice end-of-life
instructions
when
either test button
is pressed
Power Up
Blink Green,
for 30 secs
Dark
Silent
Language set
instructions only
on first time
power-up
Normal (Standby)
Single Blink
Green every
10 secs
Dark
Silent
Silent
Freeze Warning
(low temp)
Blink Red
every 10 secs
TESTING SIGNAL STRENGTH
Perform this test in accordance with NFPA 72 inspec
tion, testing and maintenance requirements to deter
mine a strong communication
path with the control panel.
1. Activate the wireless system’s GO/NO GO TEST mo
de.
2. Press the detector’s Smoke TEST button (•) for
1-2 seconds. The detector should immediately transm
it an alarm signal to the control
panel. The built-in horn will start to sound about
2.5 seconds after pressing the button.
3. The wireless system’s keypad should emit at lea
st three beeps when the alarm transmission is recei
ved and display the transmitting
detector’s zone number.
4. When the console has received the test signal,
the horn will stop and a few seconds later the dete
ctor’s zone number will clear from
the console display.
5. If the console does not respond as noted, and i
f this is an initial installation, try moving the d
etector to another location that provides
proper reception. Also be sure that the detector ha
s been “enrolled” by the control panel (see Enrollm
ent section). Then, repeat the
test.
6. Turn off the system’s TEST mode (typically secu
rity code + OFF).
- 3 -
LED INDICATORS
The SiXCOMBO has a multi-color top LED:
Green = Supervisory indication; blinks during power
on, reset,
and during normal operation
Amber = Signal maintenance and trouble events
Red = Alarm condition (either Smoke or CO)
Side LED windows indicate alarms:
red = smoke
blue = CO
CLEANING
NOTE:
Notify the proper authorities when the system will
be
temporarily out of service.
IMPORTANT:
This detector must be tested and maintained
regularly following NFPA-72 requirements. The dete
ctor should
be cleaned at least once a year.
1. Remove the detector from the base plate by turni
ng
counterclockwise.
2. Clean the outside casing with a cloth. Ensure th
at the holes
on the front of the alarm are not blocked with dirt
and dust.
Canned air can be used to remove any dust or debris
.
3. Reattach the detector to the base plate by rotat
ing
clockwise.
4. Test the detector to insure it is fully function
al. (See Testing
section).
5. Notify the proper authorities and Central Statio
n when the
system is back in service
REPLACING THE BATTERIES
5800combo QG-006
2
3
1
5
4
30
0
45
20
10
Panasonic CR123A
batteries only
~ 10
sec / seg
CAUTION:
The batteries used in this device may present a fir
e
or chemical burn hazard if mistreated. Do not rech
arge,
disassemble, heat above 100°C (212°F) or dispose of
in fire.
Use only Panasonic CR123A Lithium batteries. Use of
other
batteries may present a risk of fire or explosion.
Keep used
batteries away from children. Dispose of used batt
eries
properly.
Remove old batteries. Wait 10 seconds and then rep
lace with
four new batteries. To avoid a low battery indicati
on when
installing new batteries, all 4 batteries must be i
nstalled within
15 seconds of installing the first one. Any low bat
tery condition
that may have occurred should clear when the base p
late is
installed.
NOTE:
Constant exposure to high or low temperature or hi
gh
humidity may reduce battery life.
LIMITED LIFE OF CO SENSOR
This detector is manufactured with a long-life elec
trochemical
carbon monoxide sensor. Over time the sensor will l
ose
sensitivity and will need to be replaced. The life
span of the CO
sensor is approximately ten years from the date of
manufacture.
Periodically check the detector’s replacement date.
Remove the
detector head and refer to the ‘replace by’ sticker
placed on the
underneath side of the detector. The sticker will i
ndicate the
date the detector should be replaced.
Reminder:
This detector is also equipped with a feature that
will
signal the panel once the CO sensor has passed the
end of its’
useful life. If this occurs, it is time to replace
the detector.
What to do if the detector goes into CO alarm:
If the detector goes into CO alarm (4 beeps), immed
iately
move to a spot where fresh air is available, prefer
ably
outdoors, where the air is safe and call your secur
ity service
provider. Tell your provider the detector alarm st
atus, and that
you require professional assistance in ridding your
home of the
carbon monoxide.
This detector is NOT:
•
A substitute for the proper servicing of fuel-bur
ning
appliances or the sweeping of chimneys.
•
To be used on an intermittent basis or as a porta
ble alarm
for the spillage of combustion products from fuel-b
urning
appliances or chimneys.
Carbon monoxide gas is a highly poisonous gas which
is
released when fuels are burnt. It is invisible, has
no smell and
is therefore is impossible to detect with the human
senses.
Under normal conditions in a room where fuel burnin
g
appliances are well maintained and correctly ventil
ated, the
amount of carbon monoxide released into the room by
appliances should not be dangerous.
CAUTIONS
:
•
This device will only indicate the presence of car
bon
monoxide gas at the sensor. Carbon monoxide gas may
be
present in other areas.
•
This device is designed to protect individuals fro
m the acute
effects of carbon monoxide exposure. It will not fu
lly
safeguard individuals with specific medical conditi
ons. If in
doubt consult a medical practitioner.
•
Installation of the device should not be used as a
substitute
for proper installation, use, and maintenance of fu
el-burning
appliances, including appropriate ventilation and e
xhaust
systems.
MAINTENANCE
Do not paint, and do not use cleaning agents, bleac
h or
polish the detector.
NOTE:
Before performing any maintenance on the detector,
notify the
proper authorities and Central Station that mainten
ance is being
performed and the system will be temporarily out of
service. Disable
the zone or system undergoing maintenance to preven
t any unwanted
alarms. Power must be removed from the detector bef
ore performing
maintenance of any kind.
The SiXCOMBO detector reports maintenance issues to
the
control panel and communicates them visually and au
dibly per
Table 2.
Trouble feature:
When the sensor (supervision) is in a trouble
condition (such as a detector that is dirty or CO s
ensor non-
functioning), the detector will send a trouble sign
al to the
control panel. Depending on the issue, the detector
must then
be serviced or replaced.
NOTE:
Smoke detectors are not to be used with detector
guards unless the combination is evaluated and foun
d suitable
for that purpose.
SYMPTOMS OF CARBON MONOXIDE POISONING
Carbon monoxide bonds to the hemoglobin in the bloo
d and
reduces the amount of oxygen being circulated in th
e body.
The following symptoms are examples taken from NFPA
720;
they represent approximate values for healthy adult
s.
Concentration
(ppm CO)
Symptoms
200
Mild Headache after 2-3 hours of exposure
400
Headache and nausea after 1-2 hours of exposure
800
Headache, nausea, and dizziness after 45 minutes
of expo- sure; collapse and unconsciousness after 2
hours of exposure
Many cases of reported carbon monoxide poisoning in
dicate
that while victims are aware that they do not feel
well, they
become so disoriented that they are unable to save
themselves by either exiting the building or callin
g for
assistance. Also young children, elderly and pets m
ay be the
first to be affected.
CO ALARM ACTIVATION
Per UL standard 2075, the SiXCOMBO detector has bee
n
tested to the sensitivity limits defined in UL stan
dard 2034.
CO Alarm Thresholds
Parts per Million (ppm)
Detector Response Ti
me (Min.)
30+-3ppm
No alarm within 30 days
70+-5ppm
60-240
150+-5ppm
10-50
400+-10ppm
4-15
SPECIFICATIONS
Electrical Specifications
Voltage: ..........................................
............................ 3 volts DC
Battery Type: .....................................
................ CR123A lithium
Battery Manufacturer: .......................... Pa
nasonic CR123A only
Number of Batteries: ..............................
.................................. 4
Sensitivity: .... UL limits .9 to 3.50%/ft / ULC li
mits .9 to 3.08 %/ft
Thermal alarm: ....................................
................ 135° F (57° C)
Freeze trouble: ...................................
.......... 41° F typical (5° C)
Audible Signal: ...................................
............................. 85dBA
Physical Specifications
Diameter: ................................. 6.3 in.
Diameter x 1.65 in. Thick
..................................................
.... (16.002 cm x 4.19 cm Thick)
Weight: ...........................................
.................... 14.3 oz (406 g)
Operating Temperature Range: ........... 32° - 100°
F (0° - 38° C)
Storage Temperature Range: .............. 14 - 158°
F (-10 - 70° C)
Operating Humidity Range: .........................
............. 20-95% RH
APPROVAL LISTINGS
FCC
Listed to UL 268 & UL 2075.
Listed to CSA 6.19.
Other Standards: RoHS
FEDERAL COMMUNICATIONS COMMISSION STATEMENTS
The user shall not make any changes or modification
s to the equipment unless authorized by the Install
ation Instructions or User's
Manual. Unauthorized changes or modifications could
void the user's authority to operate the equipment
.
FCC STATEMENT
This device complies with Part 15 of the FCC Rules,
. Operation is subject to the following two conditi
ons: (1) This device may not cause
harmful interference, and (2) This device must acce
pt any interference received, including interferenc
e that may cause undesired
operation.
SUPPORT & WARRANTY
For the latest documentation and online support inf
ormation, please go to:
https://mywebtech.honeywell.com/
For the latest warranty information, please go to:
www.honeywell.com/security/hsc/resources/wa
.
For patent information, , please go to:
www.honeywell.com/patents
MyWebTech
Warranty
Patents
REFER TO THE INSTALLATION INSTRUCTIONS FOR THE CONT
ROL WITH WHICH THIS DEVICE IS USED FOR DETAILS
REGARDING THE LIMITATIONS OF THE ENTIRE ALARM SYSTE
M.
2 Corporate Center Drive
P.O. Box 9040, Melville, NY 11747
© 2017 Honeywell International Inc.
www.honeywell.com/security
Agile Ref: 800-24314 10/17 Rev. A
I56-6241-0000 10/17
- Uploaded