Qolsys IQ Hardwire 16-F - Install Guide
Related Products
Related Categories
Document Transcript
Document#: IQHW16FQG Dated: 10/16/18
The
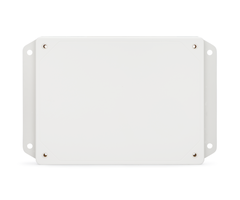
IQ Hardwire 16-F
offers a cost effective way of integrating hardwired security & smoke
detector zones with the IQ Panel 2. It includes backup battery charging, 500mA of 12volt
auxiliary power, an onboard siren relay, built-in status LED’s for each zone and support for
up to 10 two-wire smoke detectors. Normally Open and Normally Closed contacts are
supported as well as powered zones like motion sensors and glass break detectors.
Note: Not for use with CO detectors
INSTALLATION MANUAL
TECHNICAL SPECIFICATIONS
Document #: IQHW16FQG
Revision Date: 10/16/18
Qolsys Part #: QS7133-840
STEP 1: INSTALL THE HARDWARE
If mounting inside a
metal can, the antenna
must extend outside the
enclosure to ensure RF
communication
Confidential &
Proprietary.
Made in Taiwan.
Page
of 3 Qolsys Confidential and Proprietary.
1
Input Voltage:
16.0VDC Plug-In Transformer
Backup Battery:
12VDC 5AH Max (not included)
Dimensions:
5.5” X 3.5”
Operating Temperature:
32 to 122F (0 to 50C)
Humidity:
95% RH Max
EOL Supervision:
4.7k Ohm
Input Zones:
15 N/O or N/C
Smoke Zone:
1 two-wire smoke loop, 10 detectors
max. Support for System Sensor® 2W-B, 2WT-B,
2WTA-B*
*Detector models should not be mixed
Auxiliary Voltage Output:
12VDC @ 500mA Max
Tamper Zone:
Used for case tamper, no resistor
Relay Contact:
60VDC/1A Max drives siren
1.
Mount the IQ Hardwire 16-F vertically in your desired location
2.
Install the provided antenna into the “ANT” terminal at the top of the unit free from
obstructions
3.
Wire all hardwired sensors into the terminals marked Zone 1-15. Zone 16 is reserved
for two-wire smoke detectors:
a.
All zones must have a 4.7k resistor (included) installed in either the N/O
(parallel) or N/C (series) position
b.
Wire the positive and negative leads from powered devices, such as motion
sensors and glass break detectors, into the “AUX” (+) and “GND” (-) terminals to
power the devices.
c.
Wire a tamper switch into the tamper terminals without using a resistor. If a
tamper switch is not being used, permanently shunt the zone with a piece of
wire.
d.
Optional: Wire the hardwired siren (60VDC/1A Max, see wiring diagram)
4.
Plug in a 5Ah lead acid backup battery with included battery leads (battery not
included)
5.
Using the provided 16vDC power supply, connect the leads to the terminals marked
“+16.0V” & “GND”, then plug then supply into a wall outlet.
(Note: dashed wire is
positive)
Compatible Control Panel:
The IQ Hardwire 16-F
is for use with the Qolsys IQ Panel 2 only. Refer to
the full IQ Panel 2 installation manual for typical
installation layout, including recommended
locations of the control unit, detectors and
notification appliances.
Enclosure:
For UL Installations, Qolsys enclosure
QR0073-840 shall be used.
Listed Resistor:
For UL Installations, Qolsys 4.7K
Fire Resistor Part # QR0072-840 shall be used on
the 2-wire fire loop at the end of line.
Wiring:
For UL Installations, recognized limited
energy cable shall be used.
UL REQUIREMENTS
INFORMATION Trip (Open/Close) each
hardwired zone one at a
time.
Two-wire smoke detectors
should be activated via the
test button on the detector
or with a can of smoke
Once all desired zones have been
learned, press the “EOL LEARN”
button to exit “Auto Learn” mode.
The EOL CAL LED will turn OFF
indicating you are no longer in
“Auto Learn” mode and all zone
LED’s will turn OFF.
When a sensor has been
tripped, the Zone LED will
illuminate and stay on until
you exit “Auto Learn” mode.
STEP 3: PAIRING INDIVIDUAL ZONES/SENSORS
Customize the sensor
type and settings as
desired. Repeat for
each zone.
The IQ Panel 2 will
“chime” indicating it
has found a new
sensor. Touch “OK”
to proceed.
Trip the module by opening
the tamper switch or by
removing jumper installed in
Step 1 from the “Tamper”
terminals, then replace
STEP 2: PAIR THE IQ HARDWIRE 16 WITH THE IQ PANEL 2
Note: This step is required and allows the IQ Panel 2 to control the wireless Siren Relay, reset the two-wire smoke detectors after a fire event and supervise the battery,
AC power status, aux power out & tamper. The IQ Panel 2 must have the Tx/Rx 319.5 MHz SRF card installed with RF PIC 11.1.4 G2 or higher.
Press and hold “EOL LEARN”
for 1-2 secs.
(all Zone LED’s
flash and then turn off)
EOL CAL LED will turn ON.
This indicates the module is
now in “Auto Learn” mode
Follow the onscreen
prompts on the IQ Panel
to finish the enrolling
process. The IQ Hardwire
16-F should be learned in
as a “Hardwire Translator”
EOL LEARN Button:
Enters and exits
“Auto Learn” mode
MEMORY RESET Button:
Clears
memory and resets the device to factory
defaults when held for 3 seconds during power
up
PROCESSOR LED:
Flashes during
normal operation
RF XMIT LED:
Flashes when RF
transmission is being sent
TROUBLESHOOTING
EOL CAL LED:
Flashes when no zones
have been learned in yet. ON when device is
in “Auto Learn” mode. OFF when device is in
“Normal Operation Mode”
ZONES 1-15 LEDs:
OFF while in “Auto
Learn” mode unless a zone has been learned
in or tripped, then ON. OFF while in “Normal
Operation Mode” unless a zone is open, then
ON or if a zone is tampered, then FLASHES
ZONE 16 SMOKE LED:
ON when smoke
detector is in alarm
How to Clear the Memory:
Power
down the unit by unplugging the battery leads
and the power supply. Hold down “Memory
Reset” for 3 seconds while re-applying power
to the device. Processor, RF Xmit and EOL
CAL LED’s will begin to flash rapidly indicating
that the module has been reset
Page
of 3 Qolsys Confidential and Proprietary.
2
Place your IQ Panel 2 in “Auto
Learn” mode:
Settings/Advanced Settings/
Installation/Devices/Security
Sensors/Auto Learn Sensor
INSTALLATION MANUAL Page
of 3 Qolsys Confidential and Proprietary.
3
WIRING DIAGRAM
ALT SIREN WIRING - A
ALT SIREN WIRING - B
Optional
Siren Relay wiring using GND (-)
and IQ Panel 2 “EXT Siren” output*
Optional
Siren Relay wiring using 12v (+)
and IQ Panel (GEN1) “Buzzer” output*
This device complies with part 15 of the FCC Rules. Operation is subject to the following two conditions: (1) This device may not
cause harmful interference, and (2) this device must accept any interference received, including interference that may cause
undesired operation. Changes or modifications not expressly approved by the party responsible for compliance could void the
user's authority to operate the equipment.
This device complies with Industry Canada licence-exempt RSS standard(s). Operation is subject to the following two
conditions: (1) this device may not cause interference, and (2) this device must accept any interference, including
interference that may cause undesired operation of the device.
Cet appareil est conforme avec Industrie Canada exempts de licence standard RSS (s). Son fonctionnement est soumis aux
deux conditions suivantes: (1) cet appareil ne doit pas provoquer d'interférences et (2) cet appareil doit accepter toute
interférence, y compris celles pouvant causer un mauvais fonctionnement de l'appareil.
FCC ID: 2ABBZ-RF-CHW-FIRE
IC: 11817A-RFCHWFIRE
*
Not intended for UL Installations
*
Not intended for UL Installations
INSTALLATION MANUAL
For Service Contact
COMPANY NAME:
ADDRESS:
PHONE:
UL 1023, UL985, ULC 1023
& ULC S545 LISTED
- Uploaded