2GIG DBELL1: Program to Lyric Controller
Related Products
Description
A recent firmware update to the Lyric Controller and Lyric Gateway allows support for 2GIG 345Mhz sensors, such as the 2GIG DBELL1.
This update is important because, in the past, there was no option for adding a doorbell to your Honeywell system.
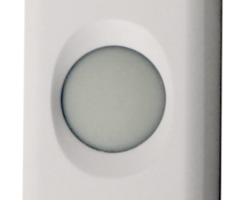
The 2GIG DBELL1 is a dual purpose, water resistant doorbell with a 350-foot range, chime options and a weatherproof seal designed to provide reliable operation in poor conditions.
Following the instructions outlined in this video will allow you to pair the DBELL1 to your Lyric system. The DBELL1 can be wired into your existing electrical system, or connected wirelessly, which is a quicker and more popular option for today’s high tech central control devices.
The video describes how to pair the DBELL1 to your system wirelessly. There are many different options you’ll need to select when pairing the DBELL1 to your system.
These options allow you to control how the DBELL1 and your Lyric controller react when the doorbell is pressed.
In the video, you’ll learn the best options for pairing the DBELL1 to your system, so that it operates like a standard doorbell that will chime and/or voice announce when pressed, instead of acting as a sensor which will set off your alarm. For example, the device type for the sensor must be set to “other” to ensure that when the doorbell is pressed, it operates like a doorbell. Otherwise, it would operate similarly to a silent alarm, where the alarm company would be notified of a disturbance when the DBELL1 is pressed.
Once you’ve set the device type, the video also outlines the different options and choices you’ll have when programming how the doorbell reacts. There are several different chime options, as well as the option to voice announce the doorbell when it’s pressed. In this video, you’ll also configure other settings like whether or not the sensor is supervised, and whether or not the sensor reports to the central control center for your alarm.
The DBELL1 can be auto-enrolled just like any other sensor on the system. Auto enrollment can save you time by sending important identifying information from the sensor to the Lyric controller, as opposed to having to key in this information by hand. Once the DBELL1 is enrolled in your system, it’s almost ready for use.
Once your sensor is enrolled in your system, the video outlines how you can alter the settings for the doorbell to change chimes, volume, and voice announcements at any time. Keep in mind that if you choose to disable voice announcements for the DBELL1, you’ll also be disabling voice announcements for other sensors as well.
Once everything is set to your liking, you can mount the doorbell to the exterior of your home and begin using it. You may also choose to add additional doorbells to the other entrances of your home. Additional doorbells can be set up by following the same processes outlined in the video for the front door.
Transcript
[LAUGHTER] Are you gonna say anything?
[INAUDIBLE]
[LAUGHTER]
Are you videoing me right now?
Of course. Yeah.
All right.
[CHUCKLING]
What is this thing called?
D bell one.
D Bell one? All right. So today-- hi, DIYers.
[LAUGHTER]
We're going to set up the D bell one.
But what happened?
OK. So the MR3 firmware update that just released for the lyric controller and the lyric gateway-- we're gonna focus on the controller though-- now supports 2GB 345 mHz sensors. So we did a little testing and we found the Doorbell. The D bell one is compatible with the lyric now.
So we configure the zone. We're going to go into programming. Go to zones. Let's put it on zone nine here.
[BEEPING]
So the device type you want to set first, and that is on other. The reason we chose other is because it's the only one that allows you to trip the doorbell without setting the alarm off, and also having it chime and voice announce on the panel. So if you choose other, response type, hit the down key all the way down until you see garage monitor, and choose that. And then set your chime.
[ALARM SOUNDING]
We did doorbell. You probably want to keep it supervised, you know. When it goes offline set a live report to none so it doesn't report out to the central station. And then you can label your door.
[ALARM RESPONDING]
This one's our front door. So we'll do front.
[ALARM RESPONDING]
Door. Save. We actually already learned this in but we'll clear it just so you can see it. You can auto enroll it just like a regular sensor. But we just tripped the motion, again. So if I press this quickly.
[BEEP]
And again.
[BEEPING]
And again.
[BEEPING]
Now we have our serial number, our loop one, which is assigned this.
[BEEP]
Save it. We'll back out. We'll go all the way to the home screen by hitting the home button.
[BEEPING]
We'll go to settings just to make sure our volume and voice and chime are enabled. If you want it to just chime and not voice announce, you can disable this-- realizing that it'll also disable your voice announcements for your other zones. We'll keep it on for now.
[BEEPING]
Crank up the volume. Save it.
[ALARM SOUNDING]
Front door.
There you go. Now we have a new doorbell for our rear panel. It's a 2 GB sensor. And Honeywell was lacking a doorbell so now we have one.
[LAUGHING]
- Uploaded