2GIG GC2: Updating Firmware Using Updater Cable (UPCBL2)
Related Products

Description
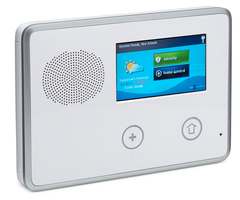
In this video, Julia from Alarm Grid shows you how to update the firmware on a 2GIG Go!Cointrol GC2 System by using the 2GIG UPCBL2 Updater Cable. The easiest way to update GC2 firmware is to activate the system for alarm monitoring, and then push a firmware update down from Alarm.com. Since the 2GIG GC2 can only communicate across cellular, and it does not have a popular IP communication pathway available, performing a remote OTA update on the GC2 takes longer than most other alarm panels. Furthermore, if you have a 2GIG GC2 System on a very old firmware version that cannot be set up with Alarm.com service, then you will need to update the firmware using an alternative method, namely the updater cable or the easy updater tool. These methods are much more inconvenient than performing an OTA update, so they ate only advised if there is no other option available.
The 2GIG GC2 is one of the first ever wireless alarm panels that was ever used as a DIY security system. Its ability to be programmed locally by the end-user, and the fact that it has a communicator that can be swapped out and replaced with a new one at any time made is a very popular opton for DIY users. Today, the most common reason to update the firmware on an existing 2GIG GC2 System is to get it to support a newer LTE communicator. In 2021, there is a big rush to update GC2 Systems to LTE radios, as older 3G radios will soon stop working as part of the 3G sunset. In order to use an LTE communicator on your GC2, it is likely that you may need to update the panel's firmware version. Once the panel has ts firmware update, you can install an LTE cellular communicator ibside the GC2, activate the unit for monitoring, and expect to use the system for a very long time.
http://alrm.gd/get-monitored
Transcript
[AUDIO LOGO] Hey, DIY-ers, this is Julia with AlarmGrid and today I'm going to show you how to perform a firmware update on a 2GIG GC2 using the update cable. You may have seen an older video that we have hosted on the site which was made by 2GIG and which is somewhat outdated now. I think it uses Windows 7. So we thought now would be a good time to make an update since a lot of people are looking to do firmware updates in order to support the newer LTE communicators. To check the version, click "security", then click "menu", "toolbox", enter the master code 1, 1, 1, 1, hit the right arrow, and then click on "version", and our panel is a version 1.19.1. This is just a picture of the updater cable that we're going to be using. You won't really see it so much in the video. So as you can see it's something you can purchase on our site or you can buy it elsewhere, but the process that we're going through today is going to show you how to use this cable to do the update. Now before we begin, you will need just a basic familiarity with the Windows operating systems in order to successfully do this. In addition, you need to either be logged in with a user that has administrator rights or logged in as the administrator on your Windows machine when you're going through this process. When you apply a firmware update, it doesn't change any programming in the panel, so you're not going to have to reprogram any of your sensors or anything once this is finished. It just updates the firmware. If you happen to be using a TS1 touchscreen keypad with your system, the TS1 and the GC2 need to be on the same version of firmware. So if you update one you have to update the other. The files that we download-- I'll show you that the firmware file for the TS1 is included when you download this file. We are not, however, going to go through the process of updating a TS1. Today we're only going to be going through updating the panel. If your system is monitored, be sure you contact your monitoring station and put the system on test before you start this process. There are probably going to be some signals that are sent because of this and we have to power down and so on. We are using Windows 10 Home Edition for this. If you are on a Windows machine you can find out what version you have by going down to the Start button near in the bottom left. If you right click and then go to System you should get a screen that shows you your specs for your Windows operating system. So here are your windows specifications. This is Windows 10 Home. Just in the interest of full disclosure, everything says that this firmware update can't be applied from a Mac operating system. However, the machine that I am using is a Mac with VMware running Windows 10 in the virtual machine. And this process has worked. So I know that that can be done. So that's the preliminaries. Let's go ahead and get into this. So to find the firmware update, because normally this is only available to alarm dealers that can log into the 2GIG website. This is one of the things that we host on our site so that end users can get to it. So I just did a search for 2GIG GC2 firmware update and my first result was the one for our site. So I'm going to go ahead and go to that page. And you'll notice when you go to this page that there are two firmware is that you can download. One is for the updater cable, which is the one that we're going to concentrate on today. The other is for the updater tool which is a different way to update. We're not going to talk about that today. So we want to go ahead and click on the file for the update cable. And we host this from Dropbox. So it's going to take us to a Dropbox page, and actually it shows us the three files that are within the zip file. So this file is a zip file. That you can see here at the top. And what we want to do once this page loads completely, as you can still see it isn't finished yet loading. Eventually we're going to get a download icon that we can click on. Here we go. OK. Now I'm going to choose Download. I want to do a direct download. By default it wants to go into the Downloads folder which is fine. I also would recommend leaving the file name so that if nothing else-- if you called us for assistance we would know what file name to tell you to look for. So we're going to say that. It's going to download. It doesn't take long. And we're finished with this page. So we're going to go ahead and close out of here up here. We want to continue downloading. This is just Google Chrome showing us our download progress. This may or may not come up for you. It depends on how your machine is set up. OK. So if you do get this screen you can just hit "Show in folder", and it's going to bring up the Downloads folder. Assuming that you don't-- I want to go ahead and close out. And in Windows 10 you can get to the same place by just clicking on File Explorer, and then going to Downloads, and in our case, it's the first file. So the first thing we need to do with this newly downloaded file is because it's a compressed file we need to unzip it. So I'm going to right click and "Extract All". And it's going to ask us where we want to extract those files and by default, it wants to go in the Downloads folder, which is fine. I'll go ahead and extract it to there. OK. So now we have-- in our Downloads folder we have another folder with that name and then these are the three files that were contained in that zip folder. So the first thing that we're going to do is we're going to run this-- the cdm21228_setup. This is actually the driver file for the cable itself. So we want to run it. And we want to run it as the administrator. So just to be sure that we have the proper permissions, if you right click on it and run as administrator, it should setup properly. Although it is going to prompt you. So we have to say "Yes" that we want to allow it to install. And it's going to go through, and just follow the steps in the Wizard. You have to agree to the license agreement to continue. Assuming that you do, and now we can finish. Now, that process is not 100% completed until you plug-in the actual cable. And I'll show you what I mean by that. So I'm going to close this, and close this for now. If you go to Windows, I'm sorry. If you go to the Start button and you're right click on it and go to Device Manager, you're going to get a list of all your devices. And if you go to ports, COM & LPT. These are COM ports and LPT would be printer ports. You can see right now I have COM1 and COM3. Once I plug-in the updater cable it's going to complete a driver installation and it's going to give me another COM port. So here we have the 2GIG GC2, it's been removed from the wall, it's just lying flat on a desk. The set screw which would be here in the top has been removed. So we're going to go ahead and take the back of it off and expose the inside. We'll actually see if we can use this to keep the third hand out of the way. And there we go. OK. So the first thing you want to do is power this down. You can do that by unplugging the battery, and then unplugging the AC barrel connector. So I would have to reach across there. All right. Now, while it's power down, you're going to plug-in your updater cable. And it's very important that you plug this in correctly. It should be-- you can see that there's a 2GIG logo on this updater cable, and it's on the same side as the slots. So you can see that there are slots on this side and no slots on this side. The side with the slots should go facing the cellular communicator. So you're going to go ahead and plug this in, and then it should only fit in there one way. So be sure that the 2GIG logo, again, is facing towards the cellular communicator. Now, once you have this plugged in then what you're going to do is you're going to begin the update on the computer and then after that has begun, then we're going to power up the 2GIG GC2. So I'm going to start the process on the computer and then I'll power on the panel, and we'll go from there. If I go back to Device Manager now after having plugged in the cable, and I go to ports-- COM & LPT, now I have a USB serial port marked as COM4. And that's important. We need to remember that it's emulating COM port 4. So now we've got our cable driver installed. It is showing up as COM4. Our next step is to go back to our files. So we go back to the File Explorer, we go back to Downloads, we go into our folder that we created. See this was the zip file. This is what we initially downloaded from the AlarmGrid website, and this is the folder that was created when we unzipped it. So these are the extracted files. And you have two files here that you can run as firmware updates. The one that says CP1, you notice there. CP stands for control panel 1. TS1 stands for touch screen 1. That's for the touchscreen keypad, though we're not going to be dealing with that one today. So what we want to do is we want to right click on the file for the control panel, we want to send to desktop-- create shortcut, and you'll notice we have our shortcut here. So we can go ahead and close this. I'll move this out a little bit so it's easier to see. Now, this is where we determine or where we tell the software what our COM port number is. So we're going to right click on this shortcut, and I apologize that it's going slowly but I promise I have right clicked on it. And we want to go to Properties. And in the properties we want to go to the Target-- and this is basically the address or the location of where this shortcut goes to. So at the very end, we want to go all the way to the end of the Target and be sure you're after the quotation mark after exe. And you're going to do a space, dash, or hyphen c-- no, I'm going to do a capital C as in COM port. And then the number 4 because in our case it was COM port 4 that was being used for the updater cable. And then you're going to do a closed quotation mark. And then you're going to Apply then OK. I'm going to right click "Run as administrator", "Yes", then after I see this screen, I'm going to plug-in battery and then the AC transformer for the panel. Oh, there we go. That's the problem. "Yes". Now it's important once you start this process-- once you see the word flashing that you not touch anything. Don't touch the panel, don't unplug anything, wait for this to complete before you make any changes at the computer or at the panel. Currently my panel is face down on my desk, but I can tell that the LEDs on the front are flashing off and on while this fittingly enough says flashing. We should be getting close to the end of the update and there's a screen that quickly comes up that says "Pass", and then it's going to go back to saying "No panel" basically after it disconnects from the panel. That's what we're waiting for. Pass and then no panel. OK. So no panel is what we were looking for that means that it's effectively disconnected from the panel. Once the flash upgrade is finished, we need to power down the panel again by unplugging the battery and AC. Then we need to disconnect the updater cable. And then we can plug-in the battery, plug-in the AC, restore the back cover, and allow the panel to complete a boot, and then we can check the version. System disarmed. Ready to arm. OK. So to check our version we're going to go through "security", "menu", "toolbox". We want to enter the master code, so 1, 1, 1, 1. Arrow right, "version", and you can see our version is 1.19.3.1, which is the latest version for the 2GIG GC2. And-- [BEEP] --to get back-- [BEEP] --just hit back or you can hit the Home button and it'll take you back there. So that is how you firmware update a 2GIG GC2 using the update cable. If you have any questions about this process or about alarm systems in general you can send us an email to support@alarmgrid.com. You can also visit our website at alarmgrid.com. If you like this video, please give it a thumbs up down below and subscribe to our channel so that you can be notified when we release future videos. I hope you found this video helpful. Have a great day.
- Uploaded