2GIG Go!Control: Firmware update walkthrough
Related Products

Related Categories
Description
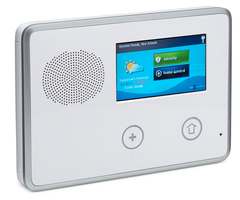
The firmware on the 2Gig Go!Control control panel can eventually become outdated. You can, as an end-user, update the firmware to ensure you always have the latest versions and features. You will need a Windows based computer and the update firmware cable.
This video will explain, in detail, how to update the firmware on your 2Gig Go!Control panel. These step by step instructions will make it easy to stay on top of your updates and always have the latest firmware versions and features.
To begin, you will need to access the 2Gig dealer website and download the latest firmware versions to your computer. The web address for these downloads is given in the video.
The video will walk you through the download process. You will need to log in to your account, or register for an account if you don’t already have one. Once you are logged in, follow the video guide for the download links and language selections.
The video will instruct you on how to find the downloaded file and which file to extract to your computer. While the extraction is taking place, you should make sure that the update cable is not plugged in and that your control panel is completely powered down.
Once you run the file to set up your computer to talk through the update cable to the control panel you will need to identify the communications port that the cable will be plugged in to. The video will show you this process in detail so that you don’t make a mistake.
After you have verified the communications port being used, follow the video to create a shortcut for the program and edit the properties to run through the communications port you defined earlier. After you have done that you can run the program.
From here, as you will see in the video, you need to plug the update cable into the correct 4-pin port on the control panel. The video will discuss how to ensure you are in the right port. After the cable is plugged in, you will then power on your control panel.
Once power is restored to the panel the program on the computer will ask if you want to flash the panel. You should click yes and the flashing process will begin. Note: this process can take over 5 minutes.
After the flashing is complete you will need to once again power down your control panel completely. Unplug the updater cable from the panel and power the panel back on.
Once the control panel reboots the new firmware update will have been installed and will be live with the new features it comes with.
In the event you have a second panel that needs to be updated, follow the instruction on the video. Because you have already set up the program on the computer, you will have less steps to perform the second time.
Transcript
Greetings. This video is going to show you how to use a Windows based computer and a 2GIG updater cable to update the firmware version on a 2GIG panel. The first thing we need to do is download the update files we need onto our computer. Those can be found at dealer.2GIG.com.
Now, you will need to log in to this website. If you haven't done so, you will need to register. Once you've done so, what you'll do is you'll find the firmware update tool link right here underneath support. Go ahead and left click on that. And then what you'll do is-- it will bring you to new page. And here's where we'll find the Update Tool Kit in English, French, and Spanish. Now, which ever one you select that will be the language that's then put on the panel. So I'm going to select English for this demonstration. I'm just going to left click on this blue bar right here that says Update Toolkit.
Now, once I've done so, it'll start the download process onto my computer. It takes anywhere from about 2 to 15 minutes, depending on your internet speeds. Now, the next thing you'll need to do is you need to find the file on your computer. Now I've set mine up to download on to my desktop. A lot of people have their browsers, like Internet Explorer, or , Firefox or Chrome, set up to download their files to the Downloads folder. So that might be a good spot to look for it if you can't find it.
Once you've found it, you just want to double left click on it, open it up. Now I have two files, one is the Mac OS X file which we're going to completely disregard. The other one is the 2GIG V 1.10.1 Firmware Update Tool. Now, mine is 1.10.1. That is the most recent version at present.
So I'm just go left click on that, and hold it down, and just drag that over to my desktop. It's going to ask you to confirm it. I'm going to click Yes. Now, it's going to start copying the files to that spot and it's going to unzip them, or uncompress them. Now, while it's doing that, make sure that your updater cable is now plugged into your computer or the panel. And make sure your panel is powered down.
Now, as you can see, I put a new folder on our desktop. I'm going to close this folder down. And as you can tell, this one is zipped up. It's got the little zipper. This one is unzipped, or uncompressed, and it's nice and open. Just go ahead and double left click on that. Now, I've got all the files I need right here. Now, I have the instructions. I have the CVM setup file. This is going to be the first one that we run. I've got the CP file. And the TS1 file. Now, the process is pretty much identical if you're going to use the CP which is for your Go!Control panel or the TS1 which is for the secondary keypad. So regardless of which one we're going to use, the steps are pretty much identical.
All right, the first step is to run this setup file. So go ahead and double left click on that. It's going to ask you to confirm it. Go ahead and click on Yes. Now, it's going to install the drivers which allow the computer to be able to recognize and talk to that cable. Once it's done, the installation box will disappear. And then what we're going to do is we need to figure out what COM port the updater cable is plugged into. The easiest way to do that on Windows 7, is just going down to the Start menu. Left click on that. And now, I've got my cursor right down here in the Search Programs and Files. We're just going to type in device space manager. I don't even need to finish it, and already at the top, I've got Device Manager up here. You just want to left click on that. And it will bring up Device Manager.
Now, I'm going to scroll down to Ports. I'm going to left click on the little arrow, and see what my USB serial port is. It says COM5. Now, if you happen to have multiple COM ports, and are not sure which one your cable is plugged in to, just go ahead and unplug your cable and see which one disappears. And then plug it back in to confirm that that's the correct. COM port. So mine is COM5. So I just need to remember the number five in my case. In your case it could be two, three, four. It could be a lot of different numbers. You just want to remember which one it is. I can then close that down.
Now, for this demonstration, we're just going to do the Control Panel. Now, again, if I was going to do the secondary keypad, I would do the identical steps but using this file down here, the TS1 file. But since we're doing the Go!Control panel, I'm going to use this one. So what I'm going to do is I'm going to right click on the CP file. I'm going to scroll down to Properties. Excuse me, I'm actually going to go to Create Shortcut. I apologize. So click on Create Shortcut. I now have this new icon and this new file here. And then I'm going to right click on that shortcut, and that's when we go to Properties.
All right. So in the target field, I want to click right here at the very end. I want to left click at the very end after the quotation marks. And I'm going to hit the space bar. The minus, or hyphen. And then I'm going to hit C5. For COM5. And then I'm just going to hit Apply. And OK.
Now, you're pretty much done with the setup process. So I'm going to double left click on the shortcut. It's going to ask me if I want to run it. I do. And now, I've got the Pinging No Panel screen. So it says Pinging, right here, No Panel. I can see up here it starts with CP, which means Control Panel. I'm going to update the Control Panel. So everything is good.
So the next step is, I need to plug the cable into my panel. Now, you do want to make sure that you plug the updater cable into the four pin spot on the panel. Some of the older versions of our panel have a five pin spot as well. You want to make sure you definitely have it plugged in to the four pin spot. I'll be right next where the GSM is that.
Once you've done that, the next step you'll want to do is you want to-- let me just make sure I've got mine set up-- The next thing you want to do is power up your panel. I plug in the backup battery first, and then I apply power. And as soon as I do so, it'll bring up a new dialogue box on my computer. And it's asking me to verify that I want to flash the panel. And I do, so I'm going to click Yes. And now the flashing process will start.
And it's got a indication bar right here that'll let you know your progress. Now, it usually takes around six minutes to complete this process. So we're going to fast forward for those six minutes.
All right, now we fast forwarded six minutes. By now your panel should have powered up. Or at least, it should be close. Right now it says perform delay after flashing. So it's actually already been flashed. It will quickly say Pass, in green. It'll have a green background anyway. And then go back to the Pinging No Panel screen. And you'll be ready to basically flash another panel if you need to.
Now with the current panel, what you'll want to do is power it down. And unplug the updater cable, and then power it back up. It's ready to go. It's now-- for me anyway, 1.10.1.
Now, if you are flashing another panel, you don't need to do a lot of the set up we've already done. All we need to do is-- let me just close all this so we can-- you just go back to our file, go to that shortcut, double left click on it, click on Run, and now it's ready to go again. Now, if I had a second panel, all I would need to do is plug the cable into the four pin spot, and power up the panel and it'll start flashing another panel.
So as you can tell, a large portion of the time it takes to get this ready is just the initial setup portion. After that, it's very, very easy to flash, and to flash a panel to another firmware if you need to.
And again, the TS1 is the exact same process. I'll do that real quick. I'm going to right click on that. Create a shortcut of the TS1. On my shortcut, I'm going to go to Properties. Add my space, minus C5. Because that's what my COM port was. Hit apply, and OK. And now my TS1 is ready to go. So if I need to do a firmware update on a TS1, it's almost the exact same process. Now, what I would do is I would just plug the cable directly into my TS1. There's a four pin, a female four pin end, so you'd need to make sure you had the male adapter on the end of the updater cable.
If you need a diagram of what that looks like or where that's plugged in, you can find that on our update instructions. As you can see, this is the male adapter pin for the TS1. That's where you plug it in on the Go!Control panel. And then on the TS1, this is where you'll plug it in at. So if you'd need a little bit more assistance, you can find it there. You can always call either 2GIG tech support or your company's technical support line.
All right. I hope you enjoyed this. Have a great day.
- Uploaded