Adding an External Keypad to a Qolsys IQ Panel 2
Related Products
Related Categories
Description
In this video, Jarrett from Alarm Grid shows you hot to add an external keypad to a Qolsys IQ Panel 2 Security System. Adding an extra keypad will allow you to control the system from a new location. Many users add secondary keypads near their back doors or their garage doors for arming and disarming the system as they come and go. Another common option is to place a keypad by the bed for arming stay and triggering panics in the event of an emergency.
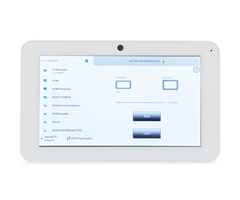
For a standard Qolsys IQ Panel 2 System, the only secondary keypad option is the Qolsys IQ Remote. This is a touchscreen keypad with a user interface that mimics that of the IQ Panel 2. The keypad pairs with the system across a WIFI network. It is great for performing any system function, except for advanced programming. You can use the IQ Remote for arming and disarming, controlling smart home automation devices, live-streaming Alarm.com Security Cameras, activating a system panic, and more. Most users prefer the IQ Remote Keypad for its ease-of-use and attractive design. A maximum number of three (3) IQ Remote devices can be paired with a single Qolsys IQ Panel 2 System.
If you have a Qolsys IQ Panel 2 Plus, then you have an additional option besides the IQ Remote. The DSC WS9LCDWF9 is a wireless PowerG Keypad that works with all versions of the Qolsys IQ Panel 2 Plus. Unlike the IQ Remote, which has a touchscreen, the DSC WS9LCDWF9 PowerG Wireless Arming Station is a push-button keypad. It is not as fancy or as technical as the Qolsys IQ Remote, but it is still good for basic arming and disarming. Just keep in mind that the DSC WS9LCDWF9 cannot be used with the original IQ Panel 2, as that system does not support the PowerG wireless protocol.
https://www.alarmgrid.com/faq/how-do-i-add-an-external-keypad-to-a-qolsys-iq-panel-2
http://alrm.gd/get-monitored
Transcript
Hey, DIYers. It's Jarrett with Alarm Grid here. Today, we're going to be going over how you would add an external keypad to the Qolsys IQ Panel 2 Plus. And now, there are actually two keypads that you can use with this system. Today we're really only going to be going over one and how to add that one, but the secondary keypad is a good one you can use, too. Now the one keypad that we're going to be covering today is the Qolsys IQ remote. As you can see it is a touch screen keypad and it looks really similar to the Qolsys IQ Panel 2 plus itself. The only difference it's a little bit smaller and the cameras are a little bit different, but either way, this is a very good keypad you can use. The other keypad that is available is by DSC. So DSC PowerG arming station keypad and the model number 4 is WS9 LCD WF9. As I said a PowerG keypad you can use so that if you need to put the keypad in a very long distance or in a detached building away from the main panel, that would be a very good keypad you can use because PowerG is meant to go long distances, right? Now, the Qolsys secure remote is the normal one that you would use. It is normally what we see a lot of people use. Now there are two ways you can set up this keypad with the Qolsys itself. You can either set of the V, the Wi-Fi network in the home or the building or you can set it up with the panels access point. We'll go over that in a little bit. But this keypad it does need to be on the same exact Wi-Fi network as the Qolsys panel itself. It cannot be on a different Wi-Fi network. Depending on how far your Wi-Fi network goes or how far can reach within the building that you're going to be setting this up in. If this is not getting a good signal or it's not able to do set up on the same Wi-Fi network, you can try the access point. The access point is another method you can go ahead and connected with, but the access points it doesn't go that far. I mean, I would say you can get a good leg maybe 20, 30 feet with it, but if you have a lot of walls, lot of doors-- if you have a lot of obstructions in between the keypad and the panel, you might want to take a look into the PowerG version. The PowerG arming station is can be a bit better for long distance because as I said, PowerG is meant to do that. So if you're going to be setting up this keypad out of that Wi-Fi network or too far from the system, now will look into that or the keypad. Now, one thing you want to keep in mind, though, the Qolsys is like a remote to this touch screen as you will see. Now the DSC arming station, though, the PowerG version, that is not touch screen. It is just an LCD screen type of keypad. It looks like the normal one. It has like the numerical buttons and everything, but as I said, it will go a longer distance. Now, in certain occasions, you can set up different keypads. I mean, there's different occasions as to why you would go and do that. A lot of the reason or most of the time people just want to have a secondary access point in the building or home to be able to arm and disarm the main panel. The other reason is if you're worried about a burglar coming in and trying to destroy the system. All right, what you could do or what we see a lot of people do as well is put the keypad near the entry point, whether it be the front door, to the garage, or in the business near the front door as well. So that if somebody comes in and tries to destroy the panel control the keypad, not the actual system. And they normally store the system either like a closet, in their bedroom, really depends on where you would like to put that panel. But you could put it in strategic points so that it's not being destroyed and it's still sending out the signals, still alerting the central station, everything that you need that system to do. Now if you want to go ahead and pair the Qolsys IQ remote to the panel, first, you want to make sure that the actual or the main panel itself is set up to your Wi-Fi and obviously is powered on. As you can see, this is powered on, but if you haven't set it up to your Wi-Fi yet, all you have to do is just go to the top gray bar at the top. Just tap on that. It's going to bring in this drop down going to go down the Settings and you want to go into Advanced Settings. Now normally when you tap on an Advanced Setting, it is going to bring up a keypad ask you for a certain code to enter. Normally, you can enter the installer code or the dealer code to get into that menu. The default is 1111 or the default installer code is 1111, default dealer code is 2222. Now, the reason why I didn't pull this up is because we had the system set up or didn't pull the windows because we have partitions set up. Whenever you have partition set up, it's not going to ask for that code. But if you don't have those setup people look out for that. But when you're in this menu, you want to go into Wi-Fi and then this is going to bring up the different Wi-Fi networks that are available. So as you can see, we have Alarm Grid connected already. It's already set up to our local Wi-Fi, but if you didn't need to set up, whichever one you have. You just tap on that Wi-Fi network and normally, it would pull up this window. It would ask you for a password. So you just enter the password and then this connects button will light up, and then all you got to do is just tap on that, it's going to go through this process and connect to the Wi-Fi network. Now, once you have confirmed that the panel is connected to the Wi-Fi, then at that point, you want to go ahead and power up your keypad. As of right now, we don't have this power it up, but what you want to do is grab the cable that comes with the keypad. It's just a certain little barrel connection type cable with its transformer. As you can see, we have the transformer right here and you have the spade lugs at the bottom with the positive and negative. Basically, these are not going to come-- normally, they're not going to come pre-wired in, so you just need like a Phillips head screwdriver. You take these little lugs and you just match it up with the positive and the negative here on the transformer and just screw those in. On the other end of it, you have a barrel connection, right? This is going to be a site that's going to plug into the panel. So what you'll do is on this side-- or I don't know if you can see it, but there is the barrel connector on the back of the panel itself, so you just plug that in. And there is already a battery backup built into this keypad, you don't have to open it up to set it up or anything. It's already wired in. So all you have to do is just plug in the power, and then power up the keypad. So now that we have the barrel connection plugged in, it's going to go ahead and plug in the transformer. And then it power up your keypad. If you look on the side there is a power switch, power button. [LAUGHS] So you just hold down the power button for a few seconds and that's going to go ahead and turn on and it's going to go through its process, see a little Android guide right here with a low battery status. It's going to take a few minutes for the power out there, so just give it a little bit. But once it's powered up, you'll see the next menu come on. All right, so as you can see the keypad is completely powered on. It brings you to the window where you see the Wi-Fi network. You can see this option or the side over here where you have the option to pair or test the keypad. We're not going to be going to this side yet. We're not going to be pressing pair yet. You want to make sure that this keypad is connected to Wi-Fi. Now before we jump into this, I do just want to explain real quick though very important for the-- if you're using a keypad with these systems, no program that can be done through the keypad, all right? If you want to add any sensors, if you want to add any different automation devices or change some settings to the system, it is all done in the main panel itself. But unfortunately, you can't do it to the keypad and that is the same thing for the power to keep that as well. So now let's go back into this. What you want to do is pair this to the same exact Wi-Fi that this system is paired on as well. So as we saw, it's on Alarm Grid. So we're going to be looking for Alarm Grid here and I'm just going to tap on that. It ask for the password so you just type in the password then. So it's going to go through it's authentication. I might have type in the password incorrectly. So if you accidentally type it in incorrectly, this is also important. You could just tap on it. So right now, she's going through the authentication process right now. And it keep saying authenticating and then save. Normally, means the password is incorrect. So if you tap on it, normally it would tell you the password is incorrect. But if it's going through that, that's only what it means. So if you tap on it and just press forgets, it's going to completely forget it and you can go ahead and re-enter that password. So if you tap on Alarm Grid or your Wi-Fi name, go ahead and type in the password. So as you can see that obtaining IP address and it's connected. So that's how you'll know that this panel is connected to the Wi-Fi. Now, would you want to go ahead and do is on the panel itself is you want to put it in the pairing process. So to get to that point, you want to tap on the small gray bar at the top, go into Settings and then go into Advanced Settings. And then that's where you would enter the installer code or the dealer code, the default installers 1111 default dealer code is 2222. So you want to go into installation devices, Wi-Fi devices because right now we paired this to Wi-Fi. It's not through the access point. So now you want to go into IQ remote devices. You can get to this window. So now you just press pair, right? And then on the panel itself, you're going to tap on pair as well. Now, it's going to go through its process, sometimes you can take a few minutes so just give it a little bit, be a little patient with it. But once it does that, then it's going to start downloading a patch. It's basically downloading things from the system. And then once that's done, it's going to go ahead and normally pull up the main menu of the Qolsys system. It's going to mimic like what you would see whenever the system is at its main menu and they tell you now it's completely pair. If it doesn't pair, it will say that it was unsuccessful and you can go ahead and either reconnect with the Wi-Fi or you can try to repair it again. With applying everything and it's getting a firmware update from the system as well, it does a quick reboot sometimes. So just want to keep that in mind. And once this is done this should go ahead and bring up the main menu of the panel itself. [BEEPING] It's going to go through its reboot process saying good to see you. [LAUGHS] It's being a little friendly. OK. It's still going through its pairing process, actually. And there you go. Now I pulled up the main menu of what the system would go ahead and show. So once you have it paired on the main panel itself, you just tap on the home button at the bottom and then bring it back to the main menu. So as you can see, it is mimicking or it is basically copying the panel. It looks exactly the same. They look very similar, but this is when you know that the keypad is paired. Now to show you real quick, I mean, just the settings and everything on the system. You just tap on the great barge same as that one. You go into Settings. It's going to ask you for the code, and it gives you a very limited view of what you can do with it. This is what I mean as to why you can't do any programming because it doesn't give you any of those options. It would have to do all of that on the main panel itself. But you could do a network test. If you had any cameras paired to the panel, you can go ahead and change the settings via that. You can go into the Wi-Fi and repair it to a new Wi-Fi, full reset, do stuff with the display, just very basic stuff on the keypad. All right, so as I discussed, there is a secondary way to be able to setup the IQ remote to the main panel, and that is via the access points on the system itself. Now, if you want to go ahead and set that up, what you want to do is just tap on the gray bar at the top and then go into Settings. Tap on Advanced Settings. Again, you want to go ahead and enter the installer code and the dealer code. Go into installation, devices, Wi-Fi devices, and you will see access point settings. So you just tap on that and this is going to give you the option to go ahead and set it up. And you can see it's not enabled so all of this down below is grayed out. So if you just tap on the little box, you can get a little check in there. It's going to go ahead and start the process of turning that on. All right, and then below it, you have the SSID so that you know what the network is named and you have the THCP/IP range. You can go ahead and change the pattern if you want to for this access points. You can go ahead and activate WPS pairings. You can connect it to your current Wi-Fi if you wanted to or-- well, no, not or but this is how you can view the password, though. So if you're not sure what the password is re-access point just go down very below or at the very bottom and just tap on access point password. We're going to go ahead and change that because bit of a long password. So you can change it to something simple, just password one for it now. All right, so now if you tap on access point password, it's now change to password one. So on the panel itself or the IQ remote itself to go ahead and connect it to the access point at the bottom right or the bottom left of the keypad, you're going to see add Wi-Fi network. Well, actually, take the back. If you look at the top, it was able to pull up the access point from the keypad or from the panel. It's called IQ Peanuts2AL622. And then this is going to bring up-- when you tap on it, this is going to go ahead and bring up the option to enter your password. So at this point, you're going to enter-- well, this one in this case, we're going to enter password one. But whatever password you set up, you want to go ahead and enter that, and then tap on Connect. It's obtaining IP address and now it is connected. And then what you want to do is on the main panel itself, you want to go ahead and pair that. So you're going to go out. You're going to go back into IQ remote devices. I did actually remove this from the network. I reset it so we can go ahead and do that. But in this instance, you want to just tap on pair and then you can tap on pair on the keypad itself. It's going to go through its pairing process, just like it did when it was connected to the Wi-Fi. So it's just getting a template as well just like the last time. So you just want to go through-- you just want to give it a few minutes so it can go ahead and pair completely. [BEEPING] All right, so now it is pulling up the main menu of the panel. So once you have confirmed it's paired just tap on the house icon at the bottom of the panel. And as you can see, it is successfully paired. So I did just want to point something out real quick. As you can see, we do have partition 1 or we have partitions enabled on the Qolsys system, and right now you're seeing partition 1. Now, if you were to scroll down or scroll up, you will see the second partition. So right now we have two partition set up on the Qolsys. Now if you had multiple partitions, all you do is just keep scrolling and be able to see partition 3, partition 4, how many you want to set up. Now, whenever you are pairing a Qolsys IQ remote to the Qolsys panel, this is actually going to by default be assigned to partition one. And if you've needed to be able to control different partitions like partition 2, partition 3, however, much you have or how many you have. You will need to assign this keypad specifically to that partition. So in order to be able to do that, you actually have to go through the programming on the panel itself because remember you can't do the programming on this keypad. And the other thing I want to point out really quick before we jump into the programming is, it only shows partition 1 here, right? On here, if you can scroll up you see partition 1, you see partition 2. But if you were to try to scroll, it's only shown partition 1. It's not able to pull a partition 2 or partition 3. So whichever partition you want us to be able control, you to need to assign into it. And then once you assign it, it's going to show that partition. And obviously if you want to arm this on that partition, you just tap on it like you normally would on the panel and then click arm stay or arm away. Now if you want to assign this keypad to a different partition-- right now, it's on partition 1. So we're going to go ahead and change this to partition 2. If you want to go ahead and do that on the panel itself, you're going to go back to that gray bar at the top. You're going to tap on Settings, you go to Advanced Settings. And remember, whenever you go into Advanced Settings, normally, it's going to bring up a window asking you to enter the code, whether it be the installer code or the dealer code. In this instance, it didn't do that because the partitions are enabled and we're actually entering that code when we power up the system. So I've already entered the installer code, so right now it's taking me to the installer code menu because it knows that I'm technically an installer operating the system. So now we're in the Installer Tools Menu, what you want to do is go to a installation and then go to devices, Wi-Fi devices. And then you'll see IQ remote devices over to the right, be tap on that. It'll pull up the IQ remote that you have programs. I have this set up on Wi-Fi now. Actually, changed it from the access points. So you can see the IP address is pulling up for this keypad and right now the name is IQ remote one because it's only the first keypad. Status is active. Now if you want to change the partitions, if you want to change certain settings for this keypad. You tap on this little pencil icon for edit. And then, you'll now see the next window where right here your partition name. Right now it is assigned to partition one. You have IQ remote one. If you want to change the name you just tap on that. You can go ahead and change it to something else if you'd like to. You have a custom description. You can assign a certain name to the keypad if this is in a garage, basement, anywhere, or back door. But if you want a custom one, you just click custom description and then just name it the way you want to. Now for the partitions, that's what we're doing here. So if you tap on partition 1, you'll see partition 2, 3, and 4 pop up. Now, let's go ahead and change this to partition 2. So on partition 2, it's still set the partition 1 as you can see. But once we click Save, you're going to see partition 2 pop up or come up on the screen. So now this keypad is assigned to partition 2. So if I were to hit the house icon-- as soon as you're done with that, all you have to do just hit the house icon. It'll take you back to the main screen and now we have our keypad assigned to partition 2. So if I were to arm the system in arm stay mode-- right now, partition 2 is arms. And if you go into the panel right now you see partition 1 disarmed. But if you go down, partition 2 is now armed. I mean, obviously if you want to just disarm it, tap on it. [BEEPING] Invalid user code. Please, re-enter a valid user code. Well, actually, I'm typing the master code incorrectly or what. Now, the default master code is 1234 if you ever need to disarm the system or you haven't changed that code yet already. But now we have the partition 2 disarms. If we had this on partition 1, you would do the same exact thing instead of saying partition 2 and arming partition 2. It would then instead arm partition 1 and so on and so forth. Now, one thing I do want to show you here is whenever we have a sensor on the other partition. Now, I have a sensor out of the partition 2. So what I'm going to go ahead and do just for a demonstration, I'm going to change the keypad to partition 1 and I'm going to arm partition 1 and I'm going to fault the sensor on partition 2 to show you how a partition works, right? Remember how I said that if you have sensors on specific partition, you don't want them to interact with the others, then you set up the partition. So living room partition 1, and then office partition 2. So what we're going to do is change this to partition 1. So we go back to the main screen now. I'm just going to go ahead and arm the system through the keypad. So we're arming partition 1. So now we have partition 1 on arm stay mode and I have a sensor here programmed to the 5816 Honeywell door contact. And if I were to fault it, nothing's happening. This on partition 2, partition 1 can't be affected by this at all. So if I were to scroll down, you see the sensor is actually faulted right now. If I were to close this center is not going to be faulted anymore, and then as soon as I open it again it is going to be faulted. But again, it is not affecting partition 1 at all. So that's really how the partitions would work. If you want to arm a certain area in the home or office, anywhere, right? If you want arm a certain area and not have it or have another area disarms and not be affected partitions. That's why you would set those up. So just going to disarm it. [BEEPING] Partition 1 is armed. And that is how you add an external keypad to the Qolsys IQ Panel 2 plus. If you have any further questions about the Qolsys IQ Panel 2 plus or alarm systems in general, please email us at support@alarmgrid.com or go to our website, alarmgrid.com. If you find this video helpful, please like, subscribe. If you want notifications of future videos, please click the bell icon. This is Jerry with the Alarm Grid. Have a wonderful day.
- Uploaded