Changing the SiXCOMBO Batteries
Related Products

Related Categories
- Wireless Carbon Monoxide Detectors
- Wireless Combination CO/Smoke Detectors
- Wireless Carbon Monoxide Detectors
- One-Go/All-Go Wireless Smoke Detectors
Description
In this video, Michael from Alarm Grid shows you how to change the batteries inside a Honeywell SiXCOMBO Smoke, Heat, and CO Detector for a Honeywell Lyric Alarm System. The Honeywell SiXCOMBO uses four (4) CR123A batteries for power. It is advised that you use lithium batteries, as they will provide a much longer battery life than alkaline batteries. By installing lithium batteries inside your SiXCOMBO device, you should only need to replace the batteries about every five (5) years. When the batteries are low and in need of replacing, a low-battery trouble condition will appear for the associated zones on the Honeywell Lyric System.
Replacing the batteries for the SiXCOMBO is quite simple. First you must open the detector by pressing the SiXCOMBO against its back plate and twisting the sensor counterclockwise to unlock it. You can then separate the sensor from its back plate and gain access to the battery compartment. You can then remove the old batteries. It is recommended that you wait at least ten (10) seconds after removing the old batteries before inserting the new ones. When inserting the new CR123A batteries, you must observe polarity. The positive (+) and negative (-) ends of the batteries should be facing the proper direction as indicated by the SiXCOMBO sensor. Once the new batteries are secure, you can then close the sensor. Properly align the sensor against the back plate, and twist it clockwise so that it locks into place.
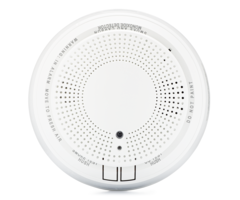
In addition to replacing the batteries every few years, the other maintenance you must perform for the SiXCOMBO is testing it regularly. The SiXCOMBO has two (2) test buttons on the front that can be used for testing signal transmissions to the panel. These are perfectly fine for testing the sensor to get an updated Certificate of Alarm (CoA). But if you want to go above and beyond and test the actual functionality of the sensor, then you will need to use canned smoke, a hair dryer on the max setting, and canned CO gas. Remember to always place your system in test mode before testing the SiXCOMBO in any manner. This is very important for preventing false alarms on your system.
https://www.alarmgrid.com/faq/how-do-i-change-the-batteries-for-the-honeywell-sixcombo
http://alrm.gd/get-monitored
Transcript
Hi DIYers. This is Michael from Alarm Grid. And today I'm going to be showing you how to replace the batteries in the Honeywell SiXCOMBO-- combination smoke detector, heat detector, and carbon monoxide sensor. This is the wireless combination life safety sensor for the Honeywell Lyric. So the Honeywell SiXCOMBO-- it's somewhat of a battery hog. It uses four, CR123A batteries. Those are lithium CR123A batteries. You definitely want to use lithium to get the longest product life-- longest battery life that is. Four, CR123A batteries come included with the sensor so you're good to go from the start. And the expected battery life is about five years. So you're covered for a while. These are also known as camera batteries. So if you're looking for them-- and you definitely want to get lithium, like I said. And these are three volt batteries. So the way that low battery detection works-- when the battery voltage drops too low, falls below a certain threshold, you'll get a notification on your panel that the batteries are low and it's time for replacement. So then you'll know to go and replace your batteries. And you want to do that as soon as possible because if the battery voltage drops even lower then the sensor will go offline entirely. You'll get RF supervision trouble assuming you have that enabled on your system. And you won't be sending signals to the panel. So if there was a fire or an outbreak of carbon monoxide gas, then you wouldn't get the report on your system. And that's very dangerous. So as this is a life safety sensor, you really want to make sure that you're replacing the batteries when told to do so by the panel when you get the low battery trouble condition. The first thing you have to do with the SiXCOMBO is you have to open it up. We'll have my hand simulate the ceiling or the wall. And you just twist it-- twist it counterclockwise and you can pull it off. [BEEPING] Right there and you see we're going to get a tamper condition on the panel there. We're going to have that be quiet by pressing the green House button right there. I'm going to set this aside right now-- the bat cover. We have our four batteries right here, the CR123A batteries-- the lithium batteries. These are the Panasonic brand. They're are a few different recommended brands you can use. Refer to the manual if you want to know which type to use. We'll take them all out and simulate putting them back in. We didn't bring other batteries today because like I said this is somewhat of a battery hog, and we didn't have random batteries just sitting around. I'm sure we do somewhere in the office but I didn't bother to find them. We'll just put these back in. These are good batteries we didn't have a low battery condition on our panel but we wanted to show you anyway. You can see that we have removed the batteries I literally just took my finger and pull them all out-- pretty simple. Now like any battery you do have to observe polarity-- that is positive and negative. You see there is a positive end and a negative end for the four batteries. You can look at all of them, they all have the symbols there so you know which way to insert the batteries. We'll do this one at a time. We have the battery here and we're going to do the positive ends in the proper slot. So we just want to put it in there-- there's the first battery. And then again, observing polarity, and we'll just put that in. And then we'll do the other two, right there-- there that's three. And get the last one-- and we got that in. [BEEPING] And we'll get that to be quiet, right there. We'll enter in our master code to get that to-- do that one more time, just to get it to stop showing the trouble condition. Well we still have the tamper off so that's why it's still doing that. So we'll worry about that in a little bit. But now we have our batteries inserted so we can go and put our cover back on. That'll go away once we put the cover on, and press down the tamper switch. What we want to do-- we want to align it-- so that way it's on the sensor evenly. If you were doing this against the wall then you wouldn't really see what you're doing. But just kind of line it up like this. So that way see how it's all flat on there. That's what you're trying to simulate when you have it on the wall. But we have ours against the wall now and then we turn it clockwise and it clicks into place-- locks into place and it's nice and closed. The last thing I want to do-- like I said, we did put the tamper cover back on the cover tamper that is-- the cover tamper. And we're going to press the green button here so we can get to our keypad and we'll enter in our master code, which ours is at the default-- one, two, three, four. Disarmed. Ready to arm. And now-- Chime. Now with the cover tamper properly applied we are able to clear the trouble on the system. And if we had a low battery condition, we would have fixed that because we would have taken out the old batteries and we would have put fresh ones in. Again these are CR123A batteries-- lithium batteries, that's what you want to use-- camera batteries, lithium camera batteries. So that's how you replace the batteries in your Honeywell SiXCOMBO. You have an expected battery life of five years. So when you get a low battery trouble condition make sure to replace the batteries as soon as possible so that way the sensor doesn't go offline. This is a life safety sensor it's very important they keep it online to protect yourself and those around you or your property-- it's very important. If you have any questions about the Honeywell Lyric, or the Honeywell SiXCOMBO, or about lithium batteries CR123A batteries, sending email to support@alarmgrid.com. If you found this video helpful, make sure to give it a thumbs up below to like the video. And remember to subscribe to our channel for updates on future videos. We hope you enjoyed the video. Thank you.
- Uploaded