Enrolling a Versa GE Sensor into a Qolsys IQ Panel 2 Plus
Related Products


Related Categories
Description
In this video, Jorge shows users how to enroll a Versa GE Sensor into a Qolsys IQ Panel 2 Plus. You can auto-enroll the sensor by putting the system into its auto-enrollment mode and then activating the sensor's tamper cover. The system will recognize the sensor and allow you to adjust its settings.
Note: The Interlogix and similar sensors have a TX ID and a DL Code. Both are often shown on the sticker on the box. The DL Code is what is transmitted by the sensor to the Qolsys IQ Panel 2 Plus. The TX ID reverses the first two (2) digits and the last two (2) digits of the DL Code, so if you're looking at the TX ID, and comparing that to the number learned into the panel, it will appear jumbled.
The Versa GE Sensor is a door and window contact sensor that operates at 319.5 MHz. It is a very versatile sensor, and it will work with nearly any alarm system that accepts this sensor frequency. It is important to note that not all versions of the Qolsys IQ Panel 2 Plus accept the 319.5 MHz frequency. There also versions of the IQ Panel 2 Plus that accept 345 MHz signals or 433 MHz signals instead of 319.5 MHz signals.
If you are wanting to use a Versa GE Sensor with an IQ Panel 2 Plus, you must make sure it is a 319.5 MHz version. This is also sometimes referred to as the "legacy Interlogix" model. Interlogix/GE Sensors, as well as wireless sensors manufactured by Qolsys also operate at the same 319.5 MHz frequency. You can use any of these sensors with a 319.5 MHz IQ Panel 2 Plus. There are a few different ways to determine if your IQ Panel 2 Plus is a 319.5 MHz version. The easiest way is to check the box. A 319.5 MHz IQ2+ will have a gold and white box.
If you have a different version of the IQ Panel 2 Plus, then there are nearly identical sensors you can use with the system. VERSA manufacturers door and window contacts across most popular alarm system frequencies. There is an available option for all versions of the IQ Panel 2 Plus. For the 345 MHz version, you can get a VERSA-2GIG Sensor. And for the 433 MHz version, you can get a VERSA-DSC Sensor. The VERSA-GE, the VERSA-2GIG, and the VERSA-DSC are all the same sensors, the only difference is the operating frequency for enrollment.
http://alrm.gd/get-monitored
Transcript
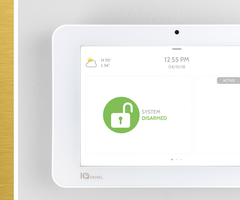
Hey DIY-ers, I'm Jorge from Alarm Grid. Today, I'm going to be showing you guys how to learn in a Versa GE Sensor with an IQ2 Plus Panel. Now, before you go ahead and start learning your sensor, you want to make sure that, first of all, you have the correct IQ2 Plus Panel, because there's about six different ones, and that you have the correct sensor. So the IQ2 Plus Panel that you have, there's about six different ones. The one that you're going to want to use is the one that has a 319.5 daughterboard card built-in, so it's the Interlogix and Qolsys daughterboard card built-in. There's two other ones that have Honeywell and 2GIG Legacy daughterboard cards. There's two other ones that have DSC Legacy daughterboard cards, but the ones that you want are going to be one of the two that have the Interlogix and Qolsys daughterboard card built-in to it. Now, they do have-- the reason I'm saying there's two different ones is because there's an AT&T or Verizon one. So, you just want to make sure that you just have the IQ2 Plus that has the Interlogix and Qolsys daughterboard card, or else this sensor will not work with your system. And when I go into the programmer screen, I'll show you how to confirm that you have the correct panel as well. Now, this Versa Interlogix sensor, it transmits at a 319.5 megahertz frequency, which is what Interlogix sensors and most Qolsys sensors work at. There are two other versions of the Versa sensor, there's 5800MINI, which is the Honeywell version of the Versa, and then there's the Versa 2GIG sensor, which is again the same sensor just intended for 2GIG panels. The Honeywell one, the 5800MINI is also a Versa sensor just intended for Honeywell systems. Now, the one way to tell what sensor you have if you already have them installed in the house, if you moved into it and they're already there-- is you'll actually if you pop the cover you'll see that the daughterboard card on the inside is a different color. So, for the Interlogix one they're actually blue, but you can see by the actual blue box. The Honeywell one, the 5800MINI has a red daughterboard card and the 2GIG Versa has a yellow daughterboard card in it. So right now, I'm going to go in and show you guys how to pop the cover, show you guys how to get the serial number in case you want to confirm whenever you guys are learning it in, and how to just make sure what sensor it actually is. So, I'm going to go ahead and open up the box and I'm going to take out the sensor and I'll show you guys right now how to pop the cover. All right, so first thing you're going to need is a flathead nothing too big, just the perfect size. There's about three little slots on the side of the sensor. You can see I've already tried popping the cover off so kind of like damage the plastic a little bit, and then there's one on the very top. So, what you're going to do is you're going to try to pop at least two of them out. So you put the flathead flat in twist, excuse me, flathead in you're going to twist and that pops one side off, and then if you pop the second one off then it should pretty much the rest should come out very easily. Now, if you look at the inside, you'll see it has the blue daughterboard card that is the serial number, alpha 34 delta 61, and it comes with a CR2032 lithium coin battery. All right, so these guys are ever looking at replacing batteries, all you guys have to do is pop the sensor open and you guys can actually get the model right off the battery and replace it like that. I'm going to go in and put the cover back on, we've confirmed the serial number. Popping the cover off is also going to be another method that you can use to learn the sensor, and I'll show you guys that as well when we get to that in the video. But first to learn the censoring, we have to get the panel into programming mode. All right, so easy thing about this panel and the sensors is that they have an auto-enrollment mode feature. All you have to do is put the panel in learning mode, pop the sensor or fault the sensor, and the panel automatically brings in the serial number and we can actually confirm it with the sticker on the inside of the daughterboard. So I'm going to go in and wake up my screen, ooh, that was a little too fast. So, the first thing to get into programming mode you're going to hit the little gray button up at the very top of the IQ2. You're going to go to Settings, right now it's giving me an error because I don't have my panel connected to Wi-Fi, if you have yours connected you will not see this screen. I'm just going to hit OK to skip past this. I'm going to go to Advanced Settings. To go into programming, to learn in sensors you need to have your installer code or your dealer code. The default codes that come with this system are 1, 1, 1, 1 or 2, 2, 2, 2, you or your company may have changed it, so you want to make sure you are using the correct code. So I'm going to use 1, 1, 1, 1, go to Installation, Devices, Security Sensors, and this is where-- before actually learning the sensor, I'm going to show you guys how to confirm what panel it is you guys actually have, all right? So I'm going to go to Add Sensor, and if you want to confirm which panel it is you have, you see where it says source, if you open up that dropdown it's going to give you the frequency that it has. So, you see this one says 319, it's actually 319.5, but they're just kind of abbreviating it. So, it is a 319 panel, if you guys have the Honeywell one you guys will actually see it says 345, and if you guys have DSC you'll see it says 433, all right? So, that just confirms that we do have the panel with the Interlogix and Qolsys daughterboard card in it. So, I can go ahead and back out of this now, and I'm going to do the easiest learning method, which is just go to Auto-learn sensor, it says it is now in a learning mode. Once you go into an Auto-learn-- once you go into that menu, the panel is now listening for frequencies from different sensors. As you see there, this one just picked up on a sensor 1740 alpha 2, however, when we looked at the serial number that was not the case for this number. So, it's picking up on a different sensor that's probably being opened up somewhere on the office, so I'm just going to go hit and Cancel, because that's not the one I wanted to learn in. If you see, I'll actually put the magnet close to this one, I'll fault it, and now, the serial number is exactly the one that we had seen earlier, 614 delta alpha 3, that's the one that was on the sticker on the inside of the sensor. If you want to confirm it, again, all you have to do pop the cover off-- give me one second, and you guys will actually see-- give me one moment, 614 delta alpha 3. So that's actually a little bit weird, the serial number that the sensors picking up has the exact characters it's just in a different order. So I'm wondering if the sticker on this sensor was printed incorrectly, but it does have all the exact same characters, we're going to go ahead and hit OK for now, because this is a sensor we want to work with. Now, when you go into this programming screen, it is going to give you different options that you can play around with. So for instance, the first thing you're going to want to do is again just confirm that sensor ID. Let me actually confirm see if it's same that was on this right now. Yeah, so again, you'll see here is still has the same characters, it's just in a different order. I'm thinking that it was a misprint for this sensor, but it did learn in when I did fault the sensor or open up the cover tamper, and I actually show you guys at the end of this video that the sensor does work with the system. So the first thing you to want to switch or leave and/or confirm that it's set to is a sensor type. Now, this is a door window sensor that I'm working with. So normally I will leave it as a door window, but I do want to show you guys different options if you're learning and different sensors. You have motions, glass breaks, key fobs, keypad, auxiliary pendants, smoke detector, seal detector, a whole bunch of different options. Obviously, we're working with the door window, so I'm going to leave it as the default door window. The sensor group, it is defaulted to the sensor group 10, so an entry/exit normal delay. So, an entry/exit door is something that you-- let's say a front door, whenever you enter the house you need a timer to start so you can get to the panel. So you can disarm it without having an alarm go off right away, that may cause false alarms if you set it to a perimeter. If you're putting this on a window, you may want to set this to instant perimeter DW, so a door window. You'll see here they also have the entry/exit long delay. so if you're putting this on a roll-up garage door, or on an exterior garage door that you have to get through and it's halfway around the house and you need a longer time, this sensor would give you that longer time. Oh, I'm sorry when you're coming in through the door that's further away you need more time to get to the panel, so you would set it to a longer delay. Instant interior door, this is basically the system go, the sensor is armed as a perimeter only when it's in away mode, and it actually follows any entry/exit delays. So if you guys arm it away, you guys walking through the front door-- let's say like the garage exterior door and you guys have to go in through the garage interior door. If you have this as an instant interior delay, since you open up that garage exterior which had an entry/exit hopefully on it, then this would follow that entry/exit delay period. If somebody just breaks into the garage and opens up this door without faulting an entry/exit first, then it makes the alarm go off right away. Now, I usually like to stick to the normal sensor group 10, which is the normal entry/exit delay, or sensor group 13 perimeter, this is just normally what we work with. I'm going to program this in as a window just to show you guys. I'm going to change the sensor name, I can do front door, kind of gives you a couple of different options here, but if you want to enter in your custom description you can go ahead and do that as well. Like let's say I wanted to enter in Alarm Grid, hit the green check. Now, if I ever fault the sensor, or if the alarm goes off the sensor will report as Alarm Grid, that's the name I gave the sensor. You can change the chime if you want, there's a lot of different options in here. I'm going to leave it as high wire which again is the defaulted. You can enabled or disabled the voice prompts, so if you don't want this sensor to announce the name, Alarm Grid every single time, you can actually switch it to off, it'll still chime but it just won't do the voice enunciation. And the security source, we're going to leave us 319. Give me just one second here. So yeah, so we're going to go ahead add new. Sensor added successfully. Now, we're going to back out to the home screen by hitting the Home button on the bottom task bar. And now, you'll see if I pull my magnet close to the sensor, and I fault it. Alarm Grid open. It'll say Alarm Grid open. All right, and you'll see the little link right here, is letting us know that it's opened. If I go ahead and close it, it should disappear, and now it's no longer active. But if you do go to All, this is where you can actually take a look at all your sensors. So if you have a bunch of sensors they'll all appear here, and the ones that are open will show that broken circuit or the broken link right there, and again, if you close it, it'll close. Now, I set this-- Alarm Grid open. -- As a window, and I set as a perimeter, which means while the system is armed, and if I fault it, even while it's arming, it will cause the alarm to go off. Take a look. So let's just arm the system. Select arm system type. Let's just say I do an Arm Away. Away mode selected. This is a parameter, which means whether the system is in an arm mode or arming states, if I trip it right now while it's in the countdown you'll see the alarm will go off. System is now disarmed. All right, so the sensor works, it is armed that's a perimeter. You can obviously changes to an entry/exit, if you're putting it on your front door, back door, side doors, or anything like that. But this was just a quick video on how to learn in the Versa GE Interlogix sensor. If you guys have any questions, feel free to email us at support@alarmgrid.com If you find the video helpful, make sure you hit Like on underneath. Subscribe to the YouTube channel and enable notifications, so whenever we upload new content, you guys get notified. I'm Jorge, and I'll see you guys next time.
- Uploaded