Enrolling the 2GIG SP1 in Access Point Mode
Related Products
Related Categories
Description
In this video, Joe shows users how to enroll a 2GIG SP1 Keypad with a 2GIG GC3 Panel in Access Point Mode. Normally, an SP1 is paired with a GC3 Panel ...
Transcript
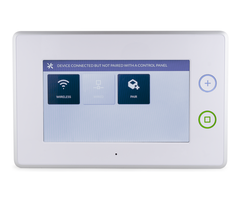
Hi, DIYers. Joey from AlarmGrid, and today we're going to talk about how to enroll your SP1 keypad to the GC3 system using the access point mode. Before we get into that, though, let's go over what this mode is and how it can help you in an installation. It's a pretty cool feature. On your GC3, if you enable the access point mode, the GC3 itself will propagate its own Wi-Fi network, and you'll actually be able to connect the Wi-Fi keypads, the SP1 or the SP2, directly to the GC3 using this mode. This is super convenient for installation. Let's say you're putting the GC3 in a place that doesn't have a Wi-Fi network that's already there. You can turn on the AP mode, and then you can connect your wireless or Wi-Fi keypads to the system while the GC3 is still able to communicate to alarm.com using its cellular communicator. The downside to using the access point mode on the GC3 is that you won't be able to use the Wi-Fi communicator to communicate to alarm.com. So if you are looking to do a dual-path setup, you won't be able to use the AP mode. Dual-path is when you have Wi-Fi and cellular enabled. So it sends a signal on both paths of communication up to alarm.com, and then alarm.com gets rid of the one that gets there second. Again, though, the access point mode is super convenient, and it can help in a pinch if you are installing this in a place that doesn't have an existing Wi-Fi network, and you want to get one of these Wi-Fi keypads connected to the system. So first, let's go over how to enable the AP mode on the GC3. So we're going to click on our 2GIG symbol. We're going to enter the default installer code, 1-5-6-1. I'm going to click on Network Settings, and then I'm going to click on Access Point. And as you can see, there's a little toggle switch right here. I'm going to click Enable. It says, "Wireless Access Point started successfully." OK. Now, as you can see, we've got our network name, which is the SSID, our network passcode, and the IP address. So I'm going to click Save Access Point Settings, and it says that it successfully started. So now we're going to connect the SP1 keypad to the GC3 through its access point. So on our SP1, I'm going to click on Wireless, and as you can see, the network name 2GIGGC3, which is the network name that's being propagated, shows up. So I'm going to click it, and then it's going to ask me for the wireless password. And as you can see, the wireless password is 9-5-4-9-3-3-5-0-9-5. Click Next. It's going to start to communicate with it, and there you go. Now we have joined it to the AP network that's being propagated by the GC3. So after this, we're actually going to have to pair it to the system. So I'm going to click back on the GC3. Back again. I'm going to click on System Configuration and Keypads. Keypad number 1 is what we want to select. I'm going to click the menu on the right hand side, and that's going to bring up the edit. So I'm going to click Enable for Keypad Used. We have an SP1 touch screen, which is what we want. And then we want to do Device ID. So this is actually the way that we're going to pair it in. So I'm going to click Pair on the GC3, and then I'm going to click Pair on the SP1. I might have to click it a second time. There it is. Pairing Key, Serial Number, and it says that the SP1 is connected. The rest of these options-- you can choose to enter information, then, if you want. Equipment Age-- that doesn't have anything to do with the system or the operation. Smart Areas Assignment-- we're not going to go into. Emergency Keys are the panic buttons-- if you want them to show up on the keypad or not. And the Voice Descriptor-- you can enter a name for the keypad. So if you want, we can do Wireless Keypad. We'll click Done. We'll click Return To System Configuration. And as you can see, this is highlighted, showing us that we did make some edits here. I'm going to click back, and it's going to show us all our changes. I'm going to click Save, which should confirm everything. And now, when I go back on our SP1, we should see the GC3 show up after it synchronizes with the system. And as you can see, after it synchronizes, we have the exact same screen as the GC3. The SP1 is now communicating with the GC3 on its access point mode, and it'll work just fine. That's how you connect an SP1 to the GC3 using its access point mode. If you have any questions about the keypad, the system, or how to perform this function, feel free to head over to our website, www.alarmgrid.com, give us a call at 888-818-7728, or send an email to support@alarmgrid.com. If you did enjoy the video, feel free to subscribe. If you want us to update you when we post future videos, hit the notification button below, and we'll send you an update when we do so. Thanks for watching, and have a great day.
- Uploaded