Getting Into Z-Wave Programming on a Honeywell Home Tuxedo
Related Products
Related Categories
Description
https://www.alarmgrid.com/faq/how-do-i-get-into-z-wave-programming-on-a-resideo-tuxedo http://alrm.gd/get-monitored.
Transcript
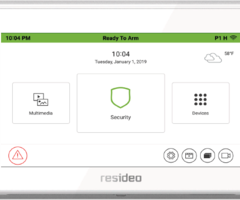
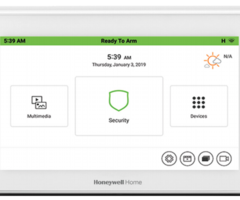
Hi, DIYers. This is Michael from Alarm Grid. And today, I'm going to be showing you how to get into Z-Wave programming on a Resideo Tuxedo keypad, also known as the Honeywell Home Tuxedo keypad. There are actually two versions of the Tuxedo-- the new gen Tuxedo, the third generation. And there's the Honeywell Home for residential use and the Resideo version for commercial use, but they're the same keypad. And as such, they use the same method for getting into Z-Wave programming. Taking a step back, the Tuxedo is both a touch screen keypad and a Z-Wave controller for a VISTA system, a Honeywell VISTA system. You don't actually need to use it with a VISTA system if you're just using it as a standalone automation controller, a Z-Wave controller or a hub. It does use Z-Wave Plus, by the way. But in most cases, you are using it with a VISTA system. People purchase the Tuxedo with the intention of using it to control their VISTA panels. There are standalone Z-Wave modules out there that are a little bit less expensive if you're just looking for a standalone automation controller. And in most cases, you're not going to use the Tuxedo, but there is the option available if you can provide power to it and just use it as a Z-Wave controller. Z-Wave devices that are enrolled with the Tuxedo, they get pushed over to Total Connect 2.0 so you can control your Z-Wave devices remotely using an app on your phone or a web browser. But getting into Z-Wave programming is very simple. We're at the main screen of the Tuxedo here and we just choose Devices. And then you see the sub menu options at the bottom of the screen and we just choose the Z-Wave set up icon that like a Z with a circle and then two semicircles coming out of it, two curved lines, I guess, coming out of it. So we just click on that. And then just like that, we're in the Z-Wave setup menu, the Z-Wave programming menu where we can do Z-Wave activities, which we're going to demonstrate some right now. Just to point out the options down here, the main ones you'll be working with our Add Device and Remove Device. You do want to remove a device or clear it from the network before you go and attempt to add it. Even if the device is brand new, it might have some residual factory data on it. So it's always a good idea to clear it out first. Then we have a Z-Wave lock down here. So we're going to use that for our testing purposes today. And we did wait a bit too long, so it did do a time-out on us. So we'll just go back, again, Devices and then Z-Wave setup down at the bottom. And so let's try removing this device from the network. We'll click Remove Device and it says, start remove device, please press the function key on the device. This will vary depending on the device you are using, so refer to the manual for your Z-Wave device. In our case, our quick set lock just has a button that we press. And it says, device removed. We press the button, which is the inclusion-exclusion button on the lock, and it sends a signal to the Tuxedo and the Tuxedo notes the clear from the network. So it then gives us the message, device removed, just simple as that. If we want to add a device, we'll click on Add Device. And now it's asking us to add and we press the same button on the lock. And we'll give it a second here. And we'll try to press-- OK, there, it just took a little bit to go through. Sometimes it can do that on the Tuxedo, but it is adding controller unit. Sometimes with locks, it can take a little bit for the signal to enroll successfully. We do get some information here. This was an S0 device. But if it's S2 capable then we should re-add it to get it on the S2 network. This lock is not capable of the S2 protocol, so that's why we're getting this message. So we're totally fine with that, so we're just going to click OK. We don't want to remove it just because of its lack of security, so to speak. Not that it's not secure. S0 is still pretty secure, but others that upgraded has two options. Anyway so that's the Z-Wave setup menu. We click on the device, we can do some device setup here. And we can name it, if we want to. I can configure some other settings, but we'll click the Save button, the check-mark icon, down here. And if we go back, which we'll do that, we can see our Z-Wave device that we added on the screen. And we'll just go and we'll lock it. And you see that went through pretty quickly. We can do the unlock option as well. And you see that our Z-Wave device is enrolled with the Tuxedo. And we can configure it as needed from there if we want to set it up with some smart scenes for automatic operation. And it's pretty much the same regardless of which Z-Wave device you're using. Just when you're adding or removing, make sure to refer to the manual. Because every Z-Wave device can be enrolled or cleared from the network a little bit differently. They follow different processes. In this case, like I said, we have a button. Some locks will require you to enter in a code like a sequence of commands to perform an enrollment exclusion function. A lot of Z-Wave, the lights just have a button on them. Make sure your device is powered on. If it's not receiving power then it won't be able to transmit a signal. So keep that in mind. But really just refer to the manual. And other than that, it's just a simple process like I've shown two other times the video Devices and then Z-Wave setup at the bottom. So that's how you access the Z-Wave setup menu for a Tuxedo keypad. If you have any questions about the Tuxedo, or about Z-Wave technology, about home automation, smart homes, send an email to support@alarmgrid.com If you found this video helpful, make sure to give it a thumbs up below to like the video. And remember to subscribe to our channel for updates on future videos. We hope you enjoyed the video. Thank you.
- Uploaded