Honeywell 5808W3: Installation Video
Related Products
Related Categories
Description
This video is about How to Install a 5808W3
Transcript
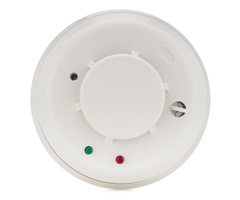
Hi, DIY wirers. Sterling from Alarm Grid here, and today we're going to show you how to install a 5808W3 wireless smoke and heat detector.
This is a wireless sensor. It works with wireless fifth series panels. We have it programmed into our Lynx Touch L5100 security system. And we're going to show you how to physically mount it. We have another video that shows you how to actually program it into your Lynx Touch system, so you can check that out if you got a new system.
It's a very nice device. The key of this is that most homes and commercial properties do have life safety smoke detectors already installed. Those are meant so that if a fire breaks out and someone is home sleeping, a loud noise goes off, there's one by code in every bedroom, outside of every bedroom, ensures that no one will be trapped inside a home during a fire.
So the reason you would add these even to a property that already has those is because when you are not home and a fire breaks out, that loud noise isn't going to do you any good. So this makes a loud noise. It also can trigger a response to a central station, so that you can get the fire trucks out to your house. Potentially, the difference between your house burning down and saving your property. So a very inexpensive way to add some extra value to your monitoring plan.
What we're going to need today is not only a 5808W3, but a power drill. We're using a 3/16 drill bit. We have two screws and wall anchors that came with the 5808W3. We have a pen to mark our two drill holes. We also have a stepladder so we can get up to the ceiling. Again, NFPA72 building code will tell you where smoke detectors should be installed per code. Those are smokes that are tied in the house power. They're all tied together. If one goes off, they all go off.
So these monitored smoke detectors, they don't have to be installed to code, although it is a good measure to see, good intended locations. We've chose this. It's actually in the living room, although there is a bedroom over here. So it's outside the bedroom. It's centrally located in the main area of the house, so that's why we're going to choose to put it here. We've already measured in between the lights here to make sure that it's a nice, clean installation.
And we're now going to show you how to do it. First thing you want to do is pop the cover from the detector base. Our panel is beeping. I'll have someone go silence that. That just shows you that it is programmed in. There is a tamper feature to this device so that if the head is removed from the base, you hear the beep and the panel responds. So we're going to put the head down for now.
We're going to take our base. Go in between our two light fixtures. And on the base, you can see there are two flange locking mounting positions. So you go with the bigger hole on opposite sides. and that is how you mark the holes for drilling. So mark our two holes. Set the head aside. Go ahead and get our power drill.
Again, a 3/16th drill bit and we're going to simply drill up into the ceiling on our two spots that we just marked. Set the drill aside. We have our anchors. Push them into our holes. And we also need a Phillips head screwdriver, which my partner is going to grab for me, as I forgot to mention that's another tool we're going to need. I'll go ahead and start to put these in. Thank you, partner.
Here's our Phillips head screwdriver that we need. Go ahead and screw it in. Don't go all the way, leave just a little bit sticking out. Tap this one in a little more. So now that we have our screws installed into our wall anchors most of the way, we're going to go ahead and fit them into the big hole and then screw them tight to the middle of these flange locks. And then we'll fully tighten them down. Put them in. Rotate to the middle. Tighten one at a time. And now our detector is nice and tight, our base. Installed.
Step two. There's a small tab on the detector. It lines up with the tamper here and just turn clockwise. Snaps it in place. If you remove it, that would be the tamper. We don't have the panel turned on right now. That's why you're not hearing it. That is how you install a 5808W3 wireless smoke and heat detector.
If you have any questions on installation or programming, please give us a call or e-mail us at support@AlarmGrid.com.
- Uploaded
- Duration: