How to learn the Honeywell 5800PIR-RES motion sensor to your L5100
Related Products

Related Categories
Description
This video is about How to learn a 5800PIR-RES to your Honeywell L5100
Transcript
Hi DIY's, Sterling from Alarm Grid here and today we're going to show you how to program a 5800 PIR-RES Wireless Motionless Sensor. We've also done videos on how to install, and how to replace the battery on this device, so the next step is obviously how to program it into your LYNX Touch Wireless Security System.
We have it removed from the back plate. You'll notice that the battery's already installed, and that there is a sticker with a serial number. Every Honeywell wireless sensor starts with a serial number of A for alpha, three digits-four digits.
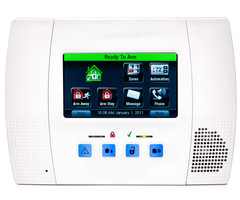
That seven digit number is the serial number that you need to enroll the device, so we're now going to walk you through the steps on what to press on your LYNX Touch to program in this device. From our home screen, and if you're on any other screen this key on the bottom right, will always take you back to the home screen.
So what we need to press is more at the bottom right, and then tools and we need to use our installer code. The default code is 4112. We're now on the program screen. You can see it says program and test at the top. We're going to need to press program. And again, for that installer code you need to use 4112 by default.
If you've changed it, obviously you've got to use the code that you changed it to. That's a code different than the master code that you use to arm and disarm the system, so make sure you have your installer code before doing your programming here. So now that were in programming, we have an option that says zones here on the left. I'm going to click on that.
We've already programmed multiple doors and windows to this system, so we're going to scroll down with the arrow here to go to our first available new zone, and what we do is we toggle the zone we want to add it to, and we click edit. On this screen these are all the parameters of the programming for wireless motion.
The first thing we need to do is actually enroll the device using the serial number, so there are two ways to do this. Both of them, you have to start by clicking into the serial number box, so option number one, we have our motion in walk-test mode, which means that it's got the red LED light every time we activate it.
So you can hear the panel beeping, activating three times auto-enrolls the device. That first time it beeps. The second time it puts the serial number on that screen. The third time it actually kicks you back to this screen, and the serial number and the loop number, which is one on this device is auto enrolled.
So again with a motion, because of the nature of how it goes to sleep after a period of inactivity, when it's not in walk-test mode, this triple auto enroll activation mode won't work as well. So if you're not in walk-test mode, and you want to enroll the sensor the other way to do it is to go ahead and click into the serial number.
We're going to clear this out, pretend we didn't just activate, and you can simply just type in the number right off this sticker so 046-3852. Make sure you click done and the same idea, the same serial number is out here. So if you're having issues getting the auto-enroll mode, just go ahead and type in the number, and save yourself some headaches there.
So again loop number one, we're good there. The next thing you can do is program your zone descriptors, which will tell the system and therefore you when there's an alarm, which device went off. Let's say you have multiple motions throughout your house. We're going to name them living room motion, dining room motion, master bedroom motion you know some descriptor of where in the house it is, so you know instead of just that it was Zone 5 motion, that it was exactly the motion in your living room.
So what you do is you click into zone descriptor one. You are shown a keyboard here. You can't just start typing, because there is a preset library, and we have to choose words from that library so that the LYNX Touch can actually speak out that name of your zone.
So if you notice, this is our living room motion so we click 'L' for living. It chooses the first 'L' word in the library, and then you use your down arrow, to scroll through the available words to get to living room. Now you'll notice we went through a couple of 'L-A's and now we're in 'L-E's.
One shortcut, instead of scrolling all the way through, let's say it's a word that's way at the end of the library you can actually press the next letter, which would be 'I' and it skips right ahead to 'L-I' words. So now if we hit the down arrow we don't have to go quite as far to get to living room. That would've taken a little longer if we didn't do that little shortcut.
You'll also notice that even though this is a zone descriptor for one word, there are certain words that are double words like living room, dining room, master bedroom. You'll notice as you look through here that you can actually get more than two words, with the slots by using a word like living room.
Within there you click done. You can now see it's here. We don't necessarily need a second descriptor. If you had two in your living room, you can say living room west maybe, or living room left, different descriptors that'll differentiate one from the other. We're going to go ahead, there's only one in our living room, so we're going to leave it as that.
The next thing you've got to do is device type. This is a handy feature of the LYNX Touch. When you choose the type of device it is, it actually will limit the response type, for how the device will activate. So if we choose motion sensor it kicks us back, and now when we go into the response type, which is the next field we've get to choose, it's only going to give us response types that a motion would use.
So you know a panic might be 24-hour audible, another response type. It's obviously not going to give us that option, because it wants to make it easier for you to choose the right response type. So you'll see there are eight different options here. The majority I would say 90% of all motions are going to be learned, as an interior follower or an interior with delay.
Those two options what they're going to do is they're going to make sure that when the system is armed to stay mode that the motion is de-active, so you have two arming modes for your LYNX Touch, arm away and arm stay.
Arm away will arm up every device; motions, doors and windows; so the house is fully protected. If you're home and you walk through the motion zone, the alarms going to go off, therefore the arm stay mode is used when someone is home inside the house. Any device programmed to interior follower or interior with delay will not arm during stay mode.
So that's the key feature and that's the reason that most motions get programmed this way. Let's say you have a motion in your basement, you know you'll never go down there when the system is armed, and you're inside you could choose something else like perimeter, but again most of the time were going to do interior follower or interior with delay.
The difference between those two is that interior delay this will always be a delay zone. When you activate your motion by walking in front of it, the alarm will not go off until your 30 second entry delay times out. So if your motion is looking at an entry/exit zone, such as your front door or your garage door, you want to make sure you set it with delay.
That way when you open the door, the motion sees that door opening it's not going to go into instant alarm. You still have your 30 seconds to get to your keypad and turn the system off. If your motion is not looking at an entry/exit delayed door, then you want to choose interior follower, and what that does is it follows the device before it.
If there was no entry/exit device tripped first, then it'll be an instant alarm. Let's say somehow someone breaks through your roof, doesn't activate any other alarm, as soon as the motion sees them it's an instant alarm. If you, your homeowner come through the garage door, pass through your living room on the way to the LYNX Touch, your garage door was a delay zone, the system's smart enough to say, "Hey, I'm not going to go into alarm. I'm going to give you your 30 seconds to get to it and turn it off."
Arm motion happens to be looking at our front door, so we're going to do interior with delay. We need it to always be on delay. We don't want false alarms. Click interior with delay. You had your response type set. You'll see the last three options on the bottom are alarm report. That would mean that if the system has alarm monitoring services, you want that on.
That way any alarms that are sent will go to the central station. Chime, you don't really need a chime for motion. You don't want your panel beeping every time you walk through your living room, so you want that off or set to no. Then the last one is supervised. Every wireless device that's not a key fob for instance should be supervised. That just means that the system will check to make sure it sees it in range, and if your sensor happens to be borderline, or out of range you'll get an error, so we always recommend that you do supervised.
The last step is very important, so you don't waste all the work you just did, click save. You can now see the living room motion sensor has been programmed as Zone 11. We can use our back arrow to exit out of programming. Make sure this is very important, whenever within programming that you do allow reentry, so that you don't lock yourself out of programming.
So were going to say, yes. Back out one more time. We're back to our home screen and we are now ready to go ahead, and put our motion back up on the back plate, so it's fully installed and programmed. If you have any issues on how to install or program your 5800PIR-RES Wireless Motion Detector, please give us a call, or email us at support@alarmgrid.com.
- Uploaded
- Duration: