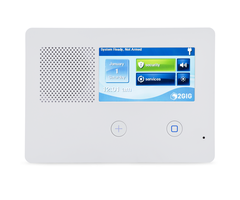
Pairing a Z-Wave Device with the 2GIG GC2e
Related Products
Description
In this video, Michael from Alarm Grid shows you how to pair a Z-Wave home automation device with a 2GIG GC2e Security System. The 2GIG GC2e has a built-in Z-Wave Plus controller for this purpose. A maximum of 232 Z-Wave devices can be used with the system, though 2GIG recommends using far fewer Z-Wave devices for optimal panel performance. It is also important to keep in mind that only the first 122 Z-Wave devices can be pushed over to Alarm.com for remote access and control.
By adding a Z-Wave device to the GC2e, you will be able to control the device from the panel. And if the system is monitored and set up with Alarm.com, then you will also be able to control it remotely through that platform by using a web browser or a mobile app on your phone. Alarm.com will also allow you to include your programmed Z-Wave devices with smart scenes so that they activate automatically based on a set schedule or with predetermined system events.
All sorts of Z-Wave devices can be used with the 2GIG GC2e. Some of the most popular options include devices like smart lights, door locks, and smart thermostats. It is important to note that only Z-Wave automation devices can be used with the GC2e. You cannot enroll Z-Wave security sensors with the system. It is recommended that you use Z-Wave Plus devices with the GC2e System if possible. Z-Wave Plus devices offer better range and battery life than classic Z-Wave devices when used with a Z-Wave Plus controller like the GC2e. However, you can certainly still use standard Z-Wave devices if you have some. After enrolling a new Z-Wave device, make sure to test it for proper function. You should also go and set up scenes for the Z-Wave device through Alarm.com.
https://www.alarmgrid.com/faq/how-do-i-pair-a-z-wave-device-to-the-2gig-gc2e
http://alrm.gd/get-monitored
Transcript
Hi, DIY-ers. This is Michael from AlarmGrid, and today, I'm going to be showing you how to pair a Z-Wave device with a 2GIG GC2e security system. Now, the 2GIG GC2e has a built-in Z-Wave Plus controller for adding Z-Wave classic and Z-Wave Plus devices. It's recommended that you use Z-Wave Plus devices if possible because they have stronger connections, better range, better battery life, and it really keeps your network consistent if you have all Z-Wave plus devices. But if you have a Z-Wave classic device that you want to throw in there as well, then that works, that'll be fine. Just remember that when the signals hop through that Z-Wave class device, they won't be Z-Wave Plus, they'll be Z-Wave classic. But if you can add Z-Wave Plus devices only, that's great. Like most Z-Wave controllers, the GC2e has space for up to 232 zones. However, that's rare that you're going to even come close to that amounts. Usually, 50, 60, you'll be pretty good. But as you add more Z-Wave devices, it can cause performance issues on your panel. You might get some slowdowns. So really, you don't want to add too many but the one thing, one good thing about adding many Z-Wave devices that you'll get a stronger mesh network of interconnectivity. So as long as you keep it reasonable, you should be fine. But the maximum limit is 232. Once you added Z-Wave device, you can control it locally at the panel and you will also be able control it remotely from Alarm.com, assuming the system is monitored and you have access to Alarm.com. that will allow you to control the Z-Wave devices through your phone using the Alarm.com mobile app or through a web browser. One thing about Alarm.com, though, is it has a smaller Z-Wave device limit of 122 Z-Wave devices. When you go to add the 123rd to the panel, it won't get pushed over to Alarm.com. You would actually have to delete a Z-Wave device from the panel, let Alarm.com refresh, and then add the new device to the panel. Let it do another refresh, and then it will appear on Alarm.com. But like I said, most people aren't going to even approach 122 Z-Wave devices. Really, we rarely see over 40 or 50 on a single panel. But if you do have a large home or business, you might get to that many. Anyway, so that's some basics on Z-Wave devices. So now, I'm going to show you how to set one up. So we have a quick set lock here that we're going to use for enrolling with the system. There are lots of Z-Wave devices you can add-- locks, door lights, thermostats, water valves, lots of things-- but we're going to get into this here. So we're at the main screen, we're going to choose Services, then we're going to Z-Wave, and then we're going to press the wrench icon in the bottom right corner. And then we're going to enter in our installer code and ours at the default 1561. And then what we're going to do first, we're going to remove the device from the Z-Wave network. That's usually the best practices, to clear it from the network first. That wipes out any residual Z-Wave data. So that way, it's fresh and ready to pair. Even if you have a brand new Z-Wave device, it might have some network data from the factory for testing so it's always a good idea to remove first. There are some very smart Z-Wave devices that don't require this, but in most cases, nine out of 10 times, you will at least want to attempt this. So we'll press the Enrollment button on the Z-Wave device, which in our case is just the A button on the quick set. And you see that the device has been removed from another network, so it acknowledged the signal and cleared its data so that way it's ready to be paired. We can press OK, and then we'll press Back, it's already been cleared. And then we'll press Add Devices, and now it's searching for a device to enroll with the network, so we'll press the Enrollment button again. And we'll give it another try here, and there we go. It did discover it, now it's going to take a few moments to get it fully paired with the network. With locks, it can take a little bit longer. So we'll let this play out, we'll just wait a minute and let this go. There we go, we didn't have to wait at all. So there we go. We got our lock set up here. It looks like it got put on node 2. We'll just press Back here, and it says, keypad door lock was added. Configure the lock for keypad codes. So that's what you do if you're adding a Z-Wave lock. In our case, we are just showing this for example so we're not super worried about that, right now with that, but that's how you would go and pair the Z-Wave device. So now, I just want to show you how you would access the locks, so that way, you could control it or any other Z-Wave device for that. You just choose Services, and then Z-Wave. And then in our case, we're working with the doors and locks, and we'll click the button here, and it's going to take a second to acquire the status. Don't be confused that you're in the wrong place. It is going to take you there. And then you see that the lock is unlocked right now, and we will choose the Lock button, and it's sending the command. And as you can hear, our lock did manage to lock. We also get the battery icon there, letting us know how much battery have left. Looks like we're at 90%. That's pretty good. So it did send the commands so we'll call that good enough because it did lock and you heard it locking, so it locks. But that's how you would go and add a Z-Wave device to a 2GIG GC2e security system and how you would go about using the device on the system. If you have questions about Z-Wave devices or about the 2GIG GC2e, send an email to support@alarmgrid.com and we would love to help you out. If you found this video helpful, make sure to give it a thumbs up below to like the video and remember to subscribe to our channel for updates on future videos. We hope you enjoyed the video. Thank you.
- Uploaded