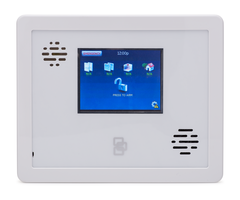
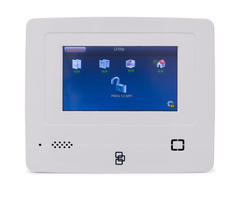
Programming a Door Sensor to the Interlogix Simon XTi or XTi-5
Related Products
Related Categories
- Small Business Security Systems
- Monitored Home Security Systems
- Home Security Systems
- DIY Wireless Security Systems
- Business Security Systems
- Apartment Security Systems
Description
This video is about Programming a Door Sensor to the Interlogix Simon XTi or XTi-5.
Transcript
hi-di-ho hours joy from alarm grid and happy Halloween today we're going to show you how to program a door window sensor into your Simon XTi or xti five we're going to perform the programming on an XT I is that what we have powered up but I do have an XT i-5 right here it looks somewhat similar the only difference between the two panels is that the X TI 5 has a slightly larger screen so if you are in the market for a new Simon XTi panel I do recommend getting the XT i-5 as you're going to be able to it's it's easier to use and the screen is slightly larger but both the panels work fine and they both work exactly the same the user interface is actually exactly the same on both the systems so on our Simon system the system out of the box is compatible with inner logic sensors as that's who makes the Simon panel but it can also use Qualis sensors out of the box as Qualis sensors work on the three 19.5 frequency which is what the inner logic sensors work on it's cool caveat if you do have a consignment system and if you do have a koala system in the house or some of those sensors you can program them them in to your panel to use them today though we do have a Simon inter logic or inner logics door and window sensor right here and as you could probably hear it said front door that's telling me that I do have that currently programming to the system so let's jump into system programming let's delete it from our sensor list and then let's riad it and test it so on our signage panel I'm going to hit the gear then I'm gonna hit the down arrow until I see programming right there I'll click enter and I'm going to enter the default installer code which is four three two one okay and then on this menu I'm going to hit sensors now it is in the system right now so let's delete it we don't have very many options we have learned sensor at its sensor and delete sensor learn sensors how you learn them in at its sensors how you edit them and then delete sensors how you delete go figure so let's click delete sensor and then as you can see it's on sensor number two our front door now the group number is important on the sensors as the group number tells you the system what the sensor is going to do I'll explain it more when we get into the actual programming of the sensor let's click delete to get it ready it's going to process the command and then it's deleted so now let's learn it back into the system so I'm going to click learn sensor it says trip the new sensor with the inner logic sensors you actually have to use the tamper to learn them in so I'm just going to pop this off the back so as you can see the battery has fallen out when we took the cover off of the back plate and it's okay you just want to make sure to put it back on so that the sensor does work so as you can see we have a coin cell battery and if you look in the sensor itself it says positive is up on our coin cell we have the plus that's the positive and it's going up we're just going to put it right here and clip it in so it's good to go now we just have to clip this back into our cover it's got little grooves slips right in and then Clips back into place so now we're all set with our sensor now in our programming you have a sensor number and then we have a sensor group you'll want to pull up your installation manual for your Simon system and check out the legend that shows the different group numbers and what they do the group number basically tells the system what the sensor is going to do each number has a different description for example group number 10 is going to program this sensor in as an entry/exit zone which means that if we want to use this sensor for a front door that's how we want to program so that we can walk out of the front door after we are in the system or that we can enter the front door to disarm a system when it's armed again the menu in the in the installation manual is going to show you all the different group numbers that are available and what they do super handy to have pulled up when you are doing your sensor programming on the system the sensor name is the front door which is perfectly fine for for us and then the bottom says product code which we're not going to get into it's not a super important feature I'm gonna click say it to lock our sensor in it's going to process this command and then go back to the learn mode for another sensor so we're good I'm going to go all the way back to the main menu and we're going to test our sensor out so move magnet next to the sensor moving it away I've moved it away from the read switch but as you can hear it did fault it did tell us that the front door is open and that we do have it open on our front doors right here so we know that the sensor is functioning that's how to program in a door window sensor to your Simon XT rx ti5 system if you do have any questions about this feel free to give us a call at eight eight eight eight one eight seven seven two eight can also head over to our website alarmgrid comm or send us an e-mail to support at alarm grid comm if you do enjoy the video feel free to subscribe if you want to get future updates when you post future videos feel free to click the notification button below and happy Halloween have a great day thanks for watching
- Uploaded