Programming a Wireless Zone On a 2GIG GC2e
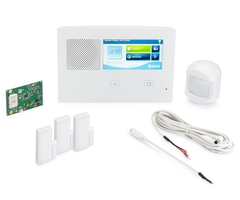
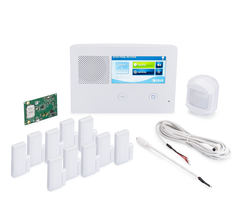
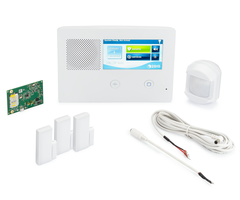
Related Products
Description
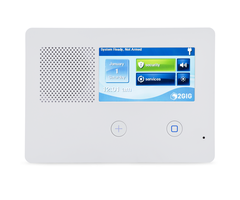
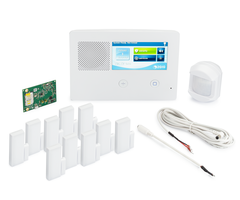
In this video, Michael from Alarm Grid shows you how to program a wireless zone on a 2GIG GC2e Security System. The 2GIG GC2e uses 345 MHz wireless sensors, including those from the 2GIG 345 MHz Series and the Honeywell 5800 Series. Additionally, the 2GIG GC2e can also use the encrypted eSeries Sensors from 2GIG. However, all sensors are programmed into the system using the same menu and general process.
When setting up a new sensor, it is strongly recommended that you auto-enroll the sensor to learn-in the Serial Number. This is better than manually entering the Serial Number, because it will ensure that you do not make a mistake when entering the number. Also, by auto-enrolling, you can be sure that the system can successfully receive transmissions from the sensor. You must also set the Equipment Code for the sensor you are enrolling. This is very important for the 2GIG eSeries Sensors, as you may encounter RF supervision trouble if you enroll an eSeries Sensor with an improper Equipment Code.
The other big part of programming a new wireless zone involves telling the system how to respond when it detects that the sensor has been faulted. The biggest setting in this regard is the Sensor Type, which may also be known as the Response Type or the Sensor Group. There are many different Sensor Type options to choose from, and you must choose the proper one so that the system responds in the manner that you want. You can also configure a variety of settings, such as whether or not the zone is able to trigger an alarm on the system and whether or not the panel monitors the sensor for RF supervision. These settings can vary greatly depending on the type of sensor you are using and how you want to use the sensor with the system.
https://www.alarmgrid.com/faq/how-do-i-program-a-zone-to-a-2gig-gc2e
http://alrm.gd/get-monitored
Transcript
Hi, DIYers. This is Michael from Alarm Grid. And today, I'm going to be showing you how to program a wireless zone to a 2GIG GC2e security system. Now the GC2e is the replacement for the original-- well, the 2GIG GC2 the GoControl panel. They brought back the same programming which everyone really liked on the GC2. And so it's returned for the GC2e. So if you know the two then you already know the GC2e. So that's great. Now the sensors that it supports, the wireless sensors, it does 345 megahertz sensors. That includes sensors from the 2GIG 345 megahertz lineup and the Honeywell 5800 series. And this panel along with also the GC3e from 2GIG, they support the 2GIG eSeries sensors, which utilize encryption, so they're difficult to break into. They're more secure. So if you're looking for a very secure system that can't be defeated by RF sniffers or anything like that then you want to go with the eSeries sensors. So those provide a valuable option as well. But they all program in the same way no matter which one you're using. Today, we have a 5800MINI here. And I'm going to go through the programming process. So let's get into it. So we're at the 2 2GIG GC2e, the main screen. We're going to click on the 2GIG logo in the bottom right corner. We're going to enter and our installer code. Our is at the default 1 5 6 1. We're going to choose System Configuration. And now we're in the programming menu. So this is where we will do the programming. So the first option is to choose the sensor-- the RF slot that you're using. You can have up to 64 zones on the system. They're numbered 1 through 48 and then 63 through 74. So just choose an open slot. And then once you've found an open slot, we'll just use number one. You press the down key to start programming the zone. So I'm going to go through each option briefly here. The first thing is RF sensor type. This is essentially the response type for the zone. It determines how the system will respond when the sensor is faulted. We're programming the door, so we'll do entry-exit one. If you aren't familiar with the RF sensor types or response types, we have other FAQs that explain them in more detail. Or you can look at the manual for your 2GIG GC2e to get a full list of response types and what they mean or RF sensor types. So we'll go with that and we're going to press down. And now we're entering the equipment code. Traditionally for the GC2 panel, this wasn't really super important. You could just choose an equivalent for the most part if yours wasn't available. But with the rise of the eSeries sensors, if you're doing an eSeries sensor, make sure you find the exact equipment code in there. Because otherwise, you can run into RF supervision trouble. So you don't want that. But we'll go through and we'll find an equivalent. Like I said, we're using a Honeywell 5800MINI, so we'll probably end up using an existing door-window contact wherever that is. We'll just scroll through these a little bit. Right there, existing door and window contact, 0655. That one will work just fine for us, so we'll go with that in our case. Press down and continue. Sensor access normally opened. So you only get this if you're programming a door-window contact. If you set this to enabled then you'll get a fault when the sensor is closed instead of when the center is opened. So the normal state for the zone would be to have the door and window open. Maybe you want that. In our case, we prefer to have our door and window closed, so we'll keep that as disabled. So we'll press down. And now we're learning in the serial number. This is the unique serial number that the sensor uses when communicating with the panel. It's how the panel recognizes the sensor. So we're going to auto enroll. That's the best way to do it. It prevents you from making a mistake and it ensures that the sensor is communicating successfully with the panel. So we'll do Shift and then we'll press the Learn button over here. And then we're going to fault our sensor here. We have it right here. [BEEPING] And right there, it gave us the serial number. It tells us even that it's Honeywell. So we're good with that. We're going to press OK. And now that we have our serial number learning, we'll press down. And RF sensor equipment age, this one really doesn't matter. You can set this to new or existing. We'll call this a new sensor. That one really doesn't matter. The loop number, so every sensor is going to use at least one zone on programming. There are some sensors that will take up multiple zones and they'll use different loop numbers for different functions. You might have a smoke detector, for instance, that also does low temperature detection. Just an example. We've also seen that with motion sensors. So they would use one zone with one loop number for smoke and heat detection and then another for low temperature detection or one for motion detection and then one for low temperature detection depending on the capabilities of the sensor. In our case, our 5800MINI only does one function and it's loop number one, so we're just going to keep that as is. And it will assign the loop number automatically when you do the auto learn. So you don't necessarily have to worry about it too much. You can look in your manual for the sensor to find out the proper loop number if you aren't sure, but usually it'll put it in. So dialer delay, if you have this enabled then it's going to delay a little bit before sending out an alarm if this zone triggers an alarm on the system. The default dialer delay is 30 seconds, but we don't want a dialer delay. If we have an alarm on our system then we want it to go through as soon as possible. Having that enabled can be an important false alarm prevention tool. So if you're worried about that then you can enable it. But in our case, we'll set it to disabled, so we don't have a dialer delay. Now, we're building the voice descriptor here and that's what the panel will speak out when the zone is faulted. So we'll press the Insert button down here and we can go through a list of words here. And we'll call it-- you can also press the keys here to enter the three-digit code and get some other ones. We jump to the S section here. We'll call it south and then we'll see if we can find door. Let's see if we can do that. That was a little bit far. We'll try again. Let's try 080. 15, let's see if we can get back there to door. We're pretty close. There we go. We'll go with south door. OK, and no, I don't want to pass that. Right there, so south door. And we'll add another answer, but we'll delete that one. That's how you delete by the way, the little box with the x. So yeah, you press the Insert button, you can scroll through and also enter a code to get exactly where you want. And then we'll press Next to see that that's what we want here. I'm going to go back to Edit Current here just in case you feel like you missed something here. Yeah, we got it all. So once you reach the end, you'll get back to the end area. You press the Next button in the bottom right corner. And you can get a summary screen of all the settings here. Just go through everything, make sure everything looks good. It does for us. So we'll press Skip down here and then we'll press End, the bottom right corner. And you want to make sure that box right there with Save Changes is marked, so that way it does apply to changes. And then just press Exit and then it's going to do a reboot process to go in at the zone. Once it boots up, I'll show you the sensor being faulted. And we're not going to trigger an alarm on our system or anything, but I will show that it is programmed. System disarmed. Ready to arm. Just to give it a brief second to boot up. Let's see here. It's taking its time a little bit. There we go right in the main screen. It says system ready, not armed because our sensor is closed right now. And apparently, me moving it just a little bit did get it there. Let's see if we can get this closed. Apparently I'm holding this in the bad spot here. There we go. OK, so you see, it's closed, and we separate, and then it's open. And then it's closed. It's open. Our sensor is working great. We're going to go and put that down. And it'll stay closed through there. So remember, if you have a zone that will trigger an alarm on the system such as an entry-exit zone, you will need to either have it closed before you can arm your system or you will need to bypass the zone. When you bypass, the system knows to ignore that sensor, knows to ignore that zone. So if you have a sensor open, you can bypass it to arm if you have it faulted. But that's how you program a wireless zone to a 2GIG GC2e security system. If you have any questions about the 2GIG GC2e, or about alarm monitoring, or about the sensors used with the GC2e, send an email to support@alarmgrid.com. If you find this video helpful, make sure to give it a thumbs up below to like the video. And remember to subscribe to our channel for updates on future videos. We hope you enjoy the video. Thank you.
- Uploaded