Programming an Encore FF345 with an L5210
Related Products

Related Categories
Description
In this video, Jorge from Alarm Grid shows you how to program an Encore FireFighter FF345 with a Honeywell L5210 Security System. The FF345 is a listening module that allows you to take a conventional or high-voltage smoke detector with a Temporal 3 sounder and use it with the L5210 Security System.
A smoke detector with a built-in sounder should produce a Temporal 3 sound when activated. This sound is used to inform building occupants about a fire. For a conventional or high-voltage smoke detector, there is no way to natively use it with an L5210 System. But you can use an FF345 Listening Module to make these devices compatible with the system. And if your smoke detectors are one-go-all-go like most high-voltage smoke detectors are, then you can use a single FF345 device to take over all your smoke detectors.
The way that an Encore FF345 works is pretty ingenious. It is a listening module that actively listens for the Temporal 3 sound associated with an activated smoke detector. As long as a smoke detector produces the Temporal 3 sound, then it can be used with the FF345. When the FF345 hears the Temporal 3 sound, it sends a 345 MHz signal to the security system. The security system will then respond as if a compatible wireless smoke detector were activated. Any FF345 module should use a 24-Hour Fire Zone, which is the same Zone Type you would use with any smoke detector.
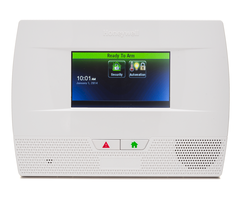
An FF345 module can be used with nearly any system that accepts the 345 MHz wireless frequency. This includes a Honeywell LYNX Touch L5210 System. You can also use wireless smoke detectors from the Honeywell 5800 Series with the system. These include the Honeywell 5806W3, the Honeywell 5808W3, and the Honeywell 5800COMBO. All of these sensors can be auto-enroll with the L5210 System.
Note: The Encore FF345 needs to be installed within 6 inches of the smoke, CO or Combination detector it will be "listening" for. It is best to install near a detector that is somewhat isolated from other detectors. If the FF345 can hear multiple detectors sounding once they go into alarm, it may take longer for it to activate.
https://www.alarmgrid.com/faq/how-do-i-program-an-encore-ff345-with-an-l5210
http://alrm.gd/get-monitored
Transcript
[ALARM GRID SOUND INTRO] HI, DIYers. I'm Jorge from Alarm Grid. Today, I'm going to be showing you guys how to program in an FF345 to an L5210. So for today's demonstration, I actually have an F7000, which is the same exact process. The only difference between the L7000 and the L5210 is that the L7000 has a slightly bigger display. But everything else is exactly the same. The same programming menus, the same processes, everything will be exactly the same. So today, I have the 2GIG FF345. It's an encore firefighter. This is a listening device that can actually take over any of your hard-wired smokes or CO detectors. Remember, this is a listening device, so it actually listens for the temporal sound of a fire alarm or a smoke detector, or if CO detector going off. If you ever realized your smoke detector and CO detector sounds, they do give off different noises. So this FF345 is actually programmed and designed to pick up and distinguish which one it's listening to. Now normally, this FF345, you want to install it about six inches from whatever smoke detector you wanted to pick up on. For most of you guys out there, you have-- you may have hard-wired smoke detectors. Either the high-voltage ones that are wired into the houses, 120 or 110 AC. Or you may also have wired smoke detectors that are wired into an old wired system. So with this device, as long as you keep them connected and powered on and functioning, you should be able to use this to take over your wired smoke detectors and learn them into let's say, a wireless system. The L5210. In this case, the L7000 L7000, because that's what we're demonstrating on today. This will also work with any system that has the 345 megahertz receiver. So if you have an L5100, if you have a-- if you have a wired alarm system with a wireless receiver that's Honeywell, the Lyric alarm system, a 2GIG alarm system, because 2GIG also works with Honeywell sensors. If you have a QOLSYS with the Honeywell data board card built into it, that is also one of the panels you can use it with the IQ 2 plus. You just have to make sure you have the one with the Honeywell data board card built into it. Now this-- like I said, it transmits at a 345 megahertz frequency. So your panel just needs to have that receiver. They also make this in 319.5. So if you have an Interlogix, Simon XT, XTi, XTi-5, if you have a normal IQ 2, IQ 1, or if you don't have the IQ 2 plus that has the Honeywell data board card, you can always use the version that comes in 319.5. Right, so we have a 345 and a 319.5. Today, we're demonstrating the 345 because that's the one that works with my Honeywell system. My AKA L5210. But really, it's an L7000. So the first I'm going to go to go ahead and do-- since it's new out of the box, I'm going to go ahead and take the sensor out. It does come with a battery. This is a CR123A lithium battery. It's cylindrical shape. So if you guys have one and need a new battery, just take the old battery out and go to your hardware store and find one that matches, and purchase it and install it. It comes with a back plate, tamper plate. We won't be using this today. But this is-- when you mount it, if somebody takes it off and this is installed onto it, it rips off and it lets the back tamper. You'll know that somebody's messed with your device. And that will cause a trouble on your alarm system. I'm going to leave this in the box for now. Really, what I want to go ahead and do and start is start opening up the sensor itself. I just want to go in and get a quick zoom in. Because this sensor actually does smoke and CO If you look at the back at the sticker you'll see the bottom two lines. One says SM. Sierra, Mary. That's sensor smoke. The other one says, CO. That's for the carbon monoxide. So as you notice while looking at the back of the sensor, they both pretty much have the same serial number. The only number that changed was the last number. And it's usually changed by one digit. So the last number for the CO goes up one digit higher than the one for smoke. And you'll see that when we go to auto enroll it. We normally recommend auto enrollment, just so that there's no user error. While you're typing in a number, you accidentally press another one. We've seen it happen plenty of times, where you enter in the correct number. Your eyes didn't do you so well and you enter in the wrong number. So make sure that whenever you're doing this, I'll show you guys how to do the auto enrollment, that that's the way that you guys do it. So the first thing we're going to go to need to do is-- there's a little side cover right here that we need to pop off. So if you actually just-- let me pop it back on. There's a little button here that you press in. It releases latch and then you can take the cover right off. Pretty simple to do. Pretty easy to take apart. The battery can only go install the one way. So the negative side to the little spring. And as soon as we power it on, the light starts blinking. Now this little silver tab right here is a tamper. So we don't want to learn the sensor in by that. There is a little black button right here. So why we're zoomed into the circuit board here, again, you're going to see the sticker up at the very top. It'll say SM for the smoke. That will be the serial number. And CO for the CO zone. Then again, that's the serial number for the carbon monoxide. As you can see, like I said before, it's only one digit difference towards the end. Now, if you were-- if you're looking at the zoomed in image here, right next to that little gray flap, silver aluminum flap, there is a little button. That's underneath a sticker. It's a little black button. And that'll be our auto enrollment button that we're going to press to enroll the sensor into our panel. We're going to go ahead and be able to start learning it in. A single press and release, we'll actually learn it in for smoke. But if you press and hold it for about two to three seconds and then release it, that'll learn it in for CO. I'll show you guys right now. So first thing we're going to do. Starting at the home screen on your L5210 or your L7000, technically, we're going to go to Security. We're going to hit More. We're going to go to Tools. Here's where you enter in your installer code. Minus 4112. From there, I'm going to go into Program. Now if you weren't taking to the screen, it's because you don't have the correct installer code. So make sure you get taken to this screen and you hit Program. The installer code, mine is defaulted, which is why it's 41112. But yours could have been changed. So after we go into programming, we're going to go into Zones. We are learning in a wireless sensor so it's a Wireless zone. And we're going to hit Add New. From Add New, were going to hit Serial number. And now the panel is in listening mode. This is where we're going to go ahead and grab the device. We're going to press it and release the button. And the panel will do a small little beep. All right, I'm not sure if you guys heard that. But I'll press it one more time. Again, just press and release. Don't hold it down, because then it will be a confuse for CO. So I just push, release. And now you'll see it actually auto populated that serial number. 0765260, which matches the smoke serial number on there. Remember, we're learning in smoke. It's a press and release. The CO is hold down and release. And when you hold on, it's like two to three seconds. And I'm going to learn it one more time to confirm it. So press and release. Boom, the panel acknowledged it. Leave the loop number as one. We're going to-- I'll leave the zone description as a back. And all I'm going to do is I'm going to switch the device type. I'm going to set it to smoke detector. Obviously, if you're being monitored, you want to make sure the alarm report is set to yes. You want to make sure the sensor is supervised. The Fire no verification or Fire with verification, that means, Fire no verification, as soon as this sensor goes off, the alarm gets sent immediately, letting the panel-- letting your central station know there's a fire alarm. If you do fire with verification, the sensor has to go off twice. Meaning, that the smoke detector has to go off twice. So it all depends on how you want to use it. If you want an immediate alarm, I would leave it as fire no verification. I'm going to go ahead and hit Save. And I've learned in my back smoke detector. Now I'm going to go ahead and go into add new again. Go into my serial number. Now I'm going to show you guys how to learn in CO. You have to press and hold the button down for two to three seconds. So I'm going to press and hold down this little button. One, two, three, release it. The panel beeps. I'm going to do this again. One, two, three, release. Now if you see the second time, it starts populating the second CO number. 0765261. It's no longer the zero at the end. That means we're holding the button down long enough. Now we're going to do it one more time. One, two, three, release. And it'll confirm everything. Yep, I'm going to go ahead and switch the zone description. I'll switch it to-- let's say back. I'll put the window to-- I'll put the device site. Again, this is going to be my CO detector, carbon monoxide. Alarm report, obviously, set to yes. You want to make sure, if you're being monitored, that the central station is receiving the CO signal. And supervision, supervise. Response type, it's only going to stay as carbon monoxide. There is no verification or non-verification there. We'll leave the loop number as one, and then you hit Save. Now we have a black smoke detector, back carbon monoxide detector. We can go ahead and put the cover back on. Put the back on first. Yes, so clip everything into place first. And then you can put the front cover back on, and it'll just snapshut. Whoops, all right. Back on first. Close it. Now it's tight. the cover doesn't come off. You're going to mount it up wherever you want it to go. And you can go ahead and test it by setting off a smoke alarm. And the sensor should pick up on the sound of the smoke or the CO. And then your panel will go off. Make sure, if you guys are testing, that you have your account on test mode. If you guys are testing CO detectors, and you don't place your account on test, and you are being monitored, the fire department will be sent out. Because CO, whenever it goes off, fire department is always dispatched no matter what. You cannot call and cancel a fire department dispatching when there is a CO alarm. Because these are gases that are undetectable. So if one of them happens to go off, procedure is to always go out and make sure everything's OK. So that's pretty much how to program in your FF345 to an L5210. Today, we demonstrated it on an L7000. But if you guys have any questions whatsoever, feel free to send us an email to support@alarmgrid.com. If you found the video helpful, make sure you hit Like underneath. Subscribe to the YouTube channel, and enable the notification. So when we upload new content, you guys get notified. I'm Jorge, and I'll see you guys next time.
- Uploaded