Programming the 5800COMBO to the L7000 Panel
Related Products
Related Categories
Description
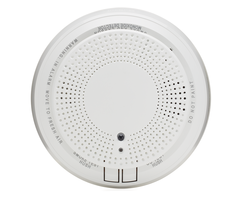
In this video, Jorge shows users how to program a Honeywell 5800COMBO to a Honeywell L7000 Panel. The 5800COMBO is a multi-purpose life-safety device that responds to smoke, heat and deadly carbon monoxide gas. It also includes a built-in freeze detector for responding to unusually low temperatures.
In order to get full functionality out of a Honeywell 5800COMBO, it will need to be programmed to multiple system zones. Each zone will serve a different purpose for the sensor, and each is necessary for achieving complete device functionality. However, if a user does not require a certain function of the 5800COMBO, then they will not have to program for that zone. In total, the sensor can use up to five zones on the L7000. These are smoke/heat detection, CO detection, low-temperature detection, supervision and end of product life.
The heat sensor inside the 5800COMBO is a fixed-temperature device that activates at 135 degrees Fahrenheit. There is no rate of rise temperature in the 5800COMBO. The smoke detector is a photoelectric sensor that activates when an internal light is refracted due to airborne particles. To prevent false alarms, an infrared (IR) sensor will scan the area for ambient light levels and other signs of a fire, such as flame flickers. The CO sensor responds to unusual high levels of CO gas that could cause serious harm or death. The low temperature sensor responds at 41 degrees or lower.
The two other zones on the 5800COMBO are for supervision and end of product life. Supervision involves having the panel listen for RF check-in signals that make sure the device is live and within signal range. End of product life is ten years, at which point the CO detector will stop working, and the device will need to be replaced. The sensor also has two test buttons for testing the smoke/heat and CO detection sensors respectively. There's also a built-in 85 dB sounder for alerting those to a life-threatening situation.
Note: When Jorge mentions enabling supervision in zone programming, he incorrectly mentions that this enables tamper and low battery supervision. However supervision for these conditions is always enabled. Supervision actually refers to the panel listening for RF check-in signals from the device and alerting the user if enough check-in signals are absent within a period of time.
http://alrm.gd/get-monitored
Transcript
Hey, DIYers. I'm George from Alarm Grid. Today, we're going to be going over how to program a 5800COMBO into an L7000. So the 5800COMBO, it's a combo detector that does both smoke and heat, and it does CO. And it also has an option to do freeze detection. So if the temperature drops below 41 degrees Fahrenheit, then the sensor will actually notify you. Now, this 5800COMBO, I'm just going to hold it up right here. You're going to see it has a smoke test button, and it has a CO test button. This is going to come in handy whenever you guys are testing the sensor out, and you guys want to basically make sure that the signals are being sent to the central station. These are the buttons that you're going to want to use, and I'll show you guys how to use that in just one second. First thing I want to do is go ahead and get it programmed into the system. So you need to make sure you put L7000 into the Programming mode. So to do that, I'm going to start off on the home screen. So I'm going to click the Home button real quick, because this is more than likely where you're going to start. This is our home screen on the L7000. You want to hit Security. You're going to hit More in the bottom right hand corner. Then you're going to hit Tools. Once you hit Tools, the system is going to ask you for a code. You need to make sure you use the installer code. Mine is defaulted at 4112. Yours could be different, depending if you or your company has changed it. So you want to make sure you use the correct one. So I go to Tools. I enter in 4112. And then I'm taken to a screen where it gives me the option-- sorry. I'm taken to a screen where it gives me these options. If you're taken to a different screen, it's because you're not using the correct installer code. So make sure you get this screen here. After you're here, hit Program. Then you're going to make your way over to Zones, and then hit Add New. Add New, basically, if you have a whole bunch of zones already learned in, it just grabs the next available zone for you. That way, you'd don't have to scroll through the page and see what's available. You just hit Add New, and it'll automatically choose a zone for you. Once I'm here, you just go to Serial Number. Now that you're in the Serial Number field, it's going to ask you to enter in the serial number for this combo detector. Most sensors, you just fault, and they'll actually trip. You would think that if you pressed these buttons on here, they would actually automatically learn the serial number in there as well. However, they do not. This is actually going to start the enunciation and the test from the speaker in the combo. So instead, what we're going to do is we're going to manually enter in the serial number that's on the back of the 5800COMBO. If you see here, there's a close. It shows you twist counterclockwise. I'm sorry. To close it, you twist clockwise. To open it, you twist counterclockwise. I'm going to twist it counterclockwise. My cover falls off. And then right here, I'm going to have the back of my 5800COMBO. You see, it has the four lithium cr123 AA batteries. And then up on the right-hand side, on this big sticker, you actually see the smoke serial number and the CO serial number. I want to get a close-up of this in a second. So you'll see that the smoke and CO serial number are basically the same. It's just the serial number, the last digit at the very end is one digit higher than the smoke one. So we're going to go ahead and type it in. I have 007195. Now, keep in mind, this is just for the smoke. If you're going to be doing CO, you have to do it for the CO again. If you're doing this for a freeze, you have to do another zone with the same serial number again. I'm going to show you guys all of that in second. So this one, I'm doing my smoke detector has my first zone. So I type in the serial number, 007195. I hit Done. For the smoke and heat, I'm going to leave it as loop 1. For the Zone Description, I'll go ahead and put it as-- I'm going to hit Clear, and I'll type in "living room." Sorry. I'll type in the "living room." For the device type, it is a Smoke Detector. So we need to hit Smoke. For the response type, you can do Fire No Verification or Fire with Verification. What that means is, Fire No Verification means that as soon as smoke enters this chamber right here, this system automatically sends the fire signal down to the panel. What the Fire with Verification does is, let's say you have this in the kitchen. And let's say you're cooking something, and the smoke from the pan goes up to the smoke. You have 30 seconds to clear the smoke, because once the sensor detects it, it gives you 30 seconds, again, to check. And if the chamber is still filled with smoke, that's when it sends the fire signal down. So Fire No Verification, it automatically sends it. Fire with Verification, it gives you 30 seconds to clear the chamber. And then it will actually check again to see if there's still smoke in there. So that'll probably be useful if you're installing this in the kitchen. I'm going to do Fire No Verification, just because I'm putting this in the living room. And Alarm Report, again, you want to make sure that's set to Yes, especially if you're being monitored by the central station. If you set it to No, that means the alarm that this sensor sets off will not be reported to the central station. So make sure that is set to Yes. Supervision, you do want to make sure it's supervised. Supervised means that, basically, if there's a low battery, if somebody messes with the tamper, it will report that over to the panel. And most importantly, after you're done editing everything, you want to make sure that you hit Save. So right here, I've programmed in my living room smoke detector. I'm going to leave the cover off, just because I'm going to do a CO detector next, and I need to know the serial number. So I'm going to hit Add New Again, you go to Serial Number. Now, my CO serial number is one digit higher. So it's 007196. I hit Done. My loop number is going to stay as 1 as well. My Zone Description, I'm going to go ahead and type in "living room" again, because they are in the same location. I'll hit Done. For the device type, this is where you got to switch it to Carbon Monoxide, yes. Response Type will automatically set to Carbon Monoxide. Again, Alarm Report, you want to set Yes. Supervision, you want to set to yes, and you hit Save. Now I have my smoke and my CO. Let's say I wanted to do the freeze detection. Remember, freeze detection uses the first serial number, which is the same serial number the smoke does, except it uses loop 3. I'm going to show you guys that now. I'm going to just go ahead and Add New. Serial Number, so that's 007195. That's the first serial number. You're going to switch this to a loop 3. Zone Description, we can type in freeze. For the Device Type, let's see if there's a Temperature. You can put it to Temperature or Environmental. I'm going to put it at Temperature. And the Response Type automatically goes to 24 hour auxiliary, which means that once the freeze detection goes off, the auxiliary siren will go off on the panel as well. It won't be a full-on, all sirens going off. It'll actually just be the actual keypad, I believe. Alarm Report, Yes. Supervision, Yes. And then you just hit Save. Now, we have three of these programmed in. We have a smoke, CO, and a freeze detection. There's actually two more that you can do, which is actually using loop 2 for either of the serial numbers. So if you use loop 2 for smoking and CO, it actually does a maintenance. And if you do loop 2 for the CO, it will actually do end-of-life. So usually, these last up to 10 years, which means that if you have the sensor, or if you have the 5800COMBO programmed into a panel and you have it set to a loop 3, and you have the seal detector serial number and you have it on loop 2 then the panel will actually notify you when these need to be replaced. So I guess it has a countdown. And after about eight to 10 years, it'll actually notify you through the panel. It will have a trouble message saying that you need to replace your 5800COMBO detector. So we have our zones programmed in. I'm going to go in and put the back cover on before I get a tamper. Because if I exit programming and the back cover's off, I'll definitely get a tamper. So now that it's here, I'm going to hit the back arrow key all the way out to my home screen. It's going to ask you if you want to allow the installer to re-enter programming. You always want to make sure that you say yes to that. I already hit Yes. So I hit the back arrow key one more time. And my system is now ready to arm. Now, you notice that I didn't have to program in the tamper. That's because it automatically gets programmed in. If I release the cover and I take this off, if you guys are ever changing batteries or anything like that, make sure your system is going to go into a Tamper mode. See, Tamper 3, Living Room, Freeze. And it will also have the smoke detector, because this is all three zones. If you want to quiet the system down, just go ahead and tap on the screen anywhere. It's going to give you the option to disarm. That's to clear the tamper. Remember, to clear a tamper, you do have to disarm twice. And what you got to do is fix the issue. So if the back plate was off, you put the back plate on, lock it into place, and you hit Disarm. You enter in the master code, or any user code. And you have to do this twice. And you have cleared the tamper. Now I'm going to show you guys how to test the actual smoke and CO. So for the smoke detection, remember the two buttons I showed you earlier? Smoke is to your left if you're looking at the sensor, and the CO is to your right if you're looking at the sensor. Obviously, if you're looking at it in the camera, it's probably the other way around. So when I go ahead and hit the Smoke button, you only got to press and release. If you hold it down, it's going to give you the battery level and everything like that. All you got to do is just press and release. Smoke sensor is good. Battery life is at least 12 months. The alarm will now sound in five seconds. Press Test to cancel. So press and releasing actually gives you the battery life. And now it's saying five seconds, it's going to send a test signal. [HIGH-PITCHED BEEPING] So it sends the signal over to the panel, and that automatically sets off a fire. Now, if you're being monitored by a central station, and you're doing this to get a certificate of alarm for that, make sure that you call the central station first and you let them know to place your system on test. That way, whenever you send this signal over to the panel and the central station receives it, they don't send the fire department out. Make sure you have your account on test with the central station before testing this out, especially if you're being monitored by a central station. Now that we tested the smoke, you obviously saw the panel went into a smoke alarm, the sensor went off, and the panel went off. Same thing for the CO. You just press and release. It'll tell you the status of the CO. It will send the CO detection over to the panel, you'll see here. CO sensors good. Remaining sensor life is at least 12 months. Battery life is at least 12 months. The alarm will now sound in five seconds. Press test to cancel. Once the alarm goes off, you can actually go ahead and disarm that with your master code. [HIGH-PITCHED BEEPING] So before all that, it should've given me the option to disarm. If you guys do not see a Disarm feature on there, if you just hit the House button right here twice, it will actually bring up the keypad and it will allow you to clear that CO detection. So now, we've tested the smoke, we've tested the CO. And if you want to test the freeze detection, you can go ahead and pop this into-- I've seen people throw it into a freezer. I've seen people grab a bag of ice and place it on the desk, and then you just place the sensor on top. And then once the sensor gets cold enough, below 41 degrees, it'll report the freeze trouble down to the panel. Now, that was just a quick video on how to program in the 5800COMBO to the L7000, and how to test it. If you guys do have any questions, feel free to email us at support@alarmgrid.com. If you guys find the video helpful, make sure that you hit Like underneath, subscribe to the YouTube channel, and enable the notifications, so whenever we upload new content, you guys do get notified. I'm George. I'll see you guys next time.
- Uploaded