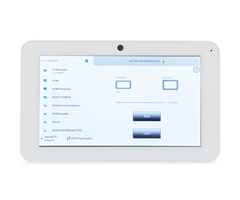
Qolsys IQ Remote: Behavior On a Partitioned System
Related Products
Related Categories
Description
https://www.alarmgrid.com/faq/how-does-the-qolsys-iq-remote-behave-on-a-partitioned-system
http://alrm.gd/get-monitored
Transcript
Hi DIYers. This is Michael from Alarm Grid. And today, I'm going to be explaining the behavior of the Qolsys IQ Remote when partitions are used on the system. That is, when partitions are used on the Qolsys IQ panel 2 or Qolsys IQ Panel 2 Plus. Just a brief introduction. The Qolsys IQ Remote-- it is the touchscreen keypad for the Qolsys IQ Panel 2 and IQ Panel 2 Plus. It pairs across Wi-Fi. And it's just a handy little touchscreen keypad that mimics the screen of the IQ 2. So nice keypad-- we like it a lot. This is actually an older style model. You see that the webcam-- camera, not webcam-- this camera, it's off to the side. The newer models have it in the center. But they all act the same way. So for our purposes, it's fine. But so right now, you see that we have our Qolsys IQ Panel 2, and it has partitions enabled. You can tell that because it gives us a login screen when we get to the system. We have to provide a code. And based on the code that we provide, that's how much authority we'll have, whether or not we'll be able to arm certain partitions, whether or not we'll have access to certain partitions, little things like that. But we already have ours enabled. But you see a big difference here. If I turn off the screen and then I turn it back on, you see it doesn't give me a login screen. It's just taking me right to it. We actually have it assigned to Partition 1, and that is the first thing I want to note. You can't switch between partitions on this. Let's log into the IQ Panel 2. Let's do our master code 1234. And Admin-- I guess that's the name of the master, the Admin code. And you see we can actually switch between different partitions by sliding upwards and downwards. We only have two partitions enabled on the system right now, but we can switch between them. You see also the messages change, whether we're on partition 1 or 2. But, unfortunately, we can't do that on the IQ Remote. You see we don't have any option here. Partition 1 arm stay. And it looks like I inadvertently armed stay. We'll go and disarm real quick. 1234. Partition 1 disarmed. So you do see that we have arming capabilities on the IQ Remote, which is great. That is our main purpose for the IQ Remote. One thing I do want to show you, when you're on partition 1, you have access to the Z-Wave module, the smart home automation devices that you enroll. And we happen to have a lighting device enrolled right now. I'm not going to go and test it, but just to show you that we do have the menus there also. A Z-Wave lock is apparently enrolled in the system and we have the photo display. But I'm going to show you that when we switch it to partition 2, that we don't actually have those. So I'm just going to go through it one more time. You see we have the locks and we have the lights. See, they're there. But if we go and change it to partition 2, we're not going to have access to the Z-Wave stuff. So let's go and do that. So we're at the Qolsys IQ Panel 2. And actually, I switched to installer mode. So we're going to just go and exit here, and now we're back at the login screen, hopefully, when it comes up. OK, so let's get in with our installer code this time. So 1111 is the default installer code. Welcome Installer. That's us. And we're going to go in. So we're at the main screen of our Qolsys IQ Panel 2 or IQ Panel 2 Plus. And we're going to hit this small gray bar at the top of the screen. We're going to choose Settings. We're going to choose Advanced Settings. And we don't have to enter a code, because we already did that at the start. So if I go into Installation, and then Installer Settings-- and I'm sorry, I thought I was disabling partitions for a second there. I'm actually switching the partition of the IQ Remote. Let's do that first. So we're going to go to Devices. We're going to go to Wi-Fi Devices. We're going to go to IQ Remote devices. And you see we have our one IQ Remote that is paired with the system. IQ Remote 1 is the device name. And if I do the pencil icon here, I can set the partition. And I'm going to set it to Partition 2. Not partition 3, Partition 2. And we're going to do save. Sensor updated successfully. And so let's go back to the IQ Remote now. You see now we have access to Partition 2. And if I scroll through it, I don't have the Z-Wave devices anymore, because you're only going to get the Z-Wave devices if it's on Partition 1. So just a little fact there. So good reason to have it on Partition 1, assuming you want to control your Z-Wave devices, which is a big reason why you have this fancy keypad and not just like the DSC Power series one. What is that? The wireless arming station that doesn't really let you do the automation stuff. So this is a good reason to keep it on Partition 1. But if you are using partitions, it can be a bit limiting, but something you'll just have to deal with. But let's see what happens if we get rid of partitions, if we just exit them all together. So we're going to back out a little bit. And we're going to go into the setting I was going into before, Installer Settings. And let's see what happens when we just disable partitions altogether. And I did not mean to pull up the keyboard there. Let's scroll down to Partitions. There we go. Partitions are currently enabled. Let's turn them off. And we're going to disable partitions. OK. And then we reboot the IQ 2, so it's just going to load up at the screen. We don't have to enter in the code until we go into Installer Settings. But you see right now we have full access to the system. There are no partitions to switch between. But we do get access to the automation devices. So it's just a little bit different, not too much. It kind of behaves as if you never have partitions enabled on this, because you don't have to enter in a code when you have partitions enabled. You just get access to the system, depending on the partition that you've assigned it. And just for proof of concept, let's go through one last time and just enable partitions and give you one last look on how it looks when partitions are enabled. We're at the main screen of our IQ 2. We press the gray bar at the top. We'll do Settings, Advanced Settings. Enter user code. This time, we do have to enter in a code. So we'll do our installer code, 1111. We could also do our dealer code, 2222. We'll do Installer Settings. I skipped a couple ones, just to show you how I got here, because I actually went through that a bit fast. This is where we'll get after we enter in the code. We do Installation. We do Installer Settings. And then we can scroll down to Partitions. And I did Other Automation there. We don't want that. We want Partitions. And we'll enable Partitions. And Partitions are now enabled. You see we get a refresh on our IQ Remotes. Once it comes up, we have it assigned to Partition 1. And like I said, we can go into the menu and change partitions. But that is a bit of the behavior when you have partitions enabled on the IQ 2 or IQ Panel 2 Plus, how the IQ Remote shows itself, how you interact with it. So if you have any questions about the IQ Remote, the Qolsys IQ Panel 2, partitioning, or alarm monitoring services, send an email to support@alarmgrid.com. If you found this video helpful, make sure to give it a thumbs up to like the video, and remember to subscribe to our channel for updates on future videos. We hope you enjoyed the video. Thank you.
- Uploaded