Alarm.com ADC-VDB101, ADCVDB102, ADC-VDB105X, and ADC-VDB106X Installation Guide - Dated 2020
Related Products


Related Categories
Document Transcript
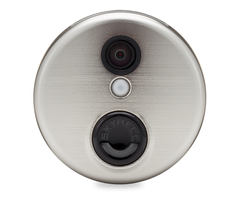
Alarm.com Wi-Fi Doorbell
Camera and Slim Line II
Installation Guide
ADC-VDB101
and ADC-VDB105X
ADC-VDB102
and ADC-VDB106X Introduction
Your customers will always know who is at the front
door with an Alarm.com Doorbell Camera. Now with
two options to choose from – our original Wi-Fi Doorbell
Camera and our new Slim Line II – it’s easy to deliver
front door awareness to even more customers!
Each Alarm.com Doorbell Camera features a doorbell with
an integrated camera, PIR motion sensor, and digital
microphone and speaker, enabling homeowners to answer
the door and speak to visitors via Two-Way Audio all right
from their app.
Slim Line II
Alarm.com Wi-Fi Doorbell
Alarm.com Wi-Fi Doorbell Included materials
∙
Wall mounting bracket
∙
Wall screws
∙
Masonry anchors
Device compatibility with Alarm.com
Alarm.com Doorbell Cameras
The following doorbell cameras are fully compatible
with Alarm.com:
∙
Alarm.com Slim Line II Doorbell Camera
∙
Alarm.com Wi-Fi Doorbell Camera, SkyBell-HD Edition
Slim Line II incompatible with SkyBell and other platforms
The Slim Line II is not compatible with other platforms and apps,
such as the SkyBell platform.
SkyBell HD cameras
Certain SkyBell HD cameras, not purchased through Alarm.com,
may not be compatible with the Alarm.com platform.
SkyBell V1 and V2 not compatible
SkyBell V1 and V2 cameras are not compatible with Alarm.com.
Requirements
Power and chime type
10-36 VAC (16-24 VAC is recommended), 10 VA or 12 VDC, 0.5 to
1.0 A wired to an in-home mechanical or digital doorbell chime.
Note:
A SkyBell Digital Doorbell Adapter must be installed if a
digital doorbell chime is present. See below for more information.
Note:
Do not install more than two doorbell cameras on a single
transformer.
WARNING:
An in-line resistor (10 Ohm, 10 Watt) is required when
installing the doorbell camera without a wired, in-home doorbell
chime. This is typically done when testing the doorbell or giving a
demonstration. Failure to install a resistor when a chime is not
present may result in damage to the doorbell camera.
Wi-Fi
Upload speed of 2 Mbps is required. Compatible with Wi-Fi 802.11
b/g/n, 2.4 GHz or 5 GHz for the Slim Line II (on the 20 MHz
bandwidth channel) up to 150 Mbps.
Mounting
The mounting plate affixes to a flat surface (a power drill may be
required) and uses the existing doorbell wiring.
Mobile app
Download the latest Alarm.com mobile app for iOS or Android
(versions 4.17 for 4.15.1 respectively or higher for video streaming).
Pre-installation checklist
Working doorbell check
A wired doorbell circuit is required to provide power to the doorbell
camera. First check that the existing wired doorbell is working and
that it is wired properly. There is a power issue if the existing
doorbell does not ring the indoor chime when the button is pressed.
This issue must be addressed before beginning the doorbell camera
installation process.
Wired doorbell check
Check that the existing doorbell is wired by visually inspecting the
doorbell button for wires. If necessary, the doorbell can be removed
from the wall to check for wiring. You can also inspect the chime
inside the home – a chime plugged into a power outlet might
indicate that an incompatible wireless doorbell system is in place.
Doorbell chime type check
Locate the chime inside the home and remove the faceplate.
Identify the chime as one of the following types:
∙
Mechanical chime
If the chime has metal bars and a striker pin, it is mechanical and
will work without additional hardware.
∙
Digital chime
If the chime has a speaker that plays a tone when pressed, it is
digital and will require the installation of the SkyBell Digital
Doorbell Adapter and the enabling of the digital doorbell setting in
the app to function properly.
∙
Tube chime
If the chime has a series of tubular bells, it is a tube chime and is
incompatible with the doorbell camera.
∙
Intercom system
If the doorbell button fixture includes a speaker, it is an intercom
system and is incompatible with the doorbell camera.
∙
No chime
If there is no chime in the system, the customer will receive alerts
only on their phone, and a resistor (10 Ohm, 10 Watt) must be used
in-line with the doorbell camera.
1 Pre-Installation Checklist (continued)
SkyBell Digital Doorbell Adapter
The SkyBell Digital Doorbell Adapter is available for purchase
through the Alarm.com Partner Portal.
Wi-Fi password check
Make sure you have the password for the Wi-Fi network in the home
where you plan to install the doorbell camera. Verify the Wi-Fi
credentials before you begin by connecting a smartphone or laptop
to the Wi-Fi network and attempting to access a website.
Internet & Wi-Fi speed check
A Wi-Fi Internet upload speed of
at least 2 Mbps is required
at the
location where the doorbell camera is installed.
Follow these steps to check the connection speed:
❶
Go to the location where the doorbell camera will be installed
❷
Close the door
❸
Disable the cellular (LTE) Internet connection on your device
and connect to the home’s 2.4 GHz or 5.0 GHz for Slim Line II
Wi-Fi network
❹
Run a speed test (for example, SpeedOf.me or speedtest.net) to
determine the Internet speed
❺
In the test results, note the upload speed. The Alarm.com Doorbell
Cameras require an upload speed of at least 2 Mbps.
Hardware installation
Alarm.com Doorbell Cameras
Alarm.com’s Doorbell Camera hardware must be used:
∙
Alarm.com Wi-Fi Doorbell Camera
∙
Alarm.com Slim Line II Doorbell Camera
SkyBell HD consumer hardware is not supported. Slim Line II
Doorbell Camera hardware is not supported on the SkyBell platform
or other service provider platforms.
Remove existing doorbell button
Take care to prevent the existing doorbell wires from slipping into
the wall.
Attach the doorbell mounting bracket to the wall
Feed the existing doorbell wires through the hole in the center of the
bracket. Affix the bracket firmly to the wall by driving the provided
wall screws through the top and bottom holes in the bracket.
Failure to make the bracket flush to the wall could cause a poor
power connection between the bracket and the doorbell camera.
Connect power wires to the mounting bracket
Loosen the terminal screws and insert the wires beneath the
screws. Do not short (touch together) the wires during this process.
Tighten the screws. The wires must be of approximately equal
thickness, and the screws should be tightened approximately the
same amount so that the screwheads are flush. If the wires are
thick, splice short lengths of additional thinner wire. The splice joints
can be hidden inside the wall, and the thinner wire can be used to
connect to the mounting bracket.
Attach the doorbell camera to the mounting bracket
Slide the top of the doorbell camera down onto the mounting
bracket and push the front of the doorbell camera toward the wall.
Tighten the set screw located on the bottom of the camera, being
careful not to damage it (power tools should not be used with the
set screw). The camera’s LED should begin to illuminate.
Connecting the SkyBell Digital Doorbell Adapter
If the home has a mechanical chime, you may skip this section. If the
home has a digital chime, a SkyBell Digital Doorbell Adapter is
required.
Remove the cover from the digital chime and locate the wire
terminals. Completely remove the screws from the terminals and
temporarily move the wires out of the way. Some digital chimes
come installed with a diode in place. In these circumstances, the
diode must be removed prior to installing the SkyBell Digital
Doorbell Adapter. If the diode remains in place, it may cause the
SkyBell Digital Doorbell Adapter to fail, leading to issues such as
constant ringing. Connect the SkyBell Digital Doorbell Adapter
wires to the chime:
∙
J4 -> “Front” Terminal (on Digital Doorbell)
∙
J3 -> “Trans” Terminal (on Digital Doorbell)
Connect the J5 wire to a wire from the wall, and connect the J6 wire
to a wire from the wall. Reassemble and reinstall the digital chime
in its original location.
Note:
The adapter may say “TO SKYBELL” on the side.
Please disregard.
2 Syncing with Alarm.com
Ready to sync
The doorbell camera is ready to sync when the LED is alternating
Red and Green.
This LED pattern indicates that the camera is in
Wi-Fi Access Point (AP) mode. In this mode, the camera broadcasts
a temporary Wi-Fi network. During the syncing process, you will
connect to this network when instructed by the app. The app will
configure the doorbell camera.
If the LED is not alternating Red and Green, see the troubleshooting
section below.
Note:
Alarm.com Doorbell Cameras can be installed through the
MobileTech app as well. MobileTech > Select Customer > Equipment
> Video Devices > Add Video Device > Install Doorbell.
Add a new doorbell camera
Navigate to the doorbell camera page by selecting the Doorbell
Camera tab in the left navigation bar. If a doorbell camera is
already installed on the account, you can add a new camera by
selecting the Settings icon on the existing doorbell camera’s screen.
Note:
If you do not see the Doorbell Camera tab, the Doorbell
Cameras service package add-on needs to be added to the account.
You may also need to check the customer’s login permissions to
ensure they have permission to add a doorbell camera.
Follow the on-screen Instructions
Keep your mobile device on the home’s Wi-Fi network (or on LTE)
and follow the on-screen instructions. You will be prompted to
provide a name for the camera.
When instructed, connect to the doorbell camera’s
temporary Wi-Fi network
The syncing process will instruct you to connect to the doorbell
camera’s temporary Wi-Fi network. The network is named
Skybell_123456789 (or SkybellHD_123456789), where 123456789
corresponds to the device’s serial number. On iPhone or iPad, you
must leave the Alarm.com app, enter the Settings app, select Wi-Fi
and select the SkyBell network. On Android, this process is
completed within the app.
It is recommended to remain within six feet of the doorbell camera
throughout the entire enrollment process to ensure the mobile
device and the doorbell camera stay connected.
During installation, your mobile device may display a message
indicating that there is no Wi-Fi available.
This is expected. Dismiss the message and continue to stay
connected to the doorbell camera’s temporary Wi-Fi during the
installation process.
Enter the home’s Wi-Fi password
Very carefully enter the home’s Wi-Fi password. If you must
configure static IP addresses or the customer has a hidden Wi-Fi
network, use the Manual Configuration tab.
Enable push notifications & recording schedules
The mobile device that is syncing the doorbell camera is
automatically added as a notification recipient.
Enable the SkyBell Digital Doorbell Adapter in the app
If you installed a SkyBell Digital Doorbell Adapter, the device must
be enabled from the Alarm.com app. Open the Alarm.com app and
select the Doorbell Camera tab. Select the Settings icon for the
camera and turn on the option to enable the digital door chime.
Select Save.
Notifications & recording schedules
Notifications
Notifications are alerts that are sent immediately to the customer’s
mobile phone when activity is detected by the Alarm.com Wi-Fi
Doorbell Camera. Push notifications help the customer take full
advantage of their new doorbell camera.
Acknowledging a doorbell camera push notification will route the
user directly to the call screen and enter a two-way audio call.
Button pushed
Receive a notification when the doorbell button is pushed. By
acknowledging the notification, you will automatically join a two-
way audio call and receive a live video feed from the camera.
Motion
Receive a notification when the doorbell detects motion. By
acknowledging the notification, you will automatically join a two-
way audio call and receive a live video feed from the camera.
Importance of push notifications
Enabling push notifications and adding recipients are critical to the
success of a doorbell camera installation. Push notifications allow
the customer to instantly see, hear and speak to visitors at the door.
We recommend the customer select the “Keep me logged in” option
on the Login screen in the Alarm.com app so that they can respond
to push notifications from the doorbell camera more quickly.
Recording schedules
Recording schedules control the times and events during which the
doorbell camera records clips.
Call (button pushed)
Record a clip when the doorbell button is pushed.
Motion
Record a clip when the doorbell detects motion. Reduce the number
of motion-triggered clips by selecting the “Low” motion sensitivity
setting. Navigate to the customer website Video Device Settings
page and adjust the “Sensitivity to Motion” slider to the “Low”
position.
3 Notifications & recording schedules
(continued)
Event triggered (for example, alarm)
Record a clip after a sensor is activated or after an alarm.
Notes:
Recording duration is typically around one minute. Clips are longer
during an alarm or when a mobile user joins a call after a button or
motion event.
Recording schedules do not need to match notification settings. You
can enable recording schedules for both button and motion events
but only enable notifications for button events if desired.
Accounts have a maximum number of clips that can be uploaded
in a month and saved on the account. Doorbell camera clips count
toward that limit.
LED colors, button functions &
general troubleshooting
Battery charging
If the LED is alternating between
Red and Blue
(HD Edition) or
pulsing
Blue
(Slim Line II), the doorbell camera’s battery is charging.
The duration of the pre-syncing charge process varies due to
differences in existing doorbell circuits but normally takes less than
30 minutes. See the
Power information & ttroubleshooting
section if
this state persists.
Wi-Fi connectivity
If the LED is
flashing Orange
, the doorbell needs to be manually
placed into AP mode. Press and hold the Main button until the LED
begins rapidly flashing
Green
, then release. The LED will flash
Green
as the doorbell camera scans the Wi-Fi networks in the area. The
doorbell camera should enter AP Mode after a couple of minutes
and the LED should begin alternating
Red
and
Green
.
Enter AP Mode (Broadcast Syncing Mode)
Press and
hold
the Main Button until the LED begins a
Green
rapid
strobe flash, then release the button.
When the LED flashes
Green
, it means the Alarm.com Wi-Fi
Doorbell Camera is in the process of entering AP Mode.
The LED will alternate
Red and Green
when the device has entered
AP Mode.
Power cycle
Press and
hold
the Main Button until the LED begins a
Blue
rapid
strobe flash. The power cycle could take up to 2 minutes.
Note:
You can power cycle the Alarm.com Wi-Fi Doorbell Camera
when it is in AP Mode (see instructions above). Press and
hold
the
button until the LED flashes
Blue
.
Factory reset
Caution:
If you initiate a factory reset, the doorbell camera will need
to be re-connected to Wi-Fi and re-synced with the account.
Press and
hold
the button until the LED begins a
Yellow
rapid strobe
flash. The reset could take up to 2 minutes.
Notes:
The Alarm.com Wi-Fi Doorbell Camera will flash
Blue
before it
flashes
Yellow
– do not release during the flashing
Blue
phase (this
will power cycle the device).
You can factory reset the device when it is in AP Mode (see
instructions above). Press and
hold
the Main button until the LED
flashes
Yellow
. If a factory reset is performed on a camera that is
already connected to Wi-Fi, the camera will need to be re-installed
to re-establish its Wi-Fi connection. If the LED on the doorbell
camera is not showing any color, there may be a power issue or the
LED may have been turned off in the Video Settings on the
customer website.
Online resources
Visit alarm.com/doorbell for troubleshooting tips, installation videos
and more.
Power information & troubleshooting
Wired power supply
The Alarm.com Wi-Fi Doorbell Camera requires a wired
power supply.
Standard doorbell power
Standard doorbell power is 16 VAC (Volts Alternating Current)
provided by a transformer that steps mains (120 VAC) power down
to low voltage. A common transformer is 16 VAC 10 VA (Volt Amps)
– this is standard if the home has a single chime. If there are
multiple chimes, the transformer will normally have a higher power
(Volt Amps) rating. Other doorbell transformers offer variable
Voltage outputs from 8 VAC to 24 VAC.
Battery for uninterrupted supply
The doorbell camera has a battery supply to provide power when
the indoor doorbell chime is rung. To make the existing doorbell
chime ring, the doorbell camera must short the doorbell circuit,
diverting power from the camera. During this time, the battery is
used to power the doorbell camera. The camera cannot run solely on
battery power – a wired power supply is required. The built-in
lithium battery has an expected battery life of 3 to 5 years,
depending on usage.
Battery charging
When the LED is alternating
Red and Blue
(HD Edition) or pulsing
Blue
(Slim Line II), the battery is charging. The battery may need to
charge prior to first-time use. The duration of the pre-syncing
charge process varies due to differences in existing doorbell circuits
but normally takes less than 30 minutes.
Power supply issues
The protection circuitry in doorbell transformers degrades over time
and with use. This causes the power output of the doorbell
transformer to drop. Eventually the power provided by the
transformer drops below the power required by the Alarm.com
Wi- Fi Doorbell Camera. At this point, the transformer needs to be
replaced.
If installation is attempted and the doorbell transformer’s power
output does not meet the required power, the doorbell camera’s
LED will flash with a
Red
(HD Edition) or
Blue
(Slim Line II) rapid
double-flash pattern. If this pattern persists, the doorbell
transformer must be replaced to provide sufficient power for
doorbell camera operation.
4 Transformer replacement
If you have confirmed there is a transformer failure, there are two
options for transformer replacement. You can either use a plug-in
wall-wart style transformer or wire a new transformer into the
home’s mains lines, physically replacing the existing transformer (a
professional electrician is recommended for this installation).
If you choose the first option, you can use an AC-AC Wall-Adapter
transformer like those commonly used to power security panels.
Next, identify a power outlet near the existing transformer. Remove
the low-voltage wires from the existing transformer and connect
those wires to the new transformer. Plug the new transformer in to
the power outlet and secure it in place.
Power configurations
No chime – With doorbell camera – Resistor required
Mechanical chime – Before installation
Mechanical chime – With doorbell camera
Digital chime – Before installation
5
Doorbell Transformer
Main Power
Low Voltage AC
Digital Door Chime
Doorbell Button
Doorbell Transformer
Main Power
Low Voltage AC
Mechanical Door Chime
Doorbell Button
Doorbell Transformer
Main Power
Low Voltage AC
Mechanical Door Chime
Doorbell Camera
Doorbell Transformer
Main Power
Low Voltage AC
Digital Door Chime
Digital Doorbell Adapter
Doorbell Camera 8281 Greensboro Drive
Suite 100
Tysons, VA 22102
201130
© 2020 Alarm.com. All rights reserved.
- Uploaded