2GIG GC3e: Enrolling an Image Sensor
Related Products
Description
https://www.alarmgrid.com/faq/how-do-i-install-the-xcvr3-gc3-to-a-2gig-gc3e
http://alrm.gd/get-monitored
Transcript
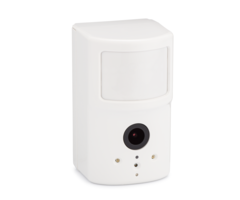
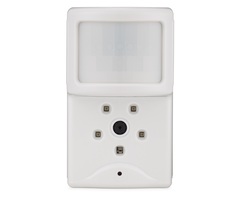
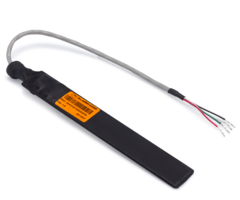
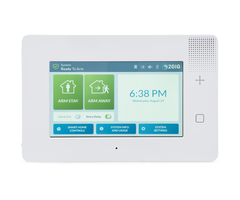
Hi, DIYers. This is Michael from Alarm Grid, and today I'm going to be showing you how to program an image sensor to a 2GIG GC3e security system. In order to use image sensors with your 2GIG GC3e, you will only need to have the 2GIG XCVR-GC3 image sensor transceiver module installed. We set that up in a different video. It just uses a four wire connection, with the panels on terminal blocks. It doesn't take away the panel's ability to support the E series encrypted sensors, or the Legacy 345 megahertz sensors from the Honeywell 5800 series and the 2GIG 345 megahertz series. So you're just adding it in, very simple and it will allow you to support image sensors. There is a couple of things that-- there are a couple of things that you need to keep in mind. You will need to have your system monitored, and set up with alarm.com. Your image sensor is communicating with alarm.com through the panel actually. I'm going to show you a little bit of that as we get into it, but it's actually programming into a wireless zone. You'll set up with a specific equipment code, 9999 for the alarm.com image sensor. And once you get enrolled, you'll actually see it in the image sensor menu. So a little bit of specific things that you have to do when you're getting this enrolled, but let's get into it. We have our image sensor right here. This is the one we'll be using today. There are two image sensors you can use with the system. You can use the 2GIG image 2 or the 2GIG image 3. We have the 2GIG image 3, which is the newer one. It's a little bit nicer with images, so that's cool, but they both enroll the same way. But we're going to get into it, so let's start from the main screen of our 2GIG GC3. Now we're at the main screen for GC3. We're going to choose the 2GIG logo in the upper right corner, and we're going to be entering our installer code, which ours is at the default of 1561. We're going to choose system configuration. We're going to choose wireless zones, and we're going to wait about 5 seconds or so for it to get into the menu. And so we're in the menu now, wireless zones. And we're going to just begin programming our image sensors, so sensor type. This is basically the response type for a sensor. We're going to choose interior follower, which is a common type of thing you would use for motion sensor. Not a day zone, we want the interior follower. And then we're going to go to sensor equipment type, it says motion. We're fine with that actually. So we're going to go to equipment code, and we're going to change that to, like I said, 9999. Which we are going to scroll down to find it, which is the alarm.com image sensor. It's on here somewhere. There it is, alarm.com image sensor. OK, so we have that set. The smart areas assignments, so we're going to keep that at S1. That's the partition that the motion sensor-- that the image sensor is assigned to. And if you're using no partition on the system, then you usually just assign it to S1. If you are using different partitions, and you want to assign it to a different one, you can do so up to four partitions on the system. OK, image sensor ID. This is actually where the magic happens here. So the way that this is going to enroll, we're going to auto enroll it. We're going to do so by powering on the sensor. First, we have to open up the sensor. We just slide down the back, and you see, we have one battery installed, but we are missing another AA battery, which we have right here. We're going to insert it, but not until I press learn on here, because then the panel will begin listening for a signal and then will-- the power on the sensor will wait a little bit, will see that the LED turns on and will hopefully get the sensor enrolled. So let's press learn on here. It's listening, and we're going to just insert our AA battery or lithium battery, that came included with the motion sensor-- the image sensor by the way. Image sensor, not motion sensor. You see, there is an LED on the sensor that is lighting up. So we're just going to see if that enrolls. Well, you have to wait a little bit, so we'll just let that go for a second. And there we go, I've found image sensor 1. That's what we want there, so we're going to choose accept. And this is when we can do the final settings here, equipment age, new or existing, it doesn't matter. Just keep yours at new, or change it to existing. It really doesn't matter. It doesn't affect anything at all. Transmission delay, that's going to put a little bit of a delay on the system, if this sensor causes an alarm on the system. That is when the sensor will produce an image by the way. We'll keep our transmission delay disabled. We just want it to send as quickly as possible, If we do get an alarm. Voice descriptor, this is essentially the name for the image sensor. We'll give it a name. We'll give it hallway image sensor, so we'll do hallway, and then we'll do I for image sensor and we'll be done. Hallway image sensor, that's what we'll call it. Sensor reports, you want to have that enabled, that-- so that the system will communicate with alarm.com in the event that this causes an alarm on the system, and then produces images. So we'll keep that enabled. Sensor reports, we will also-- well, sensor reports, we'll keep that enabled. Sensor supervised, we'll keep that enabled as well. That will have the system listen for a check in signal from the sensor periodically, to make sure it's still online. It's powered on, not taken away, not removed from the location. So we'll keep that enabled. And sensor chime, we're going to keep that disabled. You can put a chime if you want, but for a motion sensor or an image sensor, you will have those disabled. Usually those are more for doing window contact sensors, but we're fine with our settings. So we're going to go to return to system configuration, and we're going to press the return area on the left side and we're going to save. Now we're back to the main screen of our 2GIG GC3e, so let's check the image sensor menu to see what we have in there. So we're at the main screen of our 2GIG GC3e. So we get a logo in the upper right, and we're going to enter in our installer code, the default, 1561. We're going to do system configuration, and we're going to do image sensors. And you see, we have our image sensor enrolled in the system. Now the system did have to communicate with alarm.com, to make this happen. We get some information on here. We have battery life, the signal strength, the rules are synced. We can change the sensitivity level, if we want to. Probably a good option, if you're doing pet immunity, set it to low. And you also set it at high, if you really want it to be as active as possible. I'll just keep ours at normal, but you see we do get that option there. It is on zone 1. It does show the wireless zone at the sign. Remember that you have up to 100 wireless zones on the 2GIG GC3e, but that is how you enroll your image sensor with the system. You do want to request an authorization code to it. How to communicate with alarm.com is actually part of the setup, so make sure you do this when you're finishing up the setup and everything. So have your system online and communicating with alarm.com, and so you get the authorization code and you can have that set up. So let's go back to the main screen here, and we're done setting up our image sensor with the 2GIG GC3e and our alarm.com account. So if you have any questions about the 2GIG image 3, 2GIG GC3e, 2GIG image 2 image sensors, alarm monitoring services, send email to support@alarmgrid.com. If you found this video helpful, make sure to give it a thumbs up below to like the video. And remember to subscribe to our channel for updates on future videos, we hope you enjoyed the video. Thank you.
- Uploaded