Enrolling a Schlage Z-Wave Lock to a Qolsys IQ Panel 2
Related Products


Related Categories
Description
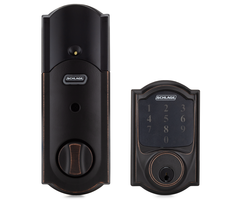
In this video, Jorge explains how to add a Schlage Z-Wave Door Lock to a Qolsys IQ Panel 2 System. This is possible because of the Z-Wave controller that is integrated with the IQ Panel 2 System. In addition to door locks, the system can also support other Z-Wave devices like lights and thermostats.
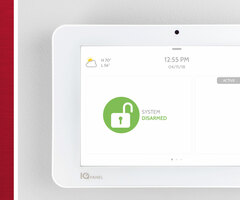
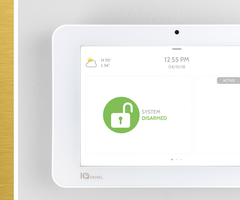
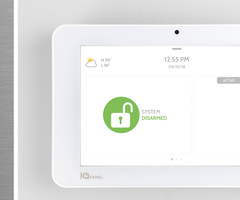
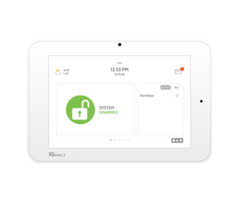
Z-Wave home automation is one of the best perks of owning an IQ Panel 2 Alarm System. Z-Wave devices can be paired with the IQ Panel 2 and controlled directly from the system. By pairing the lock with the IQ Panel 2, you can lock and unlock your door directly from the system. All you have to do is swipe left or right from the main system menu until you reach the lock you enrolled. You can then click on the lock to control the device.
You can also use Alarm.com Mobile App to operate the door lock remotely. This is possible from anywhere in the world using an Android or iOS device. Simply open the app, and login to your Alarm.com account. You will find the lock in the automation section. From there, you can lock or unlock the door as needed. This is great for letting a guest inside while you are away from home. And if you add Alarm.com Security Cameras, you will even be able to see exactly who is at your door!
Alarm.com is also used for pushing down system codes to the door lock. By doing this, you can use the same code on your door lock that you use with your IQ Panel 2 System. Once you unlock the lock using a paired code, the system will automatically disarm for your convenience. However, you will need to create an event-triggered lock automation rule from the Automation section of Alarm.com for this to work. Please note that only Alarm.com can push user codes to the lock. You cannot push user codes to the lock directly from the panel itself.
When pairing a Schlage Z-Wave Lock with an IQ Panel 2, you should always clear the lock from the network first. The lock may have been previously paired with a different Z-Wave network as part of factory testing purposes. Clearing the lock from the network will ensure that it can be paired with the IQ Panel 2 successfully.
Note: Jorge mentions that user codes can be programmed from the panel and sent to the lock either through the panel or the Alarm.com service. This can actually only be enabled through Alarm.com. Codes can be programmed in the Qolsys IQ Panel 2, but they can only be associated to the lock through Alarm.com.
http://alrm.gd/get-monitored
Transcript
[MUSIC PLAYING] Hey, DIYers. I'm Jorge from Alarm Grid. Today we're going to be going over how to enroll a Schlage Z-Wave door lock into the IQ2 system. So the first thing you want to do-- I actually have mine already installed here, but the first thing you want to do before you install the system is, on the back of your Z-Wave door lock, there's a sticker that's going to have the programming code. You want to make sure that you save that programming code because that's what we're going to use to enable the Z-Wave function so that we can clear it and then add it onto the system.
So I actually went ahead and removed this before the video, and you guys should be able to see the close-up right now. And you'll see that, on the back of the sticker, there's a programming code. There's a user code 1 and a user code 2. The one that we need right now is just the programming code because what we're actually going to be doing--
Once we get the programming code and we get the Z-Wave door lock learned into the Qolsys system, we're actually going to push the codes from the Qolsys system down to the Z-Wave door lock. That way, you guys can actually just use the codes from your alarm system that you use to arm and disarm, and you can just learn them into the Z-Wave door lock so you can enter in your code there.
And at the same time you unlock your door lock, it can also disarm the system. These are just features that you can do. And if you guys are monitored and have the Alarm.com service application, you guys can also do it from the app as well. So make sure-- as you saw in this video, make sure that you get the programming code from the back of the Z-Wave door lock.
Once you have that sticker, go ahead and finish installing everything. And then, at the end of the installation, you should have your Z-Wave door lock mounted on your door. And I have mine on a plank so it looks like this right now. The lock is currently out. And then the front shows you the touchscreen keypad. So I'm going to leave it facing this way now because I will need this so that I can learn it into the system.
The first thing we're going to go ahead and do is get right to the IQ2. So on the IQ2, go ahead and scroll down from the top or just press that top button. Hit Settings. We're going to go to Advanced Settings, and it's going to ask me for a code.
Enter user code.
We need to enter in the dealer or the installer code. Mine is defaulted, so I can use 1111 or 2222. I'm going to use 1111. Now obviously, yours may be different if you or your company has changed it, so make sure you use the correct code. After we do that, we go to Installation. We're going to be installing the device. And it's a Z-Wave device.
And the first thing you do whenever you're learning in any Z-Wave devices, whether it's a door lock, lights, garage door controller, thermostat-- the first thing you need to do is clear it. Why? Because if they've been factory tested and sometimes they don't default the whole product right from the factory, you may have information in there from a previous device or Z-Wave hub. So you need to make sure that you clear it completely.
So we're going to go ahead and hit Clear Device. It's going to put the panel into a learning mode. This is where I'm going to use my programming code, which I believe was 925979. You'll see that yellow light. I hit 0 after I see that light.
Device is cleared from the network successfully.
And that enabled my Z-Wave function, which then sends a ping out, and the panel picks up on it and it clears the device. I'm just going to hit OK since it says "Device has been clear from the network successfully." Now we've got to do the same code on there, but we have to put the panel now in an inclusion mode, which is adding a device. So we hit Add Device. We hit Include. It's going to start searching, which means I have to now entering my programming code again.
The yellow circle or the yellow light. I hit 0. Sends it through. And again, every lock is going to be different. Your programming code is going to be different from my programming code. So make sure you guys are using the one according to your Z-Wave lock. Now as you see, it already automatically gave it the type, which is the door lock. It gave it a Z-Wave ID, which is 10. For the name, since I already have a front door lock, I can't name it Front Door. I'm just going to name it Side Door. So this is going to be my Schlage Z-Wave door lock, it's going to be my side door. I'm going to go ahead and hit Add.
Side Door is added to network successfully.
Now you see I have a front door, garage door, and my side door, which is my Schlage Z-Wave lock. I'm going to back out to the Home screen. And if you just scroll to the right to get to your automation screen, you should just be able to scroll up or down between your locks. You'll see my side door right now is currently showing Locked, which is why this deadbolt it out.
If I tap on this, it will unlock it. It'll send the command to the Z-Wave Schlage lock, and then it'll unlock it, which I'll show you guys how to do that right now. So I'm going to just go ahead and hit the Unlock key on the actual IQ2. And again, like I said, this deadbolt lock will go back in.
Side Door unlocked.
Side Door unlocked. It announces it. And the lock went in. So now you've unlocked your front door-- or your side door. Again, this is stuff that you can also control through the app. So if you are being monitored or if you're looking for monitoring services, we actually do monitor these systems, and we do have Alarm.com plans that you can sign up for so that you can actually control your Z-Wave door locks remotely.
This comes in handy especially if you ever need to let anyone in, if your kids--
Side Door locked.
If your kids are coming back home from school, if you need to let a family member into the house and you have a front door lock, you can always just control your Z-Wave lock directly from the app. So it looks like the lock went into a locked mode on its own. But again, just so you guys can see, if I just hit the Unlock button--
Side Door unlocked.
Sends the command through. And again, if I just lock it up, after I'm done--
Side Door locked.
--after my guest leaves the house, I can go ahead and lock it back up and arm the system directly from the app. And that was basically just a quick tutorial on how to learning the Schlage lock. Now remember, again, I'm going to repeat this one more time-- the programming code is different for every Z-Wave Schlage lock. The user codes that get sent to the panel, you can actually enable the user codes from the keypad or from the IQ2 to be sent down to the lock. But you have to make sure you enable that, and you can do that through the app or directly from the panel.
If you guys have any questions on how to do any of this or if you guys are running into any trouble, email us at support@alarmgrid.com. Make sure you hit Like if you found the video helpful, subscribe to the channel, and also enable notification so whenever we upload new content you do get notified. My name is Jorge, and I'll see you guys next time.
- Uploaded