Getting Into the Z Wave Programming Section of a Tuxedo Touch Keypad
Related Products
Related Categories
Description
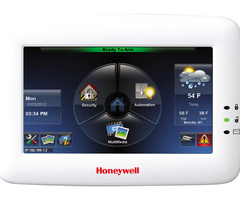
In this video, Jorge from Alarm Grid explains how to enter Z-Wave programming on a Honeywell Tuxedo Touch Keypad. In addition to serving as a touchscreen controller for a Honeywell VISTA System, the Honeywell Tuxedou Touch also operates as a Z-Wave home automation controller. You can pair Z-Wave smart home devices with the Tuxedo Touch so that you can control them at the keypad. If the Tuxedo Touch is set up with a Honeywell VISTA System that is monitored with access to Total Connect 2.0 for automation purposes, then the programmed Z-Wave devices will also get pushed over to the Total Connect 2.0 platform. This will allow you to control the Z-Wave devices remotely and include them with Total Connect 2.0 smart scenes.
Total Connect 2.0 can be accesed using a web browser or the Total Connect 2.0 Mobile App on your smartphone. Either way, you will be able to control your Z-Wave devices once you have signed-in to your account. This basically allows you to operate your Z-Wave devices remotely from almost anywhere in the world. When you make a Z-Wave command through Total Connect 2.0, an alert is forwarded to the Tuxedo Touch Keypad. The Tuxedo Touch then tells the associated Z-Wave device how to respond.
The other main benefit to pairing Z-Wave devices with the Tuxedo Touch is ability to include the devices with smart scenes. You can use smart scenes to have your programmed Z-Wave devices respond automatically based on a schedule and/or with certain predetermined events on your Honeywell VISTA Security System. This can make your life more convenient, and it is also great for saving money in energy expenses. Smart scenes can be built within the Total Connect 2.0 platform, or you can build the smart scenes locally at the Honeywell Tuxedo Touch Keypad.
https://www.alarmgrid.com/faq/how-do-i-get-into-the-z-wave-programming-section-on-a-honeywell-
http://alrm.gd/get-monitored
Transcript
Hey, DIYers. Jorge here from Alarm Grid. Today, we're going to be going over how to get into the Z-Wave programming section on a Honeywell Tuxedo Touch Wi-Fi keypad. So again, just to go over what a Honeywell Tuxedo Touch Wi-Fi keypad is, it is actually just a wired Z-Wave compatible touchscreen keypad for a VISTA alarm system. So if you have a VISTA 15P, 20P, 21iP, 128BPT, and you guys want to add a touch screen keypad and home automation devices such as lights, locks, thermostats, and different things like that, you would get this keypad for your VISTA system. It is not a standalone system, so you can't just buy the Tuxedo Touch Wi-Fi keypad and say call it a day. You actually have to get the keypad and a wired system, all right? So what is the point of getting to Z-Wave programming? This is what you're going to be using to add in smart devices to your home such as lights, locks, thermostats, garage door controllers, switches, different things like that. And it's actually two very simple steps on the Honeywell Tuxedo Touch Wi-Fi. You first have to go to Automation. After you go to Automation, in the bottom left-hand corner, there is a little Z-Wave icon with a little screwdriver and wrench. You're going to hit that and this will take you to the Z-Wave device management screen. Now you're going to see a bunch of options here at the bottom. The main two are probably going to be the first two, the Add Device and Remove Device. Now, typically, just so you guys know, if it is your first time, adding in Z-Wave devices it's always a common practice, it's the best practice to always remove the device first even if it isn't added to your Z-Wave hub. Again, a lot of people will say, why am I removing it if it's not even on there? You're removing it to clear any factory data that might be on the actual device. Sometimes people try to learn in these devices, and they're doing Include First, and they're asking, why isn't it showing up on my on my Z-Wave hub if I'm hitting the Enroll button? It's because it probably has some factory testing on it. So you have to actually remove, clear it, that'll wipe out any memory that's on the device and then you'll be free to include it. And again, it backed me out because it timed out. But real quick again, you go to Automation, you hit the little Z-Wave with the wrench icon, and you'll see the two buttons here. Now there's a bunch of other options. So there's Add Device, Remove, Abort Operation, Remove Any Failed Devices. You can do device setup, search device. So if you have a whole bunch of devices and you don't want to go through a list, you can search for it because you can actually give them names. You can scan for devices, bunch of different options here for you guys to play around with. If you guys do need help, feel free to email us at support@alarmgrid.com. If you guys found this video hopeful, make sure you hit Like underneath, subscribe to the YouTube channel, and hit the little bell icon. So whenever we upload new content, you get notified. I'm Jorge and I'll see you guys next time.
- Uploaded