Honeywell 5809: Installation Video
Related Products
Related Categories
Description
This video is about Installation of Honeywell 5809 Wireless Heat Detector
Transcript
Hi DIYers, Sterling here, from Alarm Grid, and today we're going to show you how to install a 5809 wireless heat detector. We have another video that shows you how to program your 5809 into a wireless Lynx Touch alarm system, but now we're just going to show you how to physically mount it.
The 5809 is a great sensor to use in the kitchen, because instead of the 5808W3, which is a smoke and heat detector, this is a standalone heat detector only. Therefore, in rooms like the kitchen, where you may have smoke when there is not a real fire, you're not going to get false alarms. If you're cooking, you burn something, or if you just open your oven and you have a lot of smoke, if you have a smoke and heat detector in the kitchen, you would have a lot of problems with false alarms. We always recommend that for the kitchen you put a 5809. Some other good locations are for commercial spaces and shops where you may have dust, things like that. Again, another good option is to use the 5809 instead of the 5808W3.
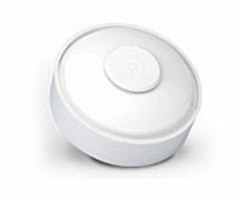
Another important note with the 5809 is that it's got two modes of detection. It will alert and sound an alarm if the temperature in the room goes over a fixed temperature of 135 degrees Fahrenheit. This metal disk would pop out, your alarm would go off, and your heat detector has protected you for the fire. If the fixed temperature detector sensor is set off and this metal disk pops out, you will need to replace the device, so it is a one-time use only sensor in the sense of the fixed heat detector.
However, at the same time, this will protect if there is a rapid change in heat. If the ambient temperature in the room jumps 15 degrees in less than one minute, this heat detector would also trigger an alarm. When it's a rapid-rise heat alarm, it will not pop the head, and you would not have to replace the device. That's an important distinction.
In relation to that, you do not want to install this in any room where the ambient temperature would be over 100 degrees Fahrenheit, because then the rapid rise would not work.
Now that we've described how the 5809 works, we're going to show you how to install it. You've got the head and the base, a two-piece device. You turn it counter-clockwise, which trips our tamper again, because we've already programmed this, and we have a simple plastic base plate. This base plate allows you to install on a ceiling, wall, game box -- all kinds of places.
So you've got four holes for mounting it. You also have a hole here for an anti-twist, so that once you have it physically mounted, if you go to pop the head off, the entire base wouldn't come off and come down, so you could use that as well. We're not going to install it that way for us, but I just wanted to point it out.
We have already drilled our two holes. To set this up, we stenciled in two holes for our two spots. Then we used our power drill to drill our holes, and we have our plastic wall anchors in there. We then used the two screws that come with the 5809. We have a Phillips head screwdriver. We're going to simply line this up. I'm tall enough that I don't need a ladder. But if you were going to mount it on the ceiling, you would obviously want to use a stepladder.
We're going to simply screw this in. Don't tighten it all the way until we're done. That's screw hole number one and then number two. You want to use, at least, two of the mounting holes. There are four, and you can use all four if you would like, but we're going to just stick with the two. Again, don't screw all the way down. On the bigger side of the hole is where you want to start, so that you can slide it into place.
Then you simply turn it clockwise, it locks into place, and then to make sure it won't come down, we want to tighten it down at this point, nice and tight. It's not going anywhere. Basically, it's installed.
We have our 5809. We have already inserted our battery. We have already learned it into our Lynx Touch panel. We have a video showing you how to do that, so check it out. Make sure not to touch the metal disk as you install. You'll notice there are two tabs on opposite sides. They match up with the two holes here. We want to line that up. Then simply twist into place, which has tripped our tamper again. Now we have our 5809 wireless heat detector installed, and ready to detect a true fire in our kitchen.
If you have any questions on how to install a 5809, please leave it in the comment section below. Make sure to subscribe to our channel for all future videos.
- Uploaded
- Duration: