Honeywell 5811: Program to L7000
Related Products
Related Categories
Description
With the Honeywell 5811 you will be able to detect intrusions through a door or window. Our tutorial video will walk you through the steps required to program the sensor to your L7000 control panel.
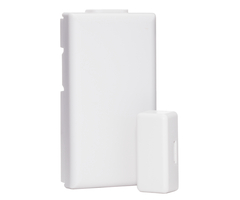
Out of the box, the sensor has 3 major parts: the mounting plate, the head and the magnet. It is important to note that the Honeywell 5811 does not have an end of life. As explained in the video, the only thing that will wear down is the battery. A good rule of thumb is to replace the batteries every 6 to 12 months.
The Honeywell 5811 has a magnetic contact which can be used to detect door openings, unlike the 5816 there is not a hardwired option. The video discusses these options in detail to ensure you utilize the best option for your security needs.
To enroll the device, you need to activate the battery by inserting the battery and make a note of the serial number. The video will show you how to accomplish this and where the serial number is located.
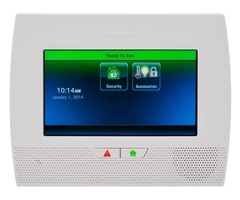
Programming on the L7000 control panel is relatively straight forward. You need to access the “Tools” menu from the home screen by using the touch screen on the panel. The walk through will show you exactly how this is done.
You should follow along with the video to enter the programming mode and use the visual clues on the panel to make sure you are in the correct spot. You will need to define the zone for the detector with the first available zone.
Like most other programmable devices you have two options for entering the serial number: manually or self-enroll. The guide discusses the manual entry method. To self-enroll, you can utilize the test button on the Honeywell 5811 detector.
The install guide will tell you all the needed information to program the device yourself. In the tutorial, you will learn that you need to program the device to loop 1 or loop 2 depending on how it is installed. This will ensure proper alerts in the event the alarm rings.
You should be aware of the reporting and supervision selections, and the video will cover these in detail. The settings should allow the device to report and be supervised so that you are always covered. In the event of an alarm, the L7000 panel will alarm locally as well as sent a report to the central station so that action can be taken if necessary.
Once the programming is complete, you should return to the home screen on the L7000 panel and you can then test the detector. Following along with the video will show you how to accomplish the test to ensure everything is working properly.
Be sure to disarm the alarm from the testing and your 5811 detector is ready to mount in the desired space. Once mounted you will complete the installation and programming of your door intrusion device.
Transcript
Now that we've done a window and a door sensor and the 5816, we're going to show you the same process for a 5811, which is the other most popular sensor used with this system. 5811, you can see already just in the box alone it's smaller than this 5816, which is the main reason someone would choose the 5811 over the 5816, being that it's much smaller off the wall, and therefore looks better for your home's decor-- blends in nicer on the frame.
When we open our sensor, it consists of a front plate, front cover, which has the circuit board, and then a back plate, which you used to mount. You can see the serial number is here on the sticker, the alpha number with the seven digits. It's also on the back, alpha with the seven digits. You've got some 3N double-sided tape on the back that you can use to mount the sensor.
It also comes with mounting screws, which are stuck to our magnet. But you can choose to do the screw installation or the 3N tape. If you are going to do the 3N tape, make sure that you clean your surface. And make sure it's very dry before you place the sensor up so that it doesn't fall off as time goes by.
So aside from the front cover and the back plate, we also have our magnet for our sensor. It comes in a baggie. We open it up. This one is different battery than the 5816 just because of the size of the sensor. And on our device-- it might be tough to see. But in the back plate, you have a little minus sign.
And on your battery, you have a big plus sign on the top. So you simply match the negative to the negative. Do not ever try to slide the battery underneath this clip. It's not meant to go underneath there. It's meant to sit right on top.
So you slide it in, and you snap it in place, and the battery sits right into that section. On here it has a tamper. It's a little bit different than the 5816. The 5816 had a little silver dongle switch. This one has a little contact point on the circuit board.
And when the cover is closed, it holds down this little clip and keeps the tamper connection closed. So in this case, we have our battery installed and we're ready to program our Honeywell 5811 sensor. So again, same process. From the home screen, we go into Security. From Security, we hit More and then Tools.
We want to do installer mode programming. So we use our installer code by default, 4112, and now we have the option to jump into programming. You click Program, Zones, and again, our template zones are there, and our zone 6 that we just programmed is there. So we're going to jump down, and we're going to use a brand new zone, zone 7.
You can select any zone you want for any sensor. Most people tend to keep them in order so you build it out as you go. Some people even do doors and windows. And then they break and have a section for the motions. And then they break and have their section for their smoke detectors.
So you can organize your zones at your panel however you like. Again, it doesn't really matter. The sensor is going to report on whichever zone it's programmed. But for keeping things nice and clean, you just go in order. So you go Zone 7, and you highlight it first, and then Edit.
Now we're in our zone programming screen for zone 7. We have our 5811 sensor here. And I'd like to point out on the 5811 you have two little plastic cash marks here. You'll notice they are not shown on this long edge, and they're not on any of the short edges.
So this is the indication of where the internal read switch lives in the circuit board. The read switch is what detects that the magnet is close to the sensor, showing that the door is closed. When the magnet pulls away from the read switch, it shows that the door opens. So in our case, to program the sensor we can either program the serial number by typing it in or we can put the magnet and activate the sensor three times.
The third time will unroll the sensor to the panel. So to do that you'll notice I can fault the sensor as many times as I want on this screen and nothing happens. As soon as I-- oops. As soon as I jump into the serial number box, now we're ready to auto enroll. You can either type the number in, or to avoid mistakes and to also verify the sensor is working, we put the magnet between the two hash marks, and we pull it away. That's activation number one.
We close our door, aka put the magnet close to the sensor again, pull it away. That's activation number two. Now we have our accurate serial number. And you can see loop number one. When on the 5816 sensor you have the internal screw contact, which is loop number one, or you have the magnet with the sensor as a loop number two. The 5811 only has one available loop. Its loop one.
So 5811s always get programmed with loop number one. And when you do the auto-enrollment mode, it will auto detect the proper loop so you can't make a mistake, another advantage of why auto enrolling is better than typing in the sensor serial number. So finally, we put it close, or closed the door one more time.
Pull it away, that's our third activation. And now our sensor is programmed with the proper serial number 0514623. We have our loop number one, so we're good to go. Now the next step is to name our zone.
In this case, we're going to use this as our back or rear door. So we're going to select out of here. We have the option for new, door, window, motion, glass break, smoke detector. We're going to choose door. So the zone would say right now just door. But if we want to clarify which door it is, we use zone descriptor one and zone descriptor two. You can use one, or both, or neither. In our case, we want to use the first one.
Rear.
Rear. When we type the R letter, it gives us the first R word, which happens to be Rear, which is the word we like to use. So we click Done. And now when the sensor is faulted, it will speak rear door.
When we did our front door, we set it with a response type of entry exit one. What that will do is give you time to open that door before the alarm goes off. You would have however many seconds you have programmed for your entry delay one before the alarm will go off. The panel would beep at you for 30 seconds, alerting you, hey, the door has been opened. Please disarm the system or the alarm will go off.
For this case, we do not use the rear door when the system is armed. We only enter and exit through the front door. So instead of doing entry exit one, which would give a criminal 30 seconds to get into that door before the alarm goes off, the better option is to set it to perimeter.
A perimeter response type tells the system to activate the full alarm mode as soon as the door is violated. So if we had our sensors activated, and we opened our door, with a perimeter zone type you get an instant alarm, no delay. The last three questions are Alarm Report, Chime, and Supervised.
Alarm report is yes if you want the sensor to transmit to your central station. If you don't have monitoring, this selection will do nothing for you. If you have monitoring, saying yes says yes. Send this sensor alarm to the central station when it's activated. If you programmed it to no, you'd be saying I don't want this alert to go anywhere beyond just the local system.
Most people are going to have this option set to yes. Chime is an option where you can choose which audible alert you would want to hear when the door is activated when the system is disarmed. When the systems are armed and it activates, that's a full alarm mode. There's no selection for that. It's just one sound from the panel in alarm mode.
But for the Chime feature, that would let you know, OK. My kids opened my back door to go to the backyard. I can run and say, hey, you guys got to come back inside or whatever it is. Maybe you have a business. You would know, OK. Someone's entered my property at my front door.
It would chime and give me the audible chime tone. So you can select. There's a few different options there. We're going to leave it standard for this case. And then the final option is supervised.
On any door and window sensor that you have programmed, we recommend that you have it supervised. What that means is that the panel will check to see are you there. Every 12 hours, it will send out a signal to say do I see this sensor. If this sensor with this serial number checks back and says, yep, I'm here, the panel's happy.
If that check comes back without an answer, then the panel would say we have a RF trouble or a supervision trouble on zone 7 letting you know that this sensor is out of range or has possibly been damaged. For some reason, the device is not being seen by the panel. So that's a good security feature so you know that your sensor will work when you go to arm the system.
Without that feature, if that sensor went dead, and you armed your system, and someone broke the back door, the panel wouldn't see it because the sensor's dead. So the supervision lets you know that the sensor will work when you need it. So we go ahead and click Save, finally, now that we have all of our parameters entered. Very important to do the save because if you just hit the back arrow, you've lost all progress of what you just did.
Save locks it in. And you now see that our zone 7 rear door is programmed. To show you that it's working, we're going to close our sensor up. We have our back plate. There's two tabs, which we use as hinges to latch into these little marks at the bottom. And then we simply snap it shut at the top. If you ever had to pop it open again, you can use a small flat head screwdriver to twist it, to pop it open.
But we had our sensor closed. We have our magnet. We're going to put it close together to show that the door is closed. And we're going to exit programming back to the home screen. So we have system ready to arm. And we're going to show you what happens when the programmed rear door sensor is activated, or the rear door is opened. So here we go.
[BEEPING]
Rear door.
You can see the system went from ready to arm to not ready to arm, fault. And if we go into our Security tab, it will indicate specifically which zone is faulted. This way if you are leaving and you wanted to arm your system, and you saw this not ready to arm message, the panel's alerting you to the specific zone that's open so that you're not able to arm and not realize that your back door is left wide open.
So now that the zone is faulted, we know, oh, my back door's open. I got to go close my door before I arm my system. We go and we close our door. Our sensor goes back to ready. Our system is now back to ready to arm. We get the nice green check mark, and we can our system.
Armed away. Exit now.
[BEEPING]
We're going to go ahead and disarm. But that shows you how to program a 5811 sensor to the L 7000 Lynx Touch panel.
- Uploaded