Honeywell 5853: Program to L7000
Related Products

Related Categories
Description
With the Honeywell 5853 you will be able to detect glass break intrusion. Our tutorial video will walk you through the steps required to program the sensor to your L7000 control panel.
The Honeywell 5853 is a wireless intrusion detection alert monitor that detect intrusions at the point of entry. As you will see in the video, this is a perimeter detection monitor and is enrolled in the system as such.
You will learn how the detector works in the video. It has a microphone that will detect the frequency of broken glass and will sound an alert through the control panel. The sensor is easily installed and set up. Once out of the box there is very little to do to install and program your new Honeywell 5853 detector.
To enroll the device, you need to activate the battery by removing the plastic tab and make a note of the serial number. The video will show you how to accomplish this and where the serial number is located.
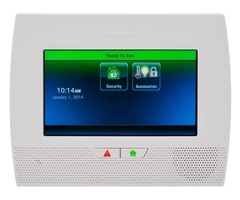
Programming on the L7000 control panel is relatively straight forward. You need to access the “Tools” menu from the home screen by using the touch screen on the panel. The walk through will show you exactly how this is done.
You should follow along with the video to enter the programming mode and use the visual clues on the panel to make sure you are in the correct spot. You will need to define the zone for the sensor with the first available zone.
Like most other programmable devices you have two options for entering the serial number: manually or self-enroll. The guide discusses the manual entry method. To self-enroll, you would have to physically break glass 3 times to activate the sensor which is not a viable option.
The install guide will tell you all the needed information to program the device yourself. In the tutorial, you will learn that you need to program the glass break detector to loop 1. This will ensure proper alerts in the event the alarm rings.
You should be aware of the reporting and supervision selections, and the video will cover these in detail. The settings should allow the device to report and be supervised so that you are always covered. In the event of an alarm, the L7000 panel will alarm locally as well as sent a report to the central station so that action can be taken if necessary.
Once the programming is complete, you should return to the home screen on the L7000 panel and you can then test the detector. Following along with the video will show you how to accomplish the test to ensure everything is working properly.
Be sure to disarm the alarm from the testing and your 5853 detector is ready to mount in the desired space. Once mounted you will complete the installation and programming of your glass break intrusion sensor.
Transcript
Now that we've shown you how to program the 5816 and the 5811 door and window sensor to the L7000 LYNX touch. We've also shown you the 5800 PIR-RES motion detector. We're going to show you the third type of detection used for intrusion with a LYNX Touch.
This is a Honeywell 5853 wireless glass break detector. Glass break detectors are great ways to protect your home from any broken glass on an intrusion alarm. Doors and windows obviously, they only protect if a window or a door is opened.
Let's say you have a very large bay window that either can't be opened, or perhaps is locked on the inside and cannot be opened unless it would be broken from the outside, and then they reach in and open it. The glass break detector would be a way to protect that broken glass at the exact moment the glass breaks, as opposed to a few seconds later when they open the window. Or worse, if they just climbed through the window and you had a contact on the window, that type of entry would not be detected without a glass break.
Of course, if they then walked in front of the motion, that would get them. So there is ways to use all various types of detection to fully cover your home, but glass break is a great way of getting perimeter detection-- detection at the exact moment of entry-- without having to put a sensor on every door and window in a room. If you have a lot of glass with a lot of different glass openings in a room, you can use one glass break detector. This has a maximum range of 25 feet. So any glass within 25 feet of this detector, whether it's mounted on the ceiling or mounted on the wall opposite the row of windows, any of the broken glass detected or smashed, rather, would be detected by this 5853 glass break detector.
This unit is pretty straightforward. You have a small little tab here that you can use a screwdriver to pop open. And then it swings down on a hinge on the inside. You have a sticker showing you the different sensitivity selections, which are designated by these two dip switches, one and two here. So you just want to select the sensitivity based on how far away from the glass is your 5853.
You've got your battery, your CR123A, which is the same battery the 5816 uses. You can see it's already pre-installed on this device. And you have this little pull to connect, which is just the plastic tab that's blocking the battery's positive terminal to the detector's positive connection. Now that we pull the tab, we see the lights light up, and the detector is live.
So we're going to show you how you can program your 5853 glass break detector to your LYNX Touch L7000 panel. As when doing any sensor programming, we have to jump into programming mode first. From the home screen, that would be Security. Once you go Security, you hit More to bring up the Tools option. You go into Tools and you go and enter your installer code, or your programming code. By default, it's 4112.
Because it worked, it takes you to the program screen. You hit the Program button, and go into Zones. From here, you see the list of zones. You can hit the down arrow to cycle through all the available zones. The last zone we programmed was our living room motion, and now we're going to do our living room glass break. So we're going to go to zone nine and highlight it so it becomes blue. And then we're going to hit Edit.
Edit. So once we're in Edit, we're on the screen to enroll the sensor. Just like with all detectors, you have to go into the serial number box first. That's the way that the panel will know to talk to this device, or rather, allow entries from this device. So with our doors and windows, because we had a sensor with a magnet that we can simply activate to auto enroll it, we were able to do that without typing in the serial number.
On the glass break detector, we would have to actually break glass to fault the device. We don't want to do that, so we can just type in this seven digit serial number, which is shown on a sticker. On a Honeywell device, it will always start with A for Alpha, followed by the seven digit number. Happens to be on the back as well on the barcode sticker. You have your alpha number with your seven digit serial number.
So we pop it open. And using our keypad screen, 001, 6456. You type this in as 6465, this sensor won't work. Very important to double check your seven digit number to make sure it matches. You go ahead and hit Done to lock in the serial number, and you have to pay attention to your loop number.
On any Honeywell detector, the loop number will tell the system how this sensor will activate the panel. And with the 5853 install instructions which come with the panel, rather, with the 5853 sensor, you can see that it will tell you the specific loop number to use with a 5853. In this case, we want to use loop number one, which happens to be the default.
Most sensors will use loop number one, but be very careful, just take the second to look at the install guide and make sure you're using the proper loop. We of course, have great info on our website that shows you the proper loop to use when programming each device. But again, most devices are going to use loop number one.
So now that we have our serial number and our proper loop, the next thing we want to do is device type. On Device Type, Honeywell's made us a nice clean list of the different types of sensors you're going to program, and we're going to choose glass break, because we're using our glass break detector. On a glass break device type, they limit our response types to only five different selections.
99% of glass break detectors you're going to program to the perimeter zone type. Perimeter zone type simply means active in both away mode and stay mode, and instant alarm when the system is armed and the device is activated. So perimeter zone type will get us an immediate alarm as soon as our door or window is shattered or broken. The alarm goes off, we've gotten our alarm detection at the exact moment of entry, which is what we want for our perimeter device.
So the next thing we want to do is name our glass break. We're going to put a glass break in every room that has glass. Zone descriptor one allows us to say which zone was activated so that we don't have to remember that zone nine is our living room, zone 10 is our family room, and so on. So we use this keypad screen to select the word we want to use. If this was going in our laundry room, we're good, laundry is good.
Living room, we can either type out living, or I just showed you using these up and down arrows, you can cycle through all of the available L words in the Honeywell library and you can choose the one you want. For our purposes, we want a living room. We do Done, and now we have it programmed that if it's detected, it would say living room glass break. That's what we would want.
Alarm report tells us will this sensor activation transmit an alarm to the central station. This system is monitored. And this detector we certainly would want to send over the central station. So we make that yes. Chime is disabled, there's really no chime option on the glass break, because the occurrence of a broken glass shouldn't really be happening. So there's really no chiming going on.
And then supervised is certainly the option that we want for this. Supervised as we've explained before, just means that the panel every 12 hours, will look and say are you there? Are you there? Are you there? It will talk to every detector that has a programmed serial number, and says, are you there? If the detector says, yep, I'm here. The panel says, I'm good, everything's OK.
If at the 12 hour check it looks for the serial number and does not get a check back, it would throw up a zone nine trouble. It's an actual RF supervision trouble. And what that means is that this detector is either too far away from the panel, or has been damaged, or somehow there's some interference that's causing the sensor to not be able to be seen by the panel.
If you ever get a supervision error, it could be one of numerous things. It could be an improperly learned in serial number. So if we had this typed in with 6465, obviously, it's going to look for that serial number. And there is no serial number in the house with that, you would get an error. With the serial number properly entered, the only other reason you'd have a supervision fault is if this again is too far away, or there's interference in the house that's causing it not to be able to see a signal sent back to the panel. Or again, if someone destroyed this device so it was completely broken, that would give you a supervision trouble. That way, you were alerted in advance that hey, I'm expecting to have zone nine that should be picking up broken glass. And with the supervision trouble, don't expect that sensor to ever check in. So we certainly want that supervised.
Once we've selected our options and we have it set the way we want for our zone nine living room glass break, very important that we save our selection which locks in all of our programming. And then we are back out to the home screen, and we're ready to mount our device. With the glass break, it's kind of hard to test it. You saw you could tap the device and that gives you a fault indication. Obviously, it's supposed to be listening for broken glass, but vibrations on the device, you can get it to fault that way. However, that's really not a good test of if the sensor is working.
The only authorized way to test this device is by using a Honeywell FG-701 glass break tester. That's a device that simulates with a recorded message, the sound of broken glass. And that device would need to be used to know for sure that this device will activate when there's glass broken. However, like I showed, tapping it, you can get the fault. And better than that even, if you want to make sure your serial number is programmed, you [BEEPING] can pop the cover. That beeping that we're hearing-- and it shows not ready to arm, zone trouble. And actually says even better than that, tamper nine, living room glass break.
The tamper on this device, there's a post on the cover that holds down the tamper switch which is inside this hole. That's just that little silver dongle just like on the door sensor. With that silver switch held down, if we were to disarm-- important that you're actually holding it down. But 1234, the default master code, with it held down, the tamper goes away. As soon as I let go, it props up the tamper again, same idea. Close the cover, disarm. Goes away.
With the cover on, there's no tamper, sensor's happy. So that is another way to make sure that you've got the right loop and the right serial number enrolled. And that is your Honeywell 5853 sensor programming to the L7000 LYNX Touch panel.
- Uploaded