Honeywell Home PROA7PLUS: Installing PROTAKEOVER
Related Products


Description
In this video, Michael from Alarm Grid shows users how to install the PROTAKEOVER module to a Honeywell Home PROA7PLUS. This same procedure can be used on the Honeywell Home PROA7, Resideo PROA7C, and Resideo PROA7PLUSC panels.
The PROTAKEOVER is a legacy RF receiver module that allows the system to communicate with legacy RF sensors that may already be installed in a monitored location. The legacy RF sensors supported are Honeywell 5800 Series 345 MHz, 2GIG 345 MHz, Qolsys and Interlogix/GE 319.5 MHz, DSC 433 Mhz, or Bosch 433 MHz. The PROTAKEOVER module comes with its own backplate. The original backplate must be replaced with the new one. The new backplate has the antenna built into it, so it MUST be used. There is currently no option to use the PROTAKEOVER with a desk-mounted system.
It is important to set the dial on the PROTAKEOVER prior to inserting it into the panel. Otherwise, the dial is inaccessible once inserted. After removing power from the panel by unplugging the DC Power Adapter, and removing the set screw, pull the panel from the original backplate. Disconnect the backup battery to power the panel completely down. It is important to save the blue terminal block from the original backplate, as you will need it for the PROTAKEOVER backplate. Once the terminal block has been clicked into the proper place, mount the PROTAKEOVER backplate in the location where the original backplate was installed. Reconnect the power wires, if necessary, making sure to observe proper polarity. At this point, the DC Power Adapter should still be unplugged.
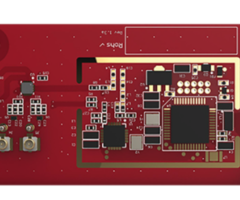
Now, turn your attention back to the panel itself. When you turn the panel over, you'll see a plate that slides off to the right. The PROTAKEOVER will mount in the upper-right corner of the panel (when the PROA7PLUS is facing away from you). Double check the dial before inserting it, to be sure it is set for the proper takeover frequency. Slide the PROTAKEOVER into place and install its set screw. Slide the white cover plate back into place. You'll see two (2) metal pins that stick out at the side of the PROTAKEOVER, these will connect to metal connection points on the antenna that is installed inside the replacement backplate.
Reconnect the backup battery. Then, mount the panel to the newly installed PROTAKEOVER backplate, making sure it seats properly. Plug the transformer in, then wait for the PROA7PLUS to boot up. You can now begin to add legacy RF sensors to the PROA7PLUS zones. The panel can support up to 123 legacy RF sensors and up to 127 PROSIX sensors for a total of 250 Zones. As long as the panel firmware is on the latest version, the PROA7PLUS and PROTAKEOVER can even support life-safety 5800 Series Wireless Zones.
https://www.alarmgrid.com/faq/how-do-i-install-a-honeywell-home-protakeover-in-a-proa7plus
http://alrm.gd/get-monitored
Transcript
[AUDIO LOGO] Hi, DIYers, this is Michael from Alarm Grid, and today I'm going to be showing you how to install the Honeywell Home PROTAKEOVER module inside a Honeywell Home Pro A7 Plus Security System. This also applies to Resideo Pro A7 Plus C, Honeywell Home Pro A7, and a Resideo Pro A7 C. All of these systems can support the PROTAKEOVER module. These are the Pro Series alarm panels from Honeywell Home and Resideo. So the reason you're adding a PROTAKEOVER module, is so that you can use one of five legacy sensor frequencies with your system. That is, you can enroll legacy sensors, not encrypted sensors, older sensors, if you will, with your system. Maybe sensors that you have left over from before from an earlier security system and you want to continue using them with your Pro A7 Plus or other Pro Series alarm panel. In our case, we're going to be setting it to 0, so that way, we can use Honeywell 5800 sensors with the system, and at the end of this video, I'll show you how you would enroll a Honeywell 5800 sensor after you have installed the Honeywell Home PROTAKEOVER module. So before you get started, if you have your system monitored, please put it on test mode with the central station, just to avoid causing any potential false alarms here. They might be getting some incoming signals as far as AC loss, your panel being powered down. So it's just a good idea to put your system on test mode first. But anyway, so let's get into it here. The first thing I'm going to show you just because I have it in hand and I don't want to forget later, I do want to show you the dial on the PROTAKEOVER module. And you see right now, we have it set to 2. Numbers 0 through 4 are used with the Pro A7 Plus and other Pro Series panels. It's believed that 5 through 9 will be used with a future hybrid panel. Top secret. But we haven't confirmed that yet. But each number 0 through 4, those five numbers represents a different legacy sensor frequency. So the one we're going to be using today is 0 for Honeywell 5800. So what I like to do to get it to adjust, I like to just take a flat object, like this flathead screwdriver here, and then I can stick it in the hole and I can sort of turn it. So that way, it's at 0 now. You see we just turned it to 0 by putting it into the indented arrow, and the arrow is now facing 0, so we're good to go on that front. But let's get it installed inside the system. So the first thing we have to do is, we have to open up the panel. And I do want to point out that this is the old back plate for the system right here. We already took it down. We already installed the PROTAKEOVER back plate that comes included with the system. It comes included with the PROTAKEOVER module. And I'll point out the differences once the panel is off the wall. But you see that there's no antenna on this original stock back plate. You will have to remove the stock back plate and put on the PROTAKEOVER back plate. They have the screw holes in the same spot, so you can just screw it in the same spots as before. So that should be fairly simple. But I just wanted to point that out real quick. The first thing we're going to do, we're actually going to cut AC power to the panel. And we have our transform right here. We're just going to go and we're just going to unplug it, just like that. So now we have an AC loss condition on system, we can just go and click that and we won't worry about that right now. If you have trouble reaching the transformer, you could instead, cut power at the circuit breaker, drop power at circuit breaker. Or you could, if you have a Honeywell LT cable, you can undo the barrel connection. So various options there. But we have cut power to the blue terminal block that you'll see when I open up the panel. Anyway, let's get into it. So we're to switch this over to a Philips head now, and we're going to undo the set screw at the bottom of the panel. So that way, we can take it off the backplate. So let's go ahead and do that. We just put that in there and we're going to activate the tuxedo touch, as we do that, or there's just the tuxedo, that is that's not the touch. But we're going to get out the set screw here, just slowly but surely, we will get it removed. And we will carefully set that aside, so we do not lose it. Now, we can go ahead and we can take this off the backplate, so we can just kind of go around and just pull it off. Now, to finish powering down the system, we're just going to undo the backup battery there. And now you see the system is fully powered down. It's no power at all. So we can't use it at all. But we want to do that before installing new hardware to avoid damaging the system or the new hardware. So our system is fully powered down. Now, I promised I would show you the backplate differences. So we do have the PROTAKEOVER backplate already installed. You see that it has an antenna up here. That gives the PROTAKEOVER module useful range. Without that backplate, you really won't have any useful wireless range, and you won't have a good time using the module. So you see this is the stock one that doesn't have the antenna installed. It doesn't have the antenna installed there. You see it doesn't. So this one does. And you see we have cut power to this blue terminal block, as we undid the transformer, we unplugged the transformer. So anyway, let's get it installed. We're going to bring the camera a bit closer and we're going to do an up close of the installation for the PROTAKEOVER module. So one thing I do want to show you with the back plates, you will have to move the blue terminal block from the old backplate to the PROTAKEOVER backplate. I find it's easiest, best to do this when they're not mounted on the wall, when they're just lying flat on a table or a desk. So that way, you can do it before mounting the backplate. If you have a Honeywell LT cable, you might leave the wires attached, but you definitely do want to cut power to the terminal block when you do this. You see we have no wires attached. We have ours, there's no power involved at all. But it's pretty easy process. So what I like to do, I like to take like a flathead screwdriver or a thin object and just kind of get in there and just kind of pry it off. You kind of have to get in there and it's a bit tricky, but then you should just be able to pull it out once you get in there enough, like that. And then so once you have it out, you can just apply it to the PROTAKEOVER backplate, the one with the antenna. You just want to get this little notch in there first. So that way, it locks into place. And like that, once you hear the click, then it's good. OK, we have the Pro A7 Plus panel down here, and we're going to install the PROTAKEOVER module. It's going to be installed dial side up. So not this side. This side will be facing up, and it's going to be this side going to be inserted into the panel. So what we're going do, we're going to take off the slot cover here. And I'm going to pull that off, pry that off. And so we just insert it into the slot here and it kind of snugly fits into place. And then once you have it installed, you can do the set screw. And remember to adjust the dial before you go and do that. We did that earlier based on the frequency you're using. So we're just going to screw that into place. And then we can reapply the slot cover on top. And there we go. We have installed the unit, and now we're going to mount it back on the backplate, the PROTAKEOVER backplate. First, I'll go ahead and I'll reconnect the backup battery, just so I don't forget to do it later. The system won't power on until it's receiving AC power from the blue terminal block. When it's receiving power, then the system will power back on. But we have installed the PROTAKEOVER module. All right, we got the slot cover fully back on the back cover of the Pro A7 Plus, so we can just go ahead and put it back on the backplate here. And the system won't receive AC power until we plug the transformer back in, but we'll do that last. I am going to reapply the set screw. This is not to be confused with that screw that we used with the PROTAKEOVER module. This is a slightly larger set screw. But we can just go ahead and insert it into the hole here carefully, and screw it into place. If you have it on the back plate correctly, you should be able to get it all the way in, like I just did. And there, we have our panel re-mounted back on the PROTAKEOVER backplate, not the original stock backplate. Remember, we swapped those out. Well, we didn't in this video, but you should. Use the one with the antenna, because otherwise, the PROTAKEOVER module will not have useful range. So we're going to plug the transformer back in. It looks like it's cut on something there, but we can just go and plug that in. And you should see that the panel is receiving AC power. And it is now going to go through the cycle process, the boot up process. We're just going to wait through that for a second. And then I will show you how you will enroll Honeywell 5800 sensor. Remember, if you have your dial set to a different number, then you'll use a different frequency. So just to go over those real quick. Like I said, 0 is Honeywell 5800. 1 is 2 gig, 345 megahertz. I believe that 3 is 319 megahertz. That might be DSC. One of those is DSC. 4 is DSC. If not the 433 megahertz. And then number 4 is definitely the Bosch sensors. Those are the five legacy frequencies that you can use. You can check our FAQ. We'll have them all listed there for you. Like I said, Honeywell 5800, 2 gig 345 megahertz, the 319, which is Qolsys, and Interlogix GE, and we also have the DSC 433 megahertz, the legacy DSC, and Bosch. Anyway, our system is back online. Looks like I rambled long enough to get it to be reloaded. So, we have a Honeywell 5800 mini sensor here. And we're going to be enrolling that with our pro A7 Plus with the PROTAKEOVER module installed, and the dial on the PROTAKEOVER module set to 0 for Honeywell 5800 sensors. So, we're at the main screen of our Pro A7 Plus. We're going to click the three horizontal bars hamburger button at the bottom. We're going to choose Tools, which is all the way at the bottom. We're going to enter in our installer code, which is a set of the default, 4-1-1-2. And then we're going to use programming. Make sure that you have local programming mode on your panel. You need the high enough firmware version. So you can request a firmware update, have it sent down to your panel. You will need a Wi-Fi connection to make that possible, make that work. So the Pro A7 Plus and Pro A7 Plus C both have the PROWIFEZW installed. If you have a Pro A7 or Pro A7 C, you will need to install that PROWIFEZW or the Pro Wi-Fi without z-wave control. But anyway, just make sure you have Wi-Fi, make sure your panel has a backup battery that's charged, make sure you don't have an AC loss condition, and make sure it's powered on and that it's actually monitored and connected to Wi-Fi. Anyway, so we're going to choose peripherals. All right, so we're at the peripheral screen now, and we're going to press the plus button in the upper right corner to get to the add a peripheral screen, where we can auto enroll one of the Honeywell 5800 sensors, or any sensor that's compatible with the system. So we have a Honeywell 5800 Mini, and we're going to fault it and see if it wants to roll. And there we go, on the first strike we got it to work. So I'm just going to briefly go through these fields here. We have another video that goes into programming in more depth, so I'm just going to do this very briefly. You see the sensor type 5800 and TAKEOVER. That is correct. This is a legacy sensor. It is using the PROTAKEOVER module. The serial number has been auto enrolled with the system. That is correct. We don't need to mess with it. That's right there. You can check the serial number on your sensor if you want to confirm, but I'm going to leave that alone. You can set the partition if you want to, if you have multiple partitions enabled on the system. We're just going to keep bars that partition 1, P1 main. Zone number, it's assigned the lowest available zone number. And actually, every zone on the system can be used with either a legacy sensor or an encrypted sensor. It's just a matter of them being assigned to the lowest zone number. So depending on the order you enroll the sensors, they can go into any one. Just remember, you can't exceed 127 encrypted sensors or 123 legacy sensors. These are legacy sensors, so you can have up to 123 of these legacy sensor zones. The service, that's referring to the loop number. If you need to change the loop number for your sensor. For this one it's fine. It does use loop number 1, the 5,800 Mini. If you're using something like a 5816, then it would use loop number 1 for the-- not the read switch, for the wireless transmitter function. That's what loop number 1 would be. And loop number 2 on that would be for the read switch the door window contact function. But that's a different sensor, but we're going to, so we're just going to leave that on service 1, loop number 1 for the 5800 Mini. For zone descriptions 1 and 2, this is what the panel will speak out, when the sensor is faulted. Let's do something like, we'll just give it a funny name here. We'll call it sprinkler. And we'll do the sprinkler door. And so we're going to leave zone description 2 blank. Now, device type, it's going to read the zone descriptor and the device type. Unless you set the device type to other, which is actually useful trick, because if you set it to other, then you can have access to every single response type, every possible response type. So that's kind of cool here. But we're fine with door. So when this one's faulted, it will say sprinkler door. And we'll hear that at the end. Response type. That's actually how the system responds when the sensor is faulted. In our case, we'll keep ours at entry exit 1. That's going to mean if the system is armed, armed state or armed away, and we fault the sensor, then it's going to trigger an entry delay countdown. And we have to disarm the system before that countdown expires or else an alarm will occur. So an entry exit zone is usually one for coming and going, like your front door, your back door, maybe your garage door. So that way, you have a chance to disarm, because you normally coming and going through there, so it's normal. But you do have to disarm in time. So make sure you know your code and if intruder doesn't know the code, then they'll have an alarm triggered on them, which is what we want. Supervise. So the system is going to listen for a check in the signal from the sensor periodically, just to make sure it's working properly. Some reasons for a supervision loss, the sensor power is down due to a dead battery. You put up a new obstacle, maybe some new walling or a large metal object and the signal can't reach the panel, then you might get supervision trouble. So, you can keep that enabled if you want to. We'll keep bars enabled. Alarm Report. That's going to, if this zone causes an alarm on the system, then if the system's monitored, it's going to send it across the alarm net's servers and it will eventually reach the central station and/or you directly, if your self-monitored through Total Connect 2.0. Text in your email. So that's Alarm Report. If your system is monitored, then you usually want to have this one enabled, unless it's just maybe a zone that you only want to have local notifications or a local alarm, a local siren on site, but you don't want to have central station involved or receiving the text and/or email alerts, then you might turn a Alarm Report off. But we'll keep bars on. Version. That's just the firmware version for the sensor. You can't adjust it. You see it's grayed out. So we'll leave that alone. We have different chime options here. If we click over here, we can set it to any one that we like. We'll keep ours at standard. You see there's also a disabled option if you don't want a chime. So we'll keep ours at standard. And lastly, we have supervision time, which we cannot adjust. This is how often the system needs to receive the check-in signal if you have supervision enabled. It's set at 742 minutes, which equates to six hours, so we're fine with that. And we've gone through every field. So we're going to click Save in the upper right here. And now we have our sensor enrolled, we're just going to go back out to the home screen. And I'm just going to fault the sensor real quick just to show you, we're not going to look at weather. But anyway, I'm just going to fault this real quick and just show you that it does-- well, I barely had to move it. But we'll do that again, just to show you. And then you see it's open right now, and then it's closed. And there. There we go. We're going to set that down and get it to where it's closed. I'm just positioning it down here, so that way we see that it does close. OK, there we go. So our sensor is closed. Now there is one last thing I wanted to tell you, and it's very important. With the PROTAKEOVER module, you can't use key fobs. That's just a limitation of it. Anyway, that concludes the installation of the PROTAKEOVER module on the Honeywell Home Pro A7 Plus. Remember, this also applies to the other Pro Series panels. That's how you install the PROTAKEOVER module. So if you have any questions about the PROTAKEOVER module, about the Honeywell Home Pro A7 Plus, or about alarm monitoring services in general, send an email to support at alarmgrid.com. If you found this video helpful, make sure to give it a thumbs up below to like the video. And remember to subscribe to our channel for updates on future videos. We hope you enjoyed the video. Thank you.
- Uploaded