Monitoring and Controlling the Temperature On a Honeywell L5210
Related Products
Related Categories
- Touchscreen Alarm Panels
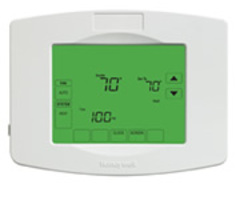
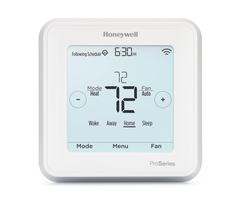
- Thermostats
- Small Business Security Systems
- Monitored Home Security Systems
- DIY Wireless Security Systems
- Apartment Security Systems
Description
In this video, Jorge from Alarm Grid shows you how you can monitor and control the temperature on a Honeywell LYNX Touch Panel. This is possible by setting up a Z-Wave thermostat with the security panel. You will need to have an L5100-ZWAVE module enrolled with the system to add a Z-Wave thermostat.
The L5100-ZWAVE module is installed directly on the main system board. You will need to open up the panel to complete the installation process. The panel must be completely powered down before you begin the installation. You can power the panel down by disconnecting the backup battery and unplugging the power transformer. If you have a cellular communicator, then it may be covering up the spot where the L5100-ZWAVE goes. You my need to remove your cellular communicator to complete the process. You will be able re-add your cellular communicator after installing the L5100-ZWAVE module.
Once you have the L5100-ZWAVE added, you will be able to enroll the Z-Wave thermostat with the system. You can use nearly any Z-Wave thermostat with a LYNX Touch System, as these devices are universally compatible for the most part. Before enrolling the Z-Wave thermostat, you should first clear it from the network. Some Z-Wave devices are paired with a network before they even leave the factory for testing purposes. Clearing the device from the network first will ensure that you can enroll it successfully.
After adding the Z-Wave thermostat, you will be able to control it from the panel. This includes increasing and decreasing the temperature and setting any heating, cooling, or fan modes. You can also check the panel to see the current temperature. All of these actions are found within the system's Automation menu. If you have access to Total Connect 2.0, then you will also be able to create smart scenes for your thermostat for automatic operation.
http://alrm.gd/get-monitored
https://www.alarmgrid.com/faq/can-i-monitor-and-control-the-temperature-on-a-honeywell-l5210
Transcript
Hey DIYers. I'm George from Alarm Grid. Today, I'm going to be showing you guys how you can monitor and control the temperature on your Lynx 5210. Now for today's demonstration, we don't actually have a Lynx 2010 up on our wall, but we do have the L700, which is exactly the same as the L5210. The only difference is the screen size. The L5210 has a smaller screen. That is the only difference between both systems. So anything you see me do today on the L7000 is going to be exactly the same that you do on your L5210. Now the first thing we need to make sure is if you're looking to monitor and control your thermostat from your panel, you first need to have a Z Wave thermostat, right. So as long as it has a Z Wave include and exclude, you're perfectly OK to use it. And then the second thing you need to have is a Z Wave module for your L5210. Now the Z Wave module is not something that comes with the system. It's something that you buy separately, I think it's somewhere around $20 $30 bucks maybe. You can find it online anywhere. We have it on our site as well. But basically, you buy it, you install it while the system is powered down. I have mine already installed in the panel, I'll show you guys in a second where it goes. And then after you have the Z Wave module in there, and after you have a Z Wave thermostat in your house, then you can actually monitor and change the temperature up, down, whatever you guys want to do, create scenes, create rules. You can actually do all of that through the L5210. And if you have the L5210 monitored, you can use Total Connect. And if you have automation enabled on Total Connect, you can also create the scenes through the Total Connect application from your phone and you can control the temperature from the application on your phone or website as well. Now let me go ahead and open the panel up, and I'm going to show you guys exactly where it goes installed. So to open the system up, there's two tabs at the very top, right and left of the system. You're going to need something sturdy. Today I'm going to use this small little Flathead. If you don't have any tools, you can always use a key, something metal, something that's sturdy. And there's two little plastic latches at the top that you just push down and you pop each side open. So I'm going to go ahead pop my right side first. The panel will start beeping letting me know that there's a cover temporary. If you just type a button to quiet it down, it should stop beeping so that doesn't bother you guys. And then the second one is always the hardest one to pop, there we go. So now that I swing it down, now my cellular communicator is actually in the way of the Z Wave module, but you see how right here on the right hand side the Wi-Fi module, if you're looking at it, swung open and swung down. The Wi-Fi modules on the right hand side. The Z Wave module is plugged in on the left hand side over here. The same way that this is plugged into this little board right here, the Z Wave module has the same attachment, but you can't see it because this cellular module, the 3GO module is in the way. But that's where the Z Wave module would go, and it just plugs directly into the side. And again, you want to make sure when you're doing this you power the system completely down. So to do that, you unplug the backup battery right here, this little plastic latch right here. And then if you guys have an LT cable, or if you guys have it hard wired for power on in these two terminals, you unplug it from the wall. I wouldn't recommend on wiring from there if you have the live wires, because you can fry your system or possibly get a small little electrocuted. But it's always easier if you have the LT cable. If you have them spliced in, you just have to unplug it from the wall. And again, that's what you're going to do to install the Z Wave module. All right, I'm going to go ahead and shut the system back up. It should just click into place. And if you guys did install it and are getting a covered tamper, you just press the Home button two times, and you just disarm the system after you've closed the cover. You have to do that twice, remember. And then the cover tamper will go away. I'm still getting a low battery, but my cover tamper no longer shows. So once you have your Z Wave module installed, you have your Z Wave thermostat, you got to first exclude any devices. So this is just good practice when it comes to any Z Wave devices. You always want to exclude and first. Remember these are factory tested, and they may not have been cleared when they were tested. So you always want to make sure you delete any programming or you may find yourself having issues. So after you've excluded it, then you can include it, and then you can mess around with it. Now I already have mine already included into my system, so I'm just going to show you guys real quick how I can actually turn up and turn down the temperature in the office. So you're going to want to go to automation. And I'm just going to go to thermostats. You see mine right now, I just have it a normal thermostat to 30, that's the default name that was given to it. When I click on it, it takes you to all the modes. You can set it to cool. You can turn it off. You can set it to heat. I'm going to set mine to cool. You can move the temperature down. You can move the temperature up. You can set the fan to auto, just to on, circulate. Again, it all depends on the kind of ac system, HVAC system that you have. And there's a couple of other options you can play with. I'm just going to leave mine like this for now. You can hit the back arrow key. You can even go in as far as creating scenes. And you can even create rules. So you can make a scene that it turns the temperature down to, let's say, turns the temperature to 78, and then the rule would be when you Arm Away, turn the temperature 78. You can make another one that sets the temperature to 71, and set the rule to when you disarm, when you get home, it turns down the temperature to 71, which is the scene. So there's a lot of different things that you can play around with. It's a lot easier if you guys are using the total connect app and automation to set the scenes as there is an actual wizard that walks you through every setup, so it's a lot easier doing it that way. But Yeah, I just wanted to show you guys a quick video on how to control and monitor your thermostats through, your Z Wave thermostat, through an L5210, or in our case, the L7000 today. It's the exact same process. If you guys have any questions at all, feel free to email us at support@alarmgrid.com. If you found the video helpful, make sure you hit Like underneath, subscribe to the channel, and enable the notifications so when we upload new content you guys get notified. I'm George and I'll see you guys next time.
- Uploaded