2GIG SP2: Pairing with the 2GIG GC3e
Related Products
Description
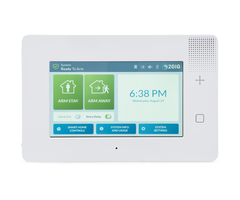
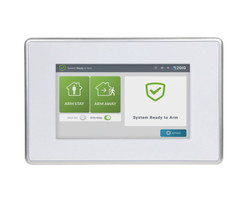
In this video, Jarrett from Alarm Grid covers the process for pairing a 2GIG SP2 Keypad with a 2GIG GC3e Security System. The 2GIG SP2 is a touchscreen keypad that works with the 2GIG GC3 and 2GIG GC3e Security Systems. The fact that this is a touchscreen keypad is often very much appreciated by end users. A touchscreen keypad can be more inviting and easier to understand than a more traditional push-button keypad.
You pair a 2GIG SP2 with a GC3 or GC3e if you want to be able to control that system from an additional on-site location. Some common locations for a 2GIG SP2 Keypad include by a front door, a back door, a garage door, or really area that is used for coming and going. The idea is that you won't have to go all the way to the main GC3 or GC3e Panel. Other options for controlling the system include a key fob or the Alarm.com Mobile App. But many users prefer having a dedicated keypad to serve as a secondary controller.
The 2GIG SP2 is paired with a compatible 2GIG GC3 or GC3e through WIFI. Most users will have WIFI readily available in their homes and offices, so this is usually how the 2GIG SP2 is paired. But if you are using the system in an area without WIFI, then you can complete the pairing process by enabling access point (AP) mode on the 2GIG GC3 or GC3e, and then connect the SP2 to that access point. It is important to note that the 2GIG SP2 Keypad only allows for relatively basic security functions. You cannot perform automation commands or system programming through the 2GIG SP2. Also, the 2GIG SP2 can only control the Smart Area Partition that it has been assigned. It cannot control other partitions on the system.
https://www.alarmgrid.com/faq/how-do-i-pair-the-2gig-sp2-with-the-2gig-gc3e
http://alrm.gd/get-monitored
Transcript
Hey, DIYers. Jarrett, here from Alarm Grid. Today we're going to be covering how you would pair a 2GIG SP2 keypad to the GC3e system. Now, when you're going ahead and setting up the SP2 keypad, there are two methods you can use to be able to connect this keypad to the panel. The first method is having both the panel and the keypad on the same Wi-Fi network and then you can just go ahead and pair the two. And if you are using the Wi-Fi method to be able to connect the keypad, you want to make sure that both panels, or the keypad and the panel, are both on the Wi-Fi network, or the same Wi-Fi network. If they're on two different Wi-Fi networks, they're not going to be able to connect to each other, and it's just going to be a waste of time. You just want to make sure that they're both on the same network. Now, the other method is setting them up via the access points setup where basically you put the system into an access point mode, and then you can go ahead and connect the keypad to the access points. We're not going to be covering that method in this video. If you want to go ahead and take a look at how to set that up, just follow the link in the video description below, and that should be able to help you out. One disclaimer about that FAQ is that it is talking about the GC3, though, not the GC3e. However, the setup is the same exact thing between the two systems. The GC3e and the GC3, programming is very, very similar. So just follow the steps and it should be able to help you out with setting that up anyway. Now, for this video, we're going to assume that you have already set up your GC3e system to the Wi-Fi network, but we are going to be showing you how to add the SP2 to the same exact Wi-Fi. Again, you want to make sure they're both on the same Wi-Fi network when you're connecting the two. Now, a little information about the SP2 keypad is, when you are programming the system, or when you're programming the keypad, it needs to be assigned to a specific partition if you did a partition set up. I believe you can set up about four partitions on the GC3e. You need to assign the keypad to at least one of those. The keypad cannot be assigned to multiple partitions or be able to control multiple partitions. It can only be assigned to one, be able to control one. So if you have partition 2, or two partitions, you need to set the keypad to either partition 1 or 2, and then that keypad is going to control that specific partition you're assigning it to. So if you want to go ahead and pair your SP2 keypad to the GC3e, I'm just going to go ahead and follow these steps here. So, first, you want to make sure your GC3e is set up to the Wi-Fi. Again, we're going to assume that you have gone ahead and already paired the GC3 to the Wi-Fi. Now, the next step is pairing your sp2 keypad to the Wi-Fi. So when you boot up this keypad, it's going to show all your Wi-Fi networks available right here. And then you can go ahead and choose between the few that would show up or the many that show up. You just want to choose your Wi-Fi network that your GC3e is currently connected to. So in this instance, the GC3e is set up to AlarmGrid. So we're going to go ahead and tap on AlarmGrid. And in the next window, it's going to pull up a keypad here. This is we're going to enter your password for the Wi-Fi. Now, when you're entering the password, you do want to make sure that you're entering it correctly. If you are not able to pair it to the Wi-Fi, I would say you want to go ahead and try entering the password again. It's a possibility that you may have entered it incorrectly. I've done it many times. So once you have entered your password here, I'm just going to go ahead and tap on Next at the bottom. It's going to say Connecting to Panel. And now you're going to get this window right here. This is going to ask you for a paring key from the main panel itself. There actually is no pairing key you have to worry about or enter. Essentially, the next step here is on the GC3e. You're going to start the pairing process. So we're just going to leave this window right here. Don't do anything. Don't enter anything. And now we're going to go to the GC3e. So what you want to do is, on the top right, you see the 2GIG logo. In some occasions you'll probably see a different logo as well, depending on the company that you're with and who is monitoring the system. But you normally want to tap on this logo here, and this is going to bring up a keypad. This is where we're going to enter the default installer code, or the installer code in general. But the default is 1561. So now it's going to bring it to this menu here. You're going to go into System Configuration, and you're going to go into Keypads. And now you're going to-- this is going to take you to the keypad slots that you can go ahead and enter or assign your keypad to. You have about eight keypad slots here, and this is where you would go ahead and enter your settings for the keypad. So in this instance, we're going to stick on Keypad 1, and just tap on Edit Keypad on the bottom, and this is going to take you to the startup. So Keypad Used, if you are assigning a keypad to this panel or to, really, any 2GIG panel, you're going to want to make sure that Keypad Used is enabled. And then you're going to go down here to Equipment Code. This is where you're going to-- this is where you're telling the GC3e what keypad you're using. So if you were using an SP1, you'd keep it at code 1060 for SP1. If you want to change it for an SP2, you just tap on the little hamburger button on the right and it's going to bring up the different options. So we're going to go to 1074 2GIG SP2 Touchscreen. And then now we're going to go to Device ID. This is where we're going to place the GC3e into paring mode. So what you want to do is just go ahead and tap on Pair. Going to go into a listening mode here. And then now, on the SP2 keypad, what you're going to do is not enter any code. You're just going to tap on the little checkbox down here-- the little blue checkbox. And it's going to successfully pair with your keypad as long as you have that panel-- or it's going to pair with the panel as long as you have it in that listening mode, or that pairing mode. So at this point, just tap on OK, and it's going to bring up this window here that the system is unavailable. That's normal. Don't worry about it. You just have to configure the rest of the settings in the GC3e So now we're going to move back over to the GC3e here, and you can see where it says SP2 connected. You're not going to press Pair New. If you want to go ahead and set up a different keypad, you want to go to the next keypad slot. Don't try to do Pair New. So we're going to now go to Smart Areas Assignment. This is where you're assigning this keypad to that partition. So if you had four partitions set up and you want the keypad to, let's say, control partition 3. All right. You have some sensors on partition 3. You want this keypad to specifically control that area and those sensors, you're going to assign it to partition 3, or S3. In this instance, we don't have any partitions set up, so we're just going to set it to S1, which is partition 1. And then now you're going to go to Equipment Age. This actually has no configuration at all with the keypad. It doesn't really matter which one you choose. We're just going to keep it on New because this is a new keypad. Then you're going to go to Emergency Keys. This is if you want to the keypad to display your panic buttons. So for instance, on the main panel, if you were to hold down this plus sign when you're at the main screen, it's going to pull up some panic buttons, or panic options. To either have the police sent out. You can set off a medical panic if you need medical dispatch. You can set off a local panic on the panel. If you wanted the same settings on the keypad, you're going to go ahead and leave this enabled. If you don't want those on there you just disable it. We're just going to keep it enabled. Voice Descriptor. This is optional. You don't have to set it up if you don't want to. It's basically just the panel enunciating the keypad's name that you would basically edit in here, or enter in here, in the Voice Descriptor. If you want the panel to acknowledge the keypad, I believe, when it is being used, you go ahead and just edit that Voice Descriptor, and then whatever you change it to, that's basically it for the settings. For right now, we're just going to leave it as None because we're not setting up any Voice Descriptor. So at this point, once all of your settings are configured, what you're going to do is tap on Back To Keypads, and you have all of your settings right here. And at this point, you're just going to tap on Return to System Configuration. You're going to tap on the back arrow. And it's going to ask you to confirm the changes. We already know that we set the equipment code to 1074 for the SP2. We have the keypad paired. It's on partition 1. Equipment Age is New. As long as everything is correct, just tap on Save, and now it's going to take it to the main screen. Now, when you look at the SP2, it's basically mimicking the keypad or the interface for the GC3e. This means that it did successfully pair. So if you want to go ahead and test it out, it's always recommended to make sure that this is working with your GC3e. Just the easiest way to go ahead and test it is just by doing an arm on the system. So we're just going to do an Arm Away, enter your master code, default is 111. And now you can see the GC3e is successfully arming right now. So we already know that this has successfully paired to the panel. And if you did want to do any other tests on the keypad to make sure it's working with the GC3e, you can. There's a few other things you can do with the Smart Areas and stuff. But once you have confirmed that everything is good to go, you successfully paired your SP2 keypad to the GC3e. And that is how you go ahead and pair the SP2 keypad to the GC3e. If you have any further questions about the GC3e or alarm systems in general, please reach us at support@alarmgrid.com. Or go to our website, alarmgrid.com. If you found this video helpful, please like or subscribe. If you want notification of future videos, please click the bell icon. This is Jarrett with AlarmGrid. You have a great day.
- Uploaded