Honeywell 5816: Program to an L5100
Related Products

Related Categories
Description
This video is about Program 5816 to L5100 Wireless Security System
Transcript
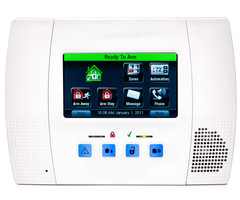
Hi DIY-ers, this is Sterling from Alarm Grade and today we're going to show you how to program a Honeywell Wireless 5816 door and window sensor. The 5816 is the most popular contact that Honeywell sells for the 5800 series wireless range. It was the sensor that comes in the L5100 PK kit which is a very popular Lynx Touch Security System Kit. The 5816 is made up of a contact and a magnet, two pieces. There's an internal read switch inside of the contact that works with the magnet to protect openings, doors, windows, cabinets, things like that you can protect if it's going to be open. Door opens, magnet pulls away, sensor will activate and alarm will trip. So we're going to show you today how to learn in your 5816 to your L5100 Lynx Touch Wireless Alarm control panel.
From the home screen what we're going to do is press more, then tools, then we're going to enter our installer code. Our panel still has default 4-1-1-2. Then you hit program. Whenever you're adding any sensor you go into zones, so that's the screen we're going to be using. So, zones. You can see we already have some sensors learned in. We're going to scroll down. Zone one is the hardwired zone. We always skip that zone unless we're dealing with hardwired sensors. We are going to scroll down to an available new zone. We're going to go 14, highlight the zone, toggles blue, click edit. We are now on our zone programming screen. You can see at the top it shows you the zone that you're working on, zone 14. There's a few different fields on this screen that we have to set up. The first thing we want to do is enroll the serial number. On the 5816 there is a barcode sticker. It starts with A for alpha and then there is a seven digit number. This seven digit number is the number we need to program into the panel. What we do is we click in the serial number. We have a keypad. We can either type in this number, or, to make it even easier you can use the auto enroll mode.
Once you're in this screen with the keypad, you can put the magnet up to the sensor. Make sure it's on the side with the two hash marks where the read switch is. That one first beep. Move it away. A second time you can see that it has now input the serial number, the same number from the sticker. 0-1-1-8-8-7-0 and it learned it in with loop number two. The last time we pull it away it actually hard codes those in and takes you back to the zone screen to finish the programming. It makes it a little bit easier instead of having to type it in. Maybe if you already have something installed from an old system you could just open and close your door three times to get it learned into your panel without having to worry about it getting the serial number.
Now that we have those values in, the next thing you want to do is name your zone. Instead of just having the panel tell you that zone 14 was tripped you can know that this is our sliding glass door. You go zone description one, toggle in, you have a keypad here. This is a library of available words so you can't start typing whatever word you want. You actually choose a letter and it will scroll through available choices for that letter. So we want sliding. We hit S. We use the down arrow. "Second, Second Floor, Sensor", we're scrolling through all of the available S words. "Service, Seven, Seventy" and you can see we're in the SE's. We can cheat and skip ahead. Hit L. It will skip right over to an SL which happens to be sliding which we want. We click done. Zone descriptor two. This is the second word we want to name it. We're going to do glass. We hit G. "Gallery". Again, we can scroll through or we can just hit an L; which takes us to the first GL word which happens to be glass, which we want. We hit done. We have sliding glass.
The next thing we want to do is device type. This is where you tell the system what is the sensor I'm working with. Is it a door sensor, a window sensor, a motion. When you choose the sensor that it is, and we're choosing door, not only will it speak this as a third word, so it will be "Sliding Glass Door", which is what we want. More importantly than that by choosing device type, when we go into the response type option it will limit the response types. Instead of giving you every different zone response type available. It cuts the list down to the available zone responses for a door sensor which typically is entry exit one or perimeter. Entry exit one will give you a delay so that when you come through the door you'll have "x" amount of seconds, typically 30, to get to the keypad and turn it off before a siren actually goes off. You would use that for all doors that you use when the system is armed. Front door, garage door, so on. If this is a back sliding glass door where you're never going to use that door when the system is armed, you chose perimeter.
When you choose perimeter there is no delay. If this zone was tripped an alarm would go off right away. We have a serial number, our loop number, our zone description, our response top, and the last three options are alarm report, chime, and supervision. Alarm report says do I want this to go to central station, yes or no? So if your system is monitored then you want to have this as a yes. Chime will let you know that anytime, even when the system is off, that you open the sensor the panel will beep and say sliding glass door so you'll know that the door was open. We like to have that one on for doors and windows. Supervised is will the system look to make sure that it sees this sensor and that it's not out of range. So you always want to have that on as well. This is all good. We click save. It is now learned in as zone 14. If we back out to the home screen, making sure we say yes when the panel asks us if we want to allow installer to reenter programming. We go back to the home screen.
Now that we have it learned in we're going to demonstrate that the sensor is working. Simply simulate a door opening. The panel faults. It shows fault 14 sliding glass door and it didn't speak it, which it can because we have our voice feature off. If we restore it, it goes back to ready to arm. You can go to settings, turn the voice on. Save it. Now, when we open it, sliding glass door the panel says the three words that we've got programmed in there. Panel's happy, we're happy, zone is happy. That is how you program a Honeywell Wireless 5816 door contact. If you have any questions on programming your zones please let us know in the comment section below. Make sure to subscribe to our YouTube videos to keep tabs on new videos that we release.
- Uploaded
- Duration: