Qolsys IQ Panel 4: Adding Prox Tags
Related Products
Description
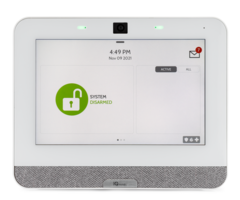
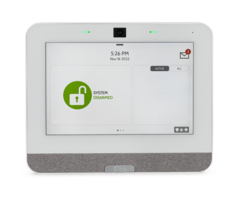
In this video, Dylan from Alarm Grid shows you how to add a proximity tag to a Qolsys IQ Panel 4. To do this, you must be using a ...
Transcript
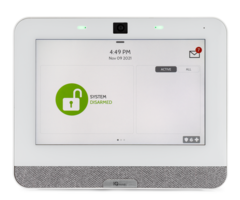
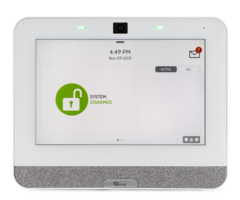
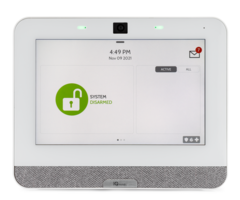
Hey, DIY-ers. Dylan here with Alarm Grid. Today we're going to review how to set up a proxy tag with your IQ-4 panel. So you're going to need a secondary keypad which is going to allow that proxy tag to pair with this. And that secondary keypad is going to need to be hooked up to a wired to wireless converter. We're going to go over the specific model numbers of those in just a moment. We're going to pair the keypad to the panel first, and then we're going to pair the proxy tag to the keypad which will then pair it to the panel. And then we're going to test and make sure everything's working. OK. So we did a bit of installation before we started this, but I'm going to show the wiring for the keypad real quick. So just to note, we have a few things here. Obviously, we have our IQ-4 panel. Now, the panel needs to be on a certain firmware version for this to work. You need to be on firmware 4.1.0 or higher. And we have our wired to wireless converter. We are using the DSC-PG9WLSHW8. Now this needs to be on firmware version 1.2 or higher. And to check the firmware, we're just going to flip this over real quick and your firmware will be listed right there. And finally, we have our a keypad here. This is what we're going to pair the proxy tag to. So this keypad is the DSC-HS2LCDPN. OK, so I've already done the wiring for this but I'm going to show real quick how that's connected. So we're going to open up the keypad. You're going to want a flathead screwdriver. There's little wedges right here. We're going to push this in, pop one open, and these are pretty sturdy so you can be pretty rough with them. Pop the other one open. And then these are our wire connections. We have the red, black, yellow, and green. So we have our wires connected. We have a white wire instead of yellow which is fine as long as it's connected properly. We have all these secured. Let me pop this back on. OK. And then we have these over to the core bus on our wired to wireless converter. And you can see they made it pretty simple for us. They put red, black, yellow, and green. So as long as you have these matching from the keypad to the actual converter, that's the correct wiring. Now the keypad is going to get power directly from the converter as well so we only have the converter with its power connection. OK. So what we're going to do now is we're going to pair the keypad itself to the IQ-4. So we're going to go to the top menu here. We're going to go to Settings, Advanced Settings. We're entering the installer code. Ours is still the default, 1111. We're going to go to Installation, Devices, Security Sensors. We're going to manually add this, so we're going to do Add Sensor. And now, just real quick, you have to have your converter already programmed to the panel itself so we've done that prior to shooting the video but that is the first step you need. You need to program the converter first and then you program the keypad. So we're going to enter in the sensor DOID, and that's going to be found right over here. That's the ID number right there, so 4603724. And since we already had the converter programmed, you programmed the converter with that same ID code. But since we've already done that, right when I entered this, it picked up the keypad right away so it knows it's a keypad. It knows it's connected to the core bus. We're going to enter in the sensor serial number, which can be found on the packaging right there, SN. So let's enter that, 521205C, and OK. We have sensor type as keypad. We have sensor group, we're going to keep this as fixed intrusion, that means this is going to be a stationary keypad we're going to be using for intrusion. We're going to keep the tamper disabled but you do have the option to enable that as well. And we're going to keep the backlight option on so that way we have the backlight, so we can see the keypad pretty easily. You can put a sensor name. So say that we have this downstairs. This is our downstairs keypad. And then source power, automatically, that already picked it up once we started programming. And we're going to Add New. OK, this shows the keypad is now enrolled. It shows system is ready to arm. And then what we're going to do now is we're going to add our proxy tag. So we'll just start back from the home screen to show that. So we're going to go back to the top menu, back into Settings, back into Advanced Settings. Installer code, so 1111. And then instead of going to Installation, we're actually going to go to User Management. So User Management, and then we see right here Add Proxy Tag. If your panel is not on the correct firmware, you're not going to see this option so if you're going into this menu and you don't see this option there, you need to update the firmware on the panel. So we're going to do Add Proxy Tag. We're going to take our proxy tag and put it to this little indicator on the keypad. Right away, we have the auto learn proxy tag showing up on the IQ-4. OK, so now that we have it added to the system, we can create the user. So first, you have the proxy tag name. You can just leave it by default or you can put a custom description. So for example, I'll just put Tag 1, pretty similar. And then you can also set the user for this. So by default, it goes to Admin. We can also do Add New User. So we'll do that. We'll just enter a name. D-Y-L-A-N. I'll leave the last name blank. We can add a custom user code, so 4321. You want to confirm that code here, 4321. The type, we have User and Guest, which are essentially the same thing. Then you have Master, which is more the main arm and disarm code for the system. So I'm just going to leave this as User. Expiration date, so if you want this to work for only a certain amount of time, you can send expiration date there. We're just going to leave this as unlimited so this tag will always work with the system. And then there's that proxy tag name I had set before so we'll do Add User. OK, and then you see right here proxy tag, shows my name, type user, and then the expiration date. And we can go back to Home. We'll just do a quick test where I'm going to hold the tag up to our keypad. OK, we have the arming. And then we can disarm the same way. I'm going to hold the tag back to the keypad and then system disarmed. OK, so we have our proxy tag paired to our IQ-4 panel. We assigned it to a user. We made sure it was functioning both to arm and disarm the system. So everything's working and looking good to go. If you had any questions for us, feel free to reach out. We have a contact phone number. The phone number is 888-818-7728. We have a support email which is support@alarmgrid.com. And also if you check out our website, www.alarmgrid.com, we have a live chat option on there as well. If you did like this video, please like the video, hit the Subscribe option, and then hit the bell icon to be notified about any future videos that we release. Again, my name is Dylan from Alarm Grid, and thank you for watching.
- Uploaded
