Qolsys IQ Panel 4: Compatible Battery
Related Products
Description
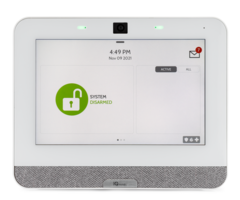
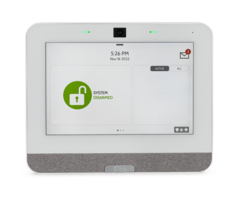
In today's video, Dylan from Alarm Grid shows you the compatible replacement battery for a Qolsys IQ Panel and walks you ...
Transcript
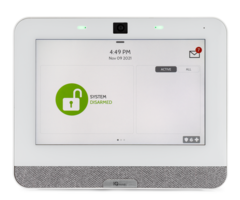
Hey, DIYers. Dylan here with Alarm Grid. Today we're going to review how to access the backup battery for the IQ Panel 4 and what battery you're going to use to replace the existing one in case you get a low battery or the battery dies. So we're going to show how to open up the panel. We'll power it off first, show how to open up the panel. I'll show you the battery. We'll review the model number and the voltage for that battery. We'll reinstall it and then have this power back on. OK, so we don't have a low battery message here. But if the battery in the panel does need to be replaced, the main screen here is going to show you a low battery error. And that's how you want to access the battery within the panel and replace it with a new one. The battery itself is the QR0083-840. This is a 3.7-volt battery. We'll show you what it looks like in just a second here. Now, the first thing you'll want to do is completely power down the panel itself. You always want to do that if you're ever going to open this. So to do so, we're going to press the top gray bar there. We'll go into Settings. We'll go into Advanced Settings. And the code you use here doesn't really matter, as we're going to get the power-down option for any code we use. What we'll use today is we're going to use the installer code, which is still the default, 1111. And then you see right here, we have the power down option. So we'll press that. We do not want the wizard to relaunch. So we're going to uncheck that. And then we'll press OK. This is going to power off the system. And we're going to wait until these two LEDs at the top turn off. That's going to show us that power is completely off. OK, perfect. OK, so we have the panel powered off. So what we'll do is now open the panel so we can gain access to the back of this. So we have hours on the desk mount. So we don't need to remove this from the wall. But even if you have this on the wall, you're going to want to access the screw at the bottom. That's going to hold this back on to the mounting plate or the back plate. So we'll use a Phillips head screwdriver. OK, remove that screw, and set it aside. And now we can remove this from the backplate there. And now we have access to the back of the panel. So we have the battery here, the QR0083-840. And we have our power supply still connected. Now, even though the panel is powered down, you always want to remove the power supply. It is more recommended to remove this at the actual outlet versus the back of the panel. But just in case you cannot reach that outlet, we're just going to remove this from the back of the panel here. You just want to be extra careful so you don't damage the power connector or the barrel connector here. So push that aside. We have that disconnected. And then we are going to follow the wire from the battery to right here. And we're going to tug on this. And that's going to disconnect the battery. So now we have absolutely no power running to this panel, no power supply, no backup battery. It is completely off. So what you'll want to do is remove the battery itself. It can be a little snug. OK, and then just be careful, as the wire does run under the holder for this. Push that through. OK, perfect. And we have the battery removed. So the battery that you'll be using to replace this is identical to this one. Again, it's the QR0083-840. You can purchase this from our website. It is a 3.7-volt battery. And this, essentially, allows the panel to be powered on for 24 hours if that main power supply is either disconnected or, say, you lose power at the home. So we'll replace this with a new version of the battery. You will want to feed that wire through the hole there, right there. Just push that right under. We'll push the battery back into place, get the wire so we have some slack on it, and then reconnect this at the connector itself. OK, just need to move this a little bit so I have more room with that wire. There we go. There we go. Much better. And push this back in place. One second. It's a little difficult to get in there, but you just want to align that properly. There we go. So we have that aligned. Let's push that in. Tug to make sure it's secured. We're going to reconnect the power. And again, if you're unplugging from the panel, just be very careful while you use this so you don't damage the connector. That's nice and secured. And we'll place the back panel back on. And we will reinsert our screw to hold this into place. Now, you can't see it just yet just because the back of the panel is facing the camera. But on the front, the LEDs for the panel are starting to go back on since the power has been resupplied. OK, that's nice and secured. And there you go. So we have the blue LEDs on top. Those are always going to go when the panel is booting up. And then we have the Qolsys screen loading. This is going to load the software and the operating system of the panel. This usually takes about a minute or so. So just be patient with it. OK, so it is back on, but it's still loading and everything. And now, if your panel doesn't just power back on, you can use the power button here on the side to power this back on. You'll press and hold that in for about three seconds. And there we go. So we got everything loaded back to how it was. Our operating system is functional. OK, so now that we have the battery installed, we're just going to run a quick test on the panel just to make sure that it is picking up properly. So we'll press the top gray bar here. We're going to go to Settings. We're going to go into Advanced Settings. And we're going to enter in our installer code. Ours is still the default, 1111. We'll go to System Tests. We'll go to Panel Test. And now we have the option to run a full test of the entire system. But just for this, we're just going to scroll down to Battery. We're going to press Run. OK, perfect. Shows past good. Shows that the battery is being picked up by the panel. And it's showing that it's working properly. OK, so that is how you replace the battery in the IQ Panel 4. A pretty simple process that we saw there. The battery, as I mentioned during the video, is-- you can order that from our website, www.alarmgrid.com. So feel free to order a new battery if you are needing one for your IQ Panel 4. If you did like the video, please like the video, subscribe to our channel, and hit the bell icon to be notified about any future videos we release. If you had any questions, feel free to contact us. We have a support phone number. That phone number is 888-818-7728. We have an email address, which is support@alarmgrid.com. And if you are on our website, www.alarmgrid.com, we have a live support chat option there as well. So feel free to use any of those options to contact us. And we'll be happy to assist you. Again, my name is Dylan from Alarm Grid. And thank you for watching.
- Uploaded
