Qolsys IQ Panel 4: Connecting to Monitoring
Related Products
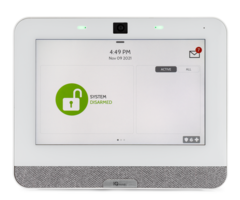
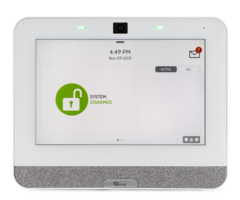
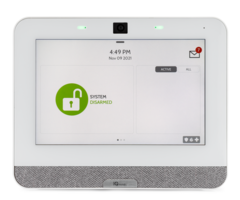
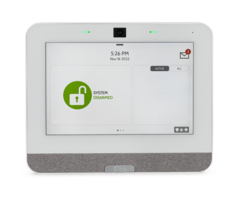
Description
In this video, Dylan shows you what you need to do to get an IQ Panel 4 registered for monitoring. This video concentrates on how ...
Transcript
Hey, DIYers. This is Dylan with Alarm Grid. Today's video is going to be about alarm monitoring options for the IQ 4 system. OK. So when you're signing up on our website for the monitoring, we'll need to get the IMEI number from the system. So I'm going to show you how to get it from your panel once this is powered on. So first thing you'll want to do is press the top of the screen here. That's going to pull down the settings option. After settings, we're going to go into advanced settings and enter our installer code. Ours is still set as the default of 1111. And then right in the middle, you'll see the about option, and then cellular. And your IMEI number will be listed right there. So during the sign up process, please provide us with this as this is how we're going to connect with the panel and get it set up with either monitoring and or alarm.com OK. So we reviewed the types of plans that we can sign up for. We reviewed how to get the system information that's going to be needed, so let's review how to actually get signed up. So here is our main website page. And right here nice, bright and orange is our alarm monitoring page. So this is going to review the different types of plans that Alarm Grid offers. We have full monitored plans up here, which will include the live monitoring, the live operator calls, and the authority dispatch. And then if we scroll down, we have the self versions of these, which is just going to be the application usage. So total connect if you're using Honeywell systems or in our case today alarm.com. And here's just a quick review of what is pretty much offered in these plans. What you get. So when we're using the Qolsys system and we're signing up with alarm.com, the minimum type of plan that we can sign up for is either the gold plan or the self gold plan. We do have the optional cellular monitoring page, which I'll show you as well. So again, just a quick recap. The gold plan offers the live monitoring. The alarm.com access, that's pretty much all these three features right here. And then our self gold plan is no live monitoring but only the alarm.com access. In this case, let's just sign up for the self gold plan. So here you will enter in some information, email, name, street address, company name if there is one, phone number, best phone number to contact you at. And please be sure to notate that it says monitoring address, so this is where the system is going to be installed. And then we'll need a credit card number. Our billing is by month so month-to-month, no contract. It's going to be taken directly from the credit or debit card that you entered here. And then we do have a terms of service that will need to be accepted here as well to continue. All right. So we've gone through the signup process through our website. We've provided the IMEI number during the signup process, and our technicians were able to create the account and then get the alarm.com login email sent to us. So when you get the email, this is essentially what it's going to look like. It will say welcome to Alarm Grid and then you'll have the login name for alarm.com showing there. And then we'll have the get started option here. And then we can also confirm down at the bottom says powered by alarm.com so we know for sure this is going to be our login email. So let's get started. So first, click get started. That's going to pull up the alarm.com website. There's going to be a terms of service here, which we will agree. All right. So the next step is to create the password. I'm just going to use a simple temporary password for us. We'll set a confirm password here. And as you see, we do have requirements that must be met, must contain at least one number, one symbol, one letter, and be at least 10 characters long. So we have met all these requirements. We're going to save. OK. Security question. Typical security questions you'll get for pretty much majority of your websites. I'm going to do a make of my first car. And I had a nice Volvo. Confirm. OK. So this is the essential first login page here. Let's do let's go. Our system name, IQ 4. You can name this really whatever you'd like. Here's some examples. My home, vacation home, office and rental. I'll put this as IQ 4 office. OK. Just more typical questions about the property. So in this case, we'll just leave it as single family home since it's just a test, but we do have the option for townhouse, apartment/condo, and business. Primary residence, yes or no. Again, we'll just keep it as yes. And one adult lives here with four pets. Property area. Say about 0 to 1,000 square feet. And who is our electrical provider. Since we are in Florida setting this up, I'm going to put Florida Power and Light. And you have the option to share outage information, for now, I'm just going to unclick that since, again, this is just a test account. OK. Arming reminder notification. You can basically set up for alarm.com to notify you if the system has not been armed at a certain time. We can set up a schedule for this. We'll just leave it as the default here so when the system has not been armed by let's say 11:30 PM on these selected days during the week, we want a notification to be sent to our email, and this is our general contact email as well so feel free to email us with any questions. You do have the option to add other options as well to this. So we have our email address here but you can put phone numbers. And then once you set up the application, you can set up push notifications as well. And then something else very important is if we want to receive this notification, we have to set it to active. OK. So everything's looking good. Next. These are general notifications that are set up by default. Alarm events, pretty self-explanatory. If the alarm is triggered, you're going to get that notification. Action by any user/keyfob. So if a user uses their code at the panel or key fob to arm or disarm the system, we'll be notified about that as well. This is good if you have multiple users set up with the panel so you can know exactly what date and time the panel is armed or disarmed and by who. Arming reminder. That's kind of the previous screen we were reviewing there so if our system is not disarmed on weekdays by 11:30 PM, we're going to get notified so we can log into alarm.com and then arm the system. And then system actions to watch. This is more error notifications. So as you see here it says power failure, communication restored, et cetera, et cetera. So if there's something going on with the system that's not an alarm or an arming event, and we have a sensor failure, power failure, loss connection to alarm.com, anything like that, we're going to get notified. OK. So devices. So if you have devices set up with your system, since this is just a demo, we don't really have much set up with ours. So the only thing showing for us is the panel camera. The panel camera for the system can be activated when there is an arm or disarm and when there is an alarm activated as well. There's a camera on the system that will take a screenshot. OK. And this is just user code review. We'll just set it as the default of yes. Continue. OK. We're all set to go. Let's get started and get logged in to alarm.com. All right. So when you first log in to alarm.com, you're going to get this get started screen. This is going to give you a general walkthrough of alarm.com, what features it offers, how to customize it to better suit your needs, so on and so forth. So this is going to be a quick summary here, the home page, and then we'll just exploring around. So automation, if you have Z-Wave devices hooked up with your system, this is going to be devices such as lights, locks, thermostats, any home automation, Z-Wave device, it'll pull up here so you can create rules for these smart scenes. So, say, if I arm my system to arm away, I can set up a scene here to turn on some lights, lock my door, change my thermostat temperature. All right. Here is the smart arming feature as well. This is essentially a arming schedule for the system. So you can set up not just an arming reminder, but you can have the panel actually arm or disarm itself at certain times if the parameters were not met. Notifications. This is kind of what we were viewing before, just a general notifications and then push devices. So once you get the application set up, this is where you're going to get those push notifications set up. So you can have multiple phones here, you can tell them what they want to be notified as, set up notification date and time so if a certain time they shouldn't be notified about anything, you can set all that here as well. And again, this is done when you set up the application. Currently, we're just on the website. Activity. So we have nothing here. Again, this is just a demo, but once you start using the system, this is going to fill up with website logins, arming events, sensor events if you have those set up. So if a door opens or closes, you can have that populate here. Alarm events, disarm events, camera settings, et cetera. And then there's that report option where we're looking at before. Users. So you can set up multiple users to work with alarm.com and they can have their own individual logins as well. So you can add login, put an email address, put a login name, and they're going to get that email that we were looking at more towards the beginning of this video. So they can set up their own login credentials and you can be notified when this is set up as well. So not just the panel and the key fob users, but also the alarm.com users. General support. This is going to have our contact information here if you do get signed up with us. So if you had any questions or need any help with the system, you can give us a call, send us an email, and we'll be happy to assist you. And finally, settings. Just more general settings, login information, account management. So account information. Just the general info we are setting up when we created the account. Manage devices. That's going to be back to the phones, and the Z-Wave devices, control panel settings. We can see what the settings are at the panel show them in alarm.com monitoring station settings. So if you have this set up for a full monitored plan, that's going to be again through our $35 per month gold plan or the $25 per month cellular monitoring plan. You're going to see your central station information here and then you can also place the system on test through there as well. So essentially, that means, if you want to test your alarm trigger the alarm but not worry about being called by the monitoring station, you can set that up through there. Places. Again, this is more done when we use the alarm.com application and not so much through the website, but you can set up geofences. So essentially, if you leave a certain area and the system is, say, not armed, you can receive a notification for that. And you can set up other types of rules and reminders for this type of setup as well. And then refer a friend. Get more people onto alarm.com, more the merrier. All right. So that was the process of getting the system set up for activation and the activation process. If you did have any interest in this or any more questions, feel free to call us at 888-818-7728. You can also check our email our email address is support@alarmgrid.com. And we do have a live chat option available on our website www.alarm.com so any of those ways get in contact with us and we'll be happy to assist you in providing more information. My name is Dylan again from Alarm Grid. Have a nice day.
- Uploaded
