Qolsys IQ Panel 4: Installing a Zigbee Card
Related Products
Description
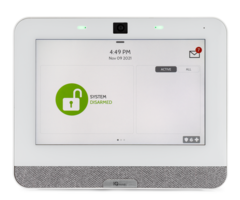
In this video, Dylan from Alarm Grid shows you how to install the Zigbee daughter card in a Qolsys IQ Panel 4. The Zigbee card ...
Transcript
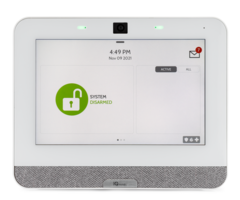
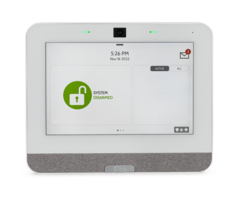
[AUDIO LOGO] Hey, DIYers, Dylan here with Alarm Grid. Today, we're going to review how to install the Zigbee daughter card into your IQ4 panel. So basically, what we're going to do during this video is, of course, install the panel. So first thing-- I'm sorry, install the card into the panel. So first thing we'll have to do is actually power down the panel. We're going to remove the back plate, plug in the card, put the back plate back on, power back on, and then test the card connection through the system test option in the panel. Now, what the card is going to do once we have that installed, it's going to allow us to connect certain Zigbee automation devices and even some Zigbee alarm sensors as well. So it's a very useful card if you have those types of devices or if you're interested in getting those devices added to your panel, OK. So we have our IQ Panel 4 here. We have the Zigbee card still in the box. So we'll remove this in just a moment. But first, we're going to power down the IQ4 panel. So to do that, we're going to go into the top menu right here. We're going to go into settings. We'll go to advanced settings. Enter user code. And here, we can enter either the master or the installer code. I'm going to use the installer code this time. We have ours still at the default, 1111. And we're going to see the power down option right there. It's going to basically just ask us if we want to power down. We're going to press OK. I'll wait for the LEDs up here to turn off. That's going to indicate it's fully powered down, which we do have now. And now, just because we're going to be taking things-- well, putting things on to the actual system board, just as a safety precaution, I'm also going to remove the power supply from our outlet. We're going to remove the secured mounting screw at the bottom of the panel. You'll need a small Phillips head for this. OK, that should be a little bit more. There we go, all right. So we have the screw removed. We're going to place that aside. We're going to flip the panel over and remove the back plate. So since we had the screw already removed, it comes out pretty easily, just have to pull up from the bottom. Lift it out there. And now, we have access to the back of the panel. So again, just to make sure that we're absolutely getting no power to the system board, we're also going to remove the backup battery. You see the wire goes to the connector here. So we're going to pull on that connector. And we have the battery unplugged. So now, we know that there is no power getting to this at all. So now, let's open up the Zigbee. Remove that. And then this also comes with a securing mounting screw as well. So I'll place that aside. And when we flip the card over, we have our connection prongs right here. And that's going to go into that connection right there. Right there. So sometimes, this wire, this black wire right here, that will be in the way of where we're connecting the card. But we do not suggest removing that because there is a risk of damaging that wire. So we'll just want to move that out of the way. And then now, we're going to install the card. Just make sure you line up that connector. Push that in, secure it, drop the security screw. Just make sure this is fully secured, OK. Drop our screw in there. Get our small Phillips back. OK, nice and secured. Card is secured and pushed in, OK. So now, we're going to reconnect the battery power. OK, that's nice and secured. I'm going to reattach the back plate. And we're going to put the secured mounting screw back to the bottom as well. OK, that's nice and secure. And then we're going to reapply the power. And I didn't mention this before, but it is best to remove the power supply opposed to removing the barrel connector from the back of the panel, just to not risk any damage to that barrel connector. So let's plug this back in. We get our green LEDs indicating that we do have power back to the panel. Get our blinking blue to indicate it's booting up. Just give this a little bit of time. OK, we have the Qolsys logo. All right, booting process, we're going to get our home screen here in just a moment. All right, so it wants us to do the installation wizard. We're going to skip most of this because we already do have the panel set up. So that's fine. Actually, we're just going to exit the wizard, OK. So we have our panel powered back on. We have the Zigbee card installed. And now, we're going to test the card just to make sure it is functioning properly. So to do that, we're going to go back to the menu option. We can go to settings. That's fine, we haven't connected to Wi-Fi. We're going to do advanced settings. Enter user code. We're going to enter our master code-- I'm sorry, our installer code. And we still have the default 1111. And then we will go to system tests, daughter card test since we installed a new daughter card, all right. So we do not have the Zigbee option showing. It should be showing right there. So we're going to reinstall that card, make sure it's secured. Power this back on and then come back to the screen here, OK. So we are back at this screen here. I do notice right away that we have the Zigbee test option showing. So that's a good indicator that this is now picking up the card. We're going to go to daughter card test just to be safe, OK. We do have the Zigbee option showing now. This is why it's always important to run this test just in case during that initial install, there is any issues. I believe, for this one, that the alignment wasn't properly done. So we're going to run the test. Result passed, OK, perfect. So we now have the Zigbee option for IQ4 panel. So if I want to start adding certain Zigbee automation devices or certain Zigbee alarm sensors, again, we have a compatibility list on our website that shows a full list of those. We do now have that option to add those to our panel. OK, so we have the card installed into the panel. We ran our system tests to make sure the card was functional. And now, we have the ability to add Zigbee automation devices and Zigbee sensors into the panel itself. We do have a compatibility list on our website, www.alarmgrid.com. So that's going to give you a list of the automation devices and the sensors that would be now compatible with our IQ4 panel. If you had any questions for us, feel free to reach out. We have a support phone line. The phone number is 888-818-7728. We have a support email address. The email address is support@alarmgrid.com. And if you come to our website, www.alarmgrid.com, we have a live chat option on there as well. So feel free to reach out through any one of those three options. My name is Dylan. If you did like the video, please like the video. Hit the subscribe option and press the bell icon for notifications, all right. And thank you for watching.
- Uploaded
