Qolsys IQ Panel 4: Performing Panel Tests
Related Products
Description
In this video, Dylan from Alarm Grid will show you how to use the Qolsys IQ Panel 4 Test features. The IQ4 has a full series of ...
Transcript
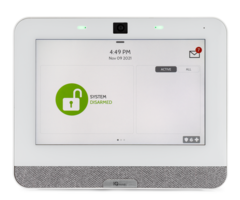
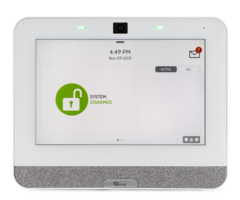
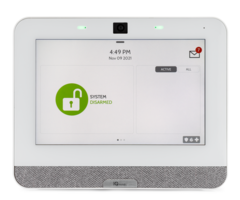
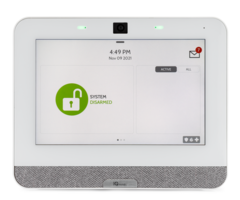
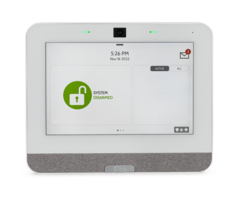
Hey, DIYers, Dylan here with Alarm Grid. Today we're going to be reviewing the panel test feature on the IQ Panel 4. So the panel test is something that's very useful. This is how you can test the system regularly to make sure it's still in working order. There's a bunch of different options that we're going to show in review and test just to make sure that everything with the system is working all the way from sensors, to the Wi-Fi and cellular connection, to the built-in glass break detector, and a general diagnostic of the system as well. OK, so here is our IQ Panel 4. I'm going to show you how to access the panel test feature of the system. We're going to look over the different options for this and just basically see what they do. So first, gray bar at the top, it's going to pull down our Settings option. We're going to go to Advanced Settings. Enter user code. And we're going to enter our installer code. We still have the default code set to 1-1-1-1. And then we'll see the System Test option right here. And we get a bunch of options on the screen. So we're going to review each, see what they do, see how they function. So we'll start off with the Wi-Fi test. This is essentially going to test the system's connection to your home network. So brings up a little test screen here. We do have this connected to Wi-Fi. So we're going to run the test. And we get our status very quick, shows us the Wi-Fi settings here, how it's communicating with our network. And everything is looking pretty good-- Status-- connected, Result-- pass. All right, so we'll back out of the Wi-Fi. And we're going to go to Sensor Test. Now, the sensor test is going to test the panel's connection with our sensor. It's basically going to check the signal strength. And now these are going to be for non-PowerG sensors as well. Just want to mention that real quick. So our front window sensor is a 5816 Honeywell sensor, which we have programmed to the system. Right now it's fairly close. So we're getting good signal strength. Everything is looking good. Now, if the sensor was further from the system and you're having some issues with the sensor itself, that's when we're going to start getting some poor signal rating here. And there's also a chart path as well. So that red line at the bottom, that's essentially no signal. Yellow is dangerously close to red. So that's when you want to start looking into either getting a compatible RF repeater, such as the 5800RP if you're using these 345 MHz sensors. But you see we're all the way up here, green, and we're going all the way up. So we're good with that-- no issue at all. So we'll back out of there. We're going to exit the Sensor Test. And next option we have here is Cellular Test. Now, the cellular test, a lot of people will run this before they get the system set up for monitoring. And it's usually going to fail. The reason is that this is testing the system's connection with alarm.com. By default the Qolsys panels have a built-in cellular radio, which is required for this to be set up with Alarm.com. This cannot be set up over a Wi-Fi-only connection. So we have this associated with Alarm.com already. We're going to do the cellular test. Start it. OK, right here-- cell wireless test successful-- all good to go. So we know that this panel is communicating with Alarm.com. It's working over the AT&T network. We get the IMEI number for the system and a signal strength rating right there-- -97 dBm, about four out of five bars, so pretty good. OK, next is Z-Wave tests. We'll come back to that one. So next is Z-Wave tests. This is going to test any Z-Wave home automation devices you have paired with your system. Types of devices are going to be lights, locks, thermostats, basically home automation-- no security or life safety sensors such as smoke detectors or heat detectors. So we're going to do Z-Wave test. This is going to give us a few options to run tests on the Z-Wave network and the devices we have paired to our panel. Currently we only have the light paired to the panel. So let's just go through these test options and see how they react. So the first test option you see there is the Z-Wave test, pretty self-explanatory. This is going to test the connection between our Z-Wave device, in this case the light and the panel. So let's go to Z-Wave test. This will populate with all the devices you have paired. Again, we only have the light. So we're going to run this test. Test time, and the result is Pass, so we know there's no connection issue between our panel and our Z-Wave light. Back here, Rediscover Network-- what this does, it's going to have the panel essentially refresh its connection with all your Z-Wave devices to make sure that the devices have the best communication path to the panel. Again, since we only have one device, it's not so big of a deal for us. But if you have multiple devices in your home and they're further from the system, this is something good to run just to make sure that everything has that best connection possible. So we did the Rediscovery. Rediscovery ended. It's now refreshed the connection between our light and the panel. Neighbor Info-- so this is essentially going to say how many Z-Wave devices are being seen and how their connection is with the panel, as well as other Z-Wave devices. So what we can do is go to View. And as you see, we only have the panel communicating. If we had other devices, that would show in this list as well. Counters-- this is pretty much just saying how many times the panel and the Z-Wave devices are communicating. We have a few acknowledge commands here, No Auto Route and Auto Route. No Auto Route means that the device could not communicate directly with the panel, so it had to go through different paths to get that connection to the panel. Auto Route is just directly to the panel. And again, since we don't have any other devices, we expect our No Auto Route to be zero and Auto Route to show the 4, which just means that this has communicated about four times since we've set it up. You have the Failed options here. So if a command does not go through or if a connection drops, you're going to get those counters to show there and start raising. Z-Wave Diagnostics-- so this is the network map. This is essentially showing us the path of connection between our light and the panel. If we had more devices here, we would see a much larger map, devices connecting to each other, connecting to the panel. Obviously green is a go. We have a great connection with just our light and our panel. And then we also have Advanced Z-Wave Diagnostics. We're going to do a Network Health Test. This is, again, just going to test the connection between our light and the panel. OK, Transmission Count shows how many times it's communicated, any errors, any route changes, any neighbors. Essentially a lot of the other options that we had gone through, this just gets it all right here on this one screen, shows us the transmission times for this as well. Let's go back here. Repeater Test-- we do not have any Z-Wave repeaters connected, so this won't let us run the test here. But if you have repeaters set up, that's going to have the panel ping those repeaters and test their connection back to the panel. And then we have Last Working Route, which is similar to the Z-Wave diagnostic screen we were in before. And then it's telling us our direct route is from the device to network, so pretty easy. If we were testing this with, say another device, and it had to go through a repeater or another Z-Wave device, it would show us how that is best connecting right there. OK, so we've done Wi-Fi. We've done sensor tests, cellular and Z-Wave. PowerG test is next. So before when we did the sensor test, we saw only one sensor, which was the Honeywell sensor. We also have a PowerG sensor program to this as well. All right, so we have our PowerG test screen here. We have one programmed as a front door sensor. It's going to show you the signal strength already. We have a strong connection here. And then you can actually do a test with the sensor itself to make sure it's working with the system. So we're going to run the test here. Now while the test is in progress, we're going to take our sensor, activate it. Front door open. Perfect. We heard the front door open. Perfect. So we know it's communicating with the system. Signal Strength is still showing Strong. We're good on our sensors. PowerG Signal Strength-- pretty similar to what we just saw there. So we don't really have to go into that one. It's just going to show us the signal strength of the sensor. We know we're already at strong. You really want to use this more if you have a larger area that you're trying to monitor and some sensors further away from the panel itself. Now, for PowerG, these have the highest basically signal length, or signal strength. So there isn't really usually a time when you're going to have signal issues with these. But if you want to test it, right there. Panel Glass Break-- so we have the glass break detector in the system enabled. Here are some few options that you can use-- Clap Test, which we'll be using today. Glass Break Simulator test-- this is really what you want to do. This is the most efficient way. You're going to use a glass break simulator, basically just plays the noise of glass breaking, and it will trigger the test on here. And there's also an Alarm Test mode. This is if you're set up with a monitoring station. You'll want to contact them to place the system on test. And this is essentially going to simulate the Glass Break Detector triggering and then triggering your alarm and sending out a signal. So we'll do the Clap Test, and then-- [CLAP]-- perfect. [CLAP] Perfect. So clap loud enough, we got the green circle. Glass break detected-- we know the Glass Break is functioning. Dual Path Wi-Fi Test-- so we've already done the Wi-Fi test. So why is there another option for it? Because this is going to test both the Wi-Fi and LT connection at the same time. And it's going to make sure that it's communicating to Alarm.com. And Alarm.com can communicate back with the system. Wi-Fi status connected, but let's run the test here. OK, Wi-Fi is good. Dual path enabling, use cellular and Wi-Fi-- perfect. So this is communicating with Alarm.com, and Alarm.com is communicating back with the system. Daughter Cards Test-- so these are essentially smaller chips that are installed into the system. This is how the system is going to know to work with Z-Wave devices, PowerG devices, the 345 MHz sensors. And then there is another option. This is mainly for image sensors. So we do not have an image sensor card right now, so that's just not available. Let's just do a quick a quick run for that one-- Result Passed, Result Passed, and Result Passed. You see it's very quick because it's essentially just checking that the chips are installed properly onto the board and that they are functioning properly. So there's not really much time that this takes. Panel Test-- this is pretty much a general diagnostic of the system. It's going to test multiple features of the system, the Arm-Disarm feature, the built-in camera, the Photos section, Help Videos that are preloaded on to the panel, the Backup Battery makes sure that's connected and working, nice LED test, Panel Tamper, which is if the panel is off the mounting plate, AC Status-- that is our power connection-- Internet Connection and Wi-Fi, testing that Wi-Fi connection once again. Upgrade service, if there's any updates that need to be done with the system. And then Z-Wave and any Sirens. So instead of going through all these one by one, we do have the option to Run All. Arm and Disarm-- perfect. Testing the camera. We'll get a nice picture of our man behind the camera there, testing the battery. And I'm not sure if you can see, but in the background we're already getting some passing. We got the LED test right there, changing the colors of those. Testing Panel Tamper, AC, Internet. Again, the tests go by pretty quickly. [RINGING] And then [INAUDIBLE]. [BEEPING] Sorry to any headphone users if that gets picked up too loudly through the video, but always good to test. So we'll just scroll through real quick, see if we have any issues-- pass, pass, pass, pass, pass, pass, good for the battery, pass. Panel Tamper failed because on the back I do have the cover off, so that was expected. If you have the cover on and secured, we're going to get a pass on that as well. AC status, we have our power cord connected properly. Internet Connection and Wi-Fi, good to go. Upgrade Service, we're A-OK. Z-Wave and then the siren, of course you heard that, all good to go. Everything is set and passed. Ambient Noise Test-- that is disabled right now because we have the Glass Break Sensor on. But essentially what that test does is that you can set a certain decibel rating for the panel to listen in to. And then if the noise in the area goes above that rating, it's going to give you a warning. Right now we don't really need to use that again. We have the Glass Break Detector enabled. And now if we had the Glass Break Detector disabled, of course we'd then have that option there. And finally, Input Voltage Test-- essentially just going to test the power connection again, make sure we're getting the proper voltage for the system. And just like that, voltage is good. We got our voltage reading right there. And we are good to go. This panel is looking in working order. Everything passed besides that Tamper, which we expected because we do not have the mounting plate installed on the back here. OK, so this is something you'd would want to do fairly regularly just to test the system, make sure it's still in working order. We have all these different options here. You don't have to go through every single one each time. You can pick and choose which one you want to test. And then just, again, just the cellular test will fail unless the system is connected with Alarm.com. So if you get the system out of the box, you want to test the cell connection, make sure you're good to go, it will not work until you're connected with Alarm.com. OK, so that was our test. Luckily our panel is in working order and good to go. If you did enjoy the video, please be sure to subscribe to our channel. And hit the bell icon to be notified about any future videos we release. If you have any questions about the Qolsys system or about monitoring options for this or any general questions as well, feel free to contact us either by phone-- our phone number is (888) 818-7728. You can reach us by email. Our email address is support@AlarmGrid.com. And if you come on our website, www.AlarmGrid.com, we do have a live chat on there as well. It's a quicker response. So multiple ways to get in touch with us, and we'll be happy to assist you with any questions. My name is Dylan from AlarmGrid, and hope you enjoyed the video, and have a nice day.
- Uploaded
