Adding a 2-Wire Smoke to the Qolsys Hardwire 16-F
Related Products


Related Categories
Description
http://alrm.gd/get-monitored.
Transcript
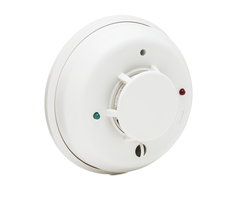
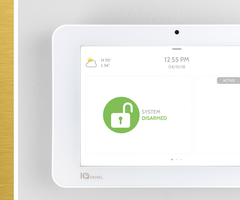
Hi, DIYers. Joe from Alarm Grid. And today, we're going to show you how to connect a 2-Wire Smoke to your Qolsys IQ 2 using a 16-F translator. First thing that you need to know about the translator is that you need to have the 2-Wire Smoke connected to it before we program it to the panel.
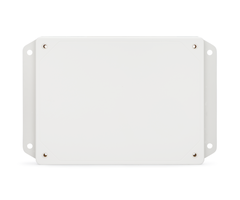
If you did connect it to the translator after you programmed it to the panel, you will have to reset the translator to get it fresh, connect your 2-Wire Smoke and then interface it with your panel. To do that though is really easy. All that we have to do is unplug-- oops-- unplug our 16-F. And then, I'm going to hold down the memory reset button and then I'm going re-plug in the 16-F.
And in a couple of seconds, the lights are going to flash rapidly, which is going to show me that this device has been reset. That rapid blink tells me that this device is now factory reset and ready to go. Another thing is, before you install it, you're going to want to make sure that all your zones have resistors attached to them, and that the tamper is in place.
Really, you want this thing completely setup before you do any programming into the system. You'll notice that on our 2-Wire Smoke zone, we do have a resistor that is connected in parallel with the Smoke. That's also needed. Now that we have this reset, we're ready to program it to our system. On your system though, your Qolsys IQ 2 is going to have to have at least version 11.1.4 for its RF pick to be able to interface with the 16-F.
To check that, we slide down from the top, Settings, Advanced Settings, 2, 2, 2, 2 is the default. We go to About, Hardware, then we scroll down. See our RF pick version is 11.1.5 G260, which is perfectly usable for this device. So we're good to go.
So if we go back to the main menu, I'm going to slide down from the top. And now, we're going to go into programming to add in our 16-F, maybe. We got it. Settings, Advanced Settings, 2, 2, 2, 2. Installation, Devices, Security Sensors, Auto Learn Sensor. So the serial number on the 16-F is on this little sticker right here, which is useful when we're programming it in, just to make sure that it learns in the right serial number.
If you have wireless motions around the house, and somebody walks by when you're trying to do this programming, you may see that pop up. So this lets you confirm that that's actually that. To do this, what I'm going to do is I'm going to undo one leg of the tamper, and that's going to trigger the system to learn-- that going to trigger the 16-F to talk to the system to learn it in.
Before we undo the one leg of the tamper, we do have to put the 16-F into its learning mode. To do that, I'm going to press the EOL Learn button. And as you can see, the EOL Cal is now illuminated. So when I loosen up the tamper terminal, and it loses connection, the system has received a signal. And the 4B44AD is the serial number that is on our 16-F telling us that that is that device.
So I'm going to hit OK. Now, it's important to change the sensor type on your system when you learn it in, because as you can see, sensor type defaults to door and a window. This is not a door and a window sensor. It's a hardwired translator. So I need to click Sensor Type, scroll down and select hardwired translator. Click Add New, and now we've added this 16-F itself to the system.
The next thing that we want to do is we want to add in our 2-Wire Smoke to our system. As we have it connected to the 16-F, by triggering our smoke, we should get it to show up on our panel. So to do this, I'm going to do a functional test. I'm going to do rather a regular test on the smoke by hitting the test button inside here and holding it down.
[BEEP]
And we got it. Now, to silence the smoke, I can just remove it from its base and then click it back on. I'm going to click OK. And again, the sensor type, it's showing door and window. We want to change this to a smoke detector. So I'm going to click that, I go down, I go down, I think I missed it. So we go back up, Smoke Detector.
I'm going to click Add New. And now, we have our hardwired translator and our smoke detector programmed to our system. The last thing you want to do, before we jump back into our main menu, is get our 16-F out of the learn mode. The EOL Cal light is still illuminated telling us that it is still in learn mode.
To remove it from that, just hold your EOL Cal button, or EOL Learn button, the light turns off, and you're good to go. So I'm going go back to the main menu, and now we should be ready to test our 2-Wire Smoke. The best way to test a 2-Wire Smoke is using canned smoke. This is literally smoke in a can, and it will simulate an actual fire and tell you that your device is working properly.
So I'm just going to make sure it's on its base, nice and secure. Then, I'm going to take my smoke in a can, I'm going to blow it in the detector.
[SPRAY]
[BEEP]
And we got an alarm. It will turn off. Eventually. Whenever you do use smoke in a can, be aware that there still may be smoke lingering in the collection chamber of you smoke detector. So if it's still going off, one way that you can really clean it out is you just remove it, you'd have to remove the base from the front. And then, just pretty much blow out and clean out the chamber in here as the smoke will linger for a bit.
But we have proven that we were able to successfully program our 2-Wire Smoke via the 16-F to our Qolsys IQ 2. If you do have any questions about this process, feel free to give us a call at 8888187728. Send us an email to support@alarmgrid.com or head to our website, www.alarmgrid.com. If you enjoyed the video, feel free to subscribe. And if you want to be notified when we post future videos, hit the notification button below, and we'll send you an update when we do so. Thanks for watching and have a great day.
- Uploaded